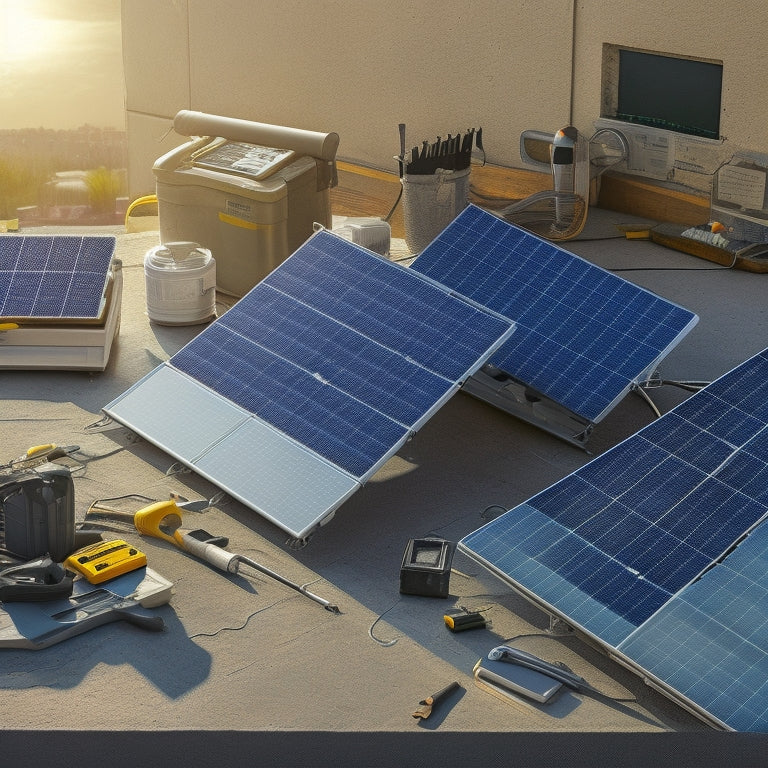
What Are the Expenses to Consider in DIY Solar Costs
When planning a DIY solar project, you'll need to take into account a range of expenses, including the cost of solar panels, mounting hardware, and racking. The type of panel, installation method, and roof complexity will impact your overall costs. You'll also need to factor in the cost of an inverter and charge controller, as well as batteries and accessories. Additionally, you'll need to account for wiring and electrical components, permitting and inspection fees, safety equipment and tools, and labor and time costs. As you investigate these expenses, you'll uncover opportunities to optimize your system and maximize your savings - and that's just the beginning.
Key Takeaways
- Solar panel costs vary depending on type, quality, and installation method, with monocrystalline panels being the most expensive.
- Mounting hardware and racking costs are influenced by roof design complexity, local codes, and environmental factors, such as wind resistance and snow loads.
- Inverter and charge controller costs depend on system energy needs, with string inverters, microinverters, and power optimizers being popular options.
- Battery bank and accessory costs are determined by capacity, type, and quality, with high-depth-of-discharge batteries and proper installation being crucial.
- Permitting, inspection fees, and safety equipment costs should be factored into overall DIY solar project expenses, including building, electrical, and zoning permits.
Solar Panel Costs Breakdown
By now, you've likely realized that the cost of solar panels is a significant factor in your DIY solar project. The type of solar panel you choose will greatly impact your overall cost. Monocrystalline silicon panels, for instance, are more expensive than polycrystalline silicon panels, but they're also more efficient.
Thin-film solar panels, on the other hand, are less expensive but less efficient as well.
When it comes to installation techniques, you'll need to evaluate the cost of labor, whether you're doing it yourself or hiring a professional. The installation method you choose will also affect the cost. For example, a roof-mounted system will require more labor and materials than a ground-mounted system.
Additionally, the complexity of your roof's design can increase the installation cost.
To get an accurate estimate, assess the following costs: the cost per watt of the solar panels, the total wattage required for your system, and the installation costs, including labor and materials.
Mounting Hardware and Racking
You'll need to choose a mounting system that securely fastens your solar panels to your roof, considering factors like roof type, size, and local building codes.
Roof mounting options include flush mounts, tilt mounts, and adjustable mounts, each with its own advantages and limitations.
You'll also need to select a racking system type, such as a fixed-tilt or tracking system, that aligns with your energy production goals and budget.
Roof Mounting Options
When planning a DIY solar installation, selecting the right roof mounting options is essential to guarantee a secure and efficient setup.
You'll need to assess the mounting angles that optimize energy production based on your location's solar exposure. Different installation techniques are required for various roof types, such as asphalt shingles, metal, or tile.
Environmental factors like wind resistance and snow loads also impact your choice. Aesthetic considerations, like the color and style of the mounting system, may influence your decision as well.
Load assessments will help you determine the maximum weight your roof can support, ensuring the mounting system can handle the weight of the solar panels.
You'll also need to evaluate roof materials and their compatibility with the mounting system. Accessibility issues, such as steep roofs or complex rooflines, may require specialized mounting options.
Racking System Types
Racking systems, the backbone of any solar installation, securely fasten panels to your roof while allowing for ideal energy production. When choosing a racking system, you'll need to take into account the type that best suits your installation.
Ground mounted systems, for instance, are ideal for larger installations or those with limited roof space. Pole mounted systems, on the other hand, are great for smaller installations or those requiring a more raised setup.
In terms of rack types, you'll need to decide between adjustable and fixed racks. Adjustable racks allow for seasonal adjustments to optimize energy production, while fixed racks are more cost-effective and suitable for locations with minimal seasonal variations.
Tracking systems, which flexibly adjust to the sun's position, can further enhance energy production but come at a higher cost.
When selecting a racking system, take into account the installation techniques required. Will you need to penetrate your roof or use a non-penetrating system?
What kind of roof type do you have, and how will that impact your racking system choice? By carefully evaluating these factors, you can guarantee a secure and efficient solar installation that meets your energy needs.
Inverter and Charge Controller
In conjunction with your solar panel array, the inverter and charge controller are crucial components that guarantee efficient energy conversion and storage.
You'll need an inverter to convert the DC power generated by your solar panels into AC power that's usable in your home. There are several inverter types to evaluate, including string inverters, microinverters, and power optimizers. Each type has its pros and cons, so it's important to choose the one that best fits your system's needs.
The charge controller, on the other hand, regulates the flow of energy from your solar panels to your battery bank. Its features, such as maximum power point tracking (MPPT) and pulse-width modulation (PWM), guarantee that your batteries are charged efficiently and safely.
When selecting a charge controller, look for features like adjustable voltage and current limits, as well as built-in monitoring and fault detection.
Battery Bank and Accessories
You've selected your inverter and charge controller, now it's time to focus on the battery bank and accessories that will store the energy generated by your solar panels.
The battery bank is an essential component of your DIY solar system, and its capacity will directly impact your energy efficiency. You'll need to determine the right battery capacity for your system, considering factors like your energy usage, solar panel output, and desired backup time.
When choosing batteries, look for ones with high depth of discharge (DOD) and long lifetimes to guarantee solar longevity. Proper installation techniques are vital, so make sure to follow manufacturer guidelines and consider consulting a professional if you're unsure.
Regular maintenance tips, such as monitoring temperature and voltage, will help extend the life of your batteries.
Regarding budget planning, batteries can be a significant expense, so be sure to factor them into your overall system cost.
Wiring and Electrical Components
You'll need to select the right connectors and fuses to guarantee safe and efficient energy transfer throughout your DIY solar system.
Inverters and breakers are also essential components, as they convert DC power to AC and prevent electrical overloads.
When choosing these components, consider factors like voltage, current, and compatibility with your system's other elements.
Connectors and Fuses
Your solar panel system's wiring and electrical components rely heavily on connectors and fuses to guarantee safe and efficient energy transmission. These vital components make certain that your system operates within the desired voltage and current ratings, preventing damage to your equipment and potential electrical hazards.
When it comes to connectors, you'll need to take into account the type and quality of connectors suitable for your system. There are various connector types, including MC4, H4, and Amphenol, each with its own specifications and applications.
Fuse ratings are another important aspect to take into account. Fuses are designed to protect your system from overcurrent conditions, so it's critical to select fuses with the correct ampere ratings for your solar panels and electrical components.
You'll need to make sure that your fuse ratings match the maximum current output of your solar panels to prevent overheating and electrical fires. The cost of connectors and fuses may seem negligible compared to other system components, but their importance can't be overstated.
Investing in high-quality connectors and fuses will provide long-term reliability and safety for your DIY solar panel system.
Inverters and Breakers
As you investigate deeper into the wiring and electrical components of your DIY solar panel system, inverters and breakers emerge as vital elements that guarantee efficient and safe energy transmission.
Inverters, which convert DC power from your solar panels to AC power for your home, play an essential role in maximizing energy output. Look for an inverter with high inverter efficiency, typically above 95%, to minimize energy losses.
You'll also need to take into account breaker types, such as circuit breakers or arc fault breakers, to protect your system from electrical surges and faults. Breakers also help prevent electrical shocks and fires, providing a safe and reliable energy supply.
When selecting an inverter and breaker, contemplate factors like compatibility with your solar panel array, system voltage, and local electrical codes.
Be prepared to invest in a high-quality inverter and breaker to guarantee peak performance and safety. While these components may seem like an added expense, they're vital for a reliable and efficient DIY solar panel system that can power your home for years to come.
Roof Installation and Preparation
During the solar panel installation process, mounting the system onto your roof is an important step that requires careful planning and execution.
You'll need to assess your roof's condition and structural integrity to determine if it can support the weight of the solar panels. Weatherproofing techniques, such as flashing and sealants, will also be necessary to prevent water damage and guarantee a secure installation.
When planning your installation timeline, consider the material sourcing for your roof mounts, rails, and flashing. Make certain to research local regulations and comply with building codes to avoid any potential issues.
Aesthetic considerations, like the color and style of your roof, should also be factored in to guarantee the solar panels blend in seamlessly.
The orientation of your roof is vital, as it affects the system's energy output. You'll want to position your panels to maximize sunlight exposure, considering any obstructions or shading.
Permitting and Inspection Fees
The permitting process is a crucial step in the solar panel installation expedition, requiring careful maneuvering of local regulations and compliance with building codes. As you traverse this process, you'll need to take into account the costs associated with obtaining necessary permits and undergoing inspections.
| Permit Type | Application Fees | Timeline Expectations |
|---|---|---|
| Building Permit | $100-$500 | 1-2 weeks |
| Electrical Permit | $50-$200 | 1-2 weeks |
| Zoning Permit | $200-$1,000 | 2-4 weeks |
| Environmental Permit | $500-$2,000 | 4-6 weeks |
You'll need to guarantee compliance with local regulations, including zoning laws and environmental impact assessments. Your inspection checklist should include items such as electrical connections, roof anchoring, and system commissioning. Application fees vary widely depending on your location and the type of permit required. Be prepared for a permitting process that can take anywhere from a few weeks to several months, depending on the complexity of your project. By understanding these requirements and costs, you can plan accordingly and avoid costly delays in your DIY solar project.
Safety Equipment and Tools
Beyond the permitting process, you'll need to invest in essential safety equipment and tools to guarantee a hazard-free DIY solar installation experience. This includes purchasing personal protective equipment (PPE) such as hard hats, safety glasses, gloves, and steel-toed boots.
You'll also need to invest in fall protection gear, like safety harnesses and ropes, to make certain you're secure while working at heights.
In addition to safety gear, you'll need to acquire specialized tools for the installation process. These may include a multimeter, wire strippers, and a drill press.
It's vital to maintain your tools in good condition to prevent accidents and make certain efficient installation. Regular tool maintenance, such as cleaning and lubricating moving parts, will extend the lifespan of your equipment and prevent costly repairs.
Labor and Time Costs
When calculating the labor and time costs of your DIY solar project, you'll need to take into account the value of your own time and potentially hiring professional help for certain tasks.
You'll need to put a dollar figure on the hours you'll spend designing, installing, and maintaining your solar array.
If you're not comfortable with certain aspects of the project, you may need to factor in the cost of hiring a professional, which can greatly impact your overall budget.
Your Time Valuation
Calculating the financial benefits of a DIY solar installation requires factoring in the value of your time, as you'll be investing labor and hours into the project.
When considering your time valuation, think about the opportunity cost of spending your time on this project instead of other activities that could generate income or personal fulfillment.
- You're giving up weekends or evenings that could be spent with family and friends.
- You're taking time away from your primary job or business, which could impact your career advancement or revenue.
- You're sacrificing leisure activities or hobbies that bring you joy and relaxation.
Effective time management is essential to completing the project efficiently and minimizing the opportunity cost.
Assign a monetary value to your time based on your hourly wage or the value you place on your free time. This will help you understand the true cost of the project and make informed decisions about whether DIY solar installation is the right choice for you.
Hiring Professional Help
You've considered the value of your time and how it affects the overall cost of a DIY solar installation.
Now, let's examine the costs associated with hiring professional help. If you're not comfortable with the installation process or lack the necessary skill set, hiring a professional installer can be a viable option. This decision will greatly impact your overall DIY solar costs.
A professional installation will certainly add to your expenses, but it may provide a better cost benefit analysis in the long run. A qualified installer will guarantee a safe and efficient installation, reducing the risk of errors and potential safety hazards.
Additionally, they'll handle the necessary permits, inspections, and warranties, alleviating some of the burden from your shoulders.
The cost of hiring a professional installer varies depending on factors like location, system size, and complexity. On average, you can expect to pay between $2.50 and $3.50 per watt, which translates to around $15,000 to $21,000 for a typical 5-kilowatt system.
While this may seem like a considerable expense, it's crucial to weigh it against the benefits of a professional installation, including increased efficiency, reliability, and peace of mind.
Monitoring and Maintenance
About 1% of your DIY solar system's overall cost goes towards monitoring and maintenance, a crucial aspect that guarantees your system operates at peak levels. This investment guarantees you can identify and address any issues promptly, maximizing your system's performance and energy output.
You'll need to take into account the following aspects of monitoring and maintenance:
-
Regular system checks: Schedule routine checks to inspect your system's components, confirming they're clean, secure, and functioning correctly. This helps prevent minor issues from escalating into major problems.
-
Software tools and troubleshooting techniques: Invest in software tools that provide real-time system performance data, enabling you to identify and troubleshoot issues efficiently. Develop an understanding of common troubleshooting techniques to resolve problems quickly.
-
Environmental factors and cleaning methods: Be prepared to address environmental factors that can impact your system's performance, such as dust, debris, or extreme weather conditions. Develop a cleaning schedule and learn effective cleaning methods to maintain your system's efficiency.
Frequently Asked Questions
Can I Install DIY Solar Panels on a Metal Roof?
You'll face unique installation challenges on a metal roof, requiring specialized flashing and mounting systems to guarantee a watertight seal; consider roof considerations like material type, pitch, and obstacle clearance to confirm a successful DIY solar panel installation.
What Is the Warranty on DIY Solar Panel Systems?
When you install a DIY solar panel system, you'll typically get a 25-year warranty on the panels and a 10-year warranty on the inverter, covering defects and performance issues, with some manufacturers offering extended warranty duration and broader warranty coverage.
Do DIY Solar Panels Affect Home Insurance Rates?
When you install DIY solar panels, you'll need to contemplate how they'll impact your home insurance rates, as policy adjustments may be required to account for installation risks, which can affect coverage implications and potentially increase your premiums.
Can I Add More Panels to My DIY System Later?
You're not stuck with your initial DIY solar setup forever! You can easily add more panels to your system later, future-proofing your energy independence with seamless panel expansion and future upgrades that'll keep you powered up for years to come.
Are DIY Solar Panels Compatible With Smart Home Systems?
You'll be pleased to know that most DIY solar panels are compatible with smart home systems, offering seamless solar compatibility and smart integration, allowing you to monitor and control your energy usage and production in real-time.
Conclusion
As you commence your DIY solar project, remember that "time is money." Be prepared to invest both in the various components and in your own sweat equity. From panels to permitting, each expense adds up, and overlooking even one can lead to costly delays or safety risks. By factoring in all these costs upfront, you'll avoid surprises and guarantee a successful, sustainable energy solution that pays for itself in the long run.
Related Posts
-
Trends in Renewable Energy Storage Technologies
You're witnessing rapid advancements in renewable energy storage technologies aimed at improving efficiency and scala...
-
Home Solar Systems for Environmental Impact
Home solar systems markedly reduce your carbon footprint by utilizing renewable energy. By adopting solar energy, you...
-

Energy-Efficient Heating and Cooling Appliances
Energy-efficient heating and cooling appliances can cut your energy bills markedly. By opting for models with high En...

