
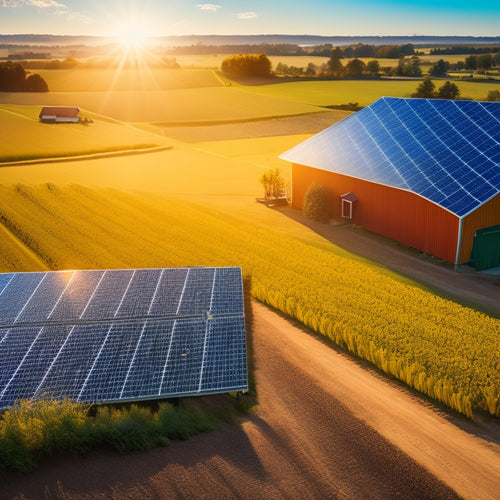
Troubleshoot and Fix Common Panel Issues Easily
To troubleshoot and fix common panel issues, begin by analyzing performance data for energy output drops. Clean panels using a soft-bristled brush and mild soap without high-pressure water. Address shading by inspecting for vegetation or other obstructions. Check for electrical problems by examining circuit breakers, grounding, and wiring. Monitor your inverter's LED indicators and error codes. Confirm all connections are tight and inspect for physical damage. Prevent animal damage with barriers, and regularly update system software for peak performance. By systematically following these steps, you'll effectively maintain your panels and learn more about optimizing their performance.
Key Takeaways
- Inspect panels for shading and clear vegetation to improve exposure.
- Clean panels using a soft-bristled brush and mild soap solution.
- Check for and fix loose electrical connections to ensure consistent power flow.
- Regularly update system software to maintain optimal performance.
- Examine panels for physical damage and repair or replace as needed.
Identifying Energy Output Drops
https://www.youtube.com/watch?v=cxWsGwq9X1w
To identify energy output drops, start by examining the panel's performance data over a consistent period. You'll want to look at daily, weekly, and monthly figures to spot any output fluctuations. Consistency is key here. By comparing data sets, you can determine if there's a significant decrease in energy efficiency.
Next, check your system's monitoring software. Most modern solar setups come with built-in tools that track performance metrics. Use these tools to pinpoint when and where the drops occur. Are they happening at specific times of the day or under certain weather conditions?
Don't overlook the importance of correlating your findings with external factors. For instance, shading from nearby trees or buildings can cause notable output fluctuations. Identifying these patterns helps you take targeted action.
Cleaning Solar Panels
Maintaining peak energy efficiency often requires regular cleaning of your solar panels to remove dust, debris, and other particulates that can obstruct sunlight.
To begin, gather the appropriate cleaning tools such as a soft-bristled brush, a non-abrasive sponge, and a squeegee. Using these tools guarantees that you won't scratch or damage the panels' surface.
Next, assess your water usage. Opt for distilled water if possible, as it prevents mineral deposits that can cloud the panels. Mix it with a mild soap solution to effectively break down grime. Avoid high-pressure water sprays, as they could potentially damage the panels or loosen their connections.
In terms of technique, start by gently brushing off loose debris. Then, apply your soapy water solution with a sponge, making sure to reach all corners and edges. Rinse thoroughly with distilled water to remove any soap residue.
Addressing Shading Issues
Shading on solar panels can greatly diminish their efficiency, making it imperative to identify and mitigate any sources of obstruction. To liberate your system from performance drops, take a methodical approach in addressing shading issues.
Start by conducting a thorough inspection of your installation site.
Identify Sources of Shading: Examine your panels from different angles and times of day to pinpoint any shading sources. Common culprits include vegetation overgrowth and nearby structures.
Tree Pruning: If trees are causing shading, strategic pruning can markedly improve solar exposure. Trim branches that cast shadows on your panels, ensuring you're compliant with local regulations.
Vegetation Overgrowth: Regularly clear any bushes, shrubs, or other plants that might encroach upon your panels. This preventative measure keeps your system free from unnecessary obstructions.
Panel Positioning: Assess whether relocating or adjusting the tilt of your panels could minimize shading. Sometimes a slight repositioning can make a substantial difference in exposure.
Fixing Electrical Problems
Diagnosing electrical problems in your solar panel system requires a systematic approach to identify and rectify faults efficiently. Start by inspecting the circuit breakers. Confirm they haven't tripped, as this can disrupt the power flow. Reset any tripped breakers and observe if the problem persists. If it does, you'll need to dig deeper.
Next, check for grounding issues. Poor grounding can lead to erratic performance and potential hazards. Use a multimeter to measure the resistance between the ground and the panel frame. The resistance should be close to zero. If it's not, you may need to tighten connections or replace grounding components.
Examine the wiring for any signs of wear, corrosion, or loose connections. Damaged wires can cause significant disruptions. Replace any faulty wiring and ensure all connections are secure. Remember, a secure electrical system is the backbone of your solar panel's efficiency.
If you've addressed circuit breakers, grounding issues, and wiring, but the problem persists, consider consulting a professional. Electrical problems can be complex, and professional guidance ensures your system operates safely and efficiently.
Monitoring Inverter Status
When monitoring inverter status, first check the LED indicators for any warning or fault signals.
Next, analyze the error codes displayed to identify specific issues.
Check LED Indicators
Monitoring the LED indicators on your inverter provides critical insights into the operational status and potential issues of your solar panel system. By understanding LED colors and blinking patterns, you can quickly diagnose and address problems, ensuring peak performance.
Here are some steps to effectively monitor these indicators:
-
Identify LED Colors: Different colors represent various operational states. Commonly, green indicates normal operation, yellow signals a warning, and red signifies an error or fault.
-
Observe Blinking Patterns: Blinking frequencies and patterns can provide additional information. For instance, a steady green light might mean everything's fine, while a blinking green light could indicate the system is initializing or in standby mode.
-
Refer to the Manual: Your inverter's manual will detail specific LED behaviors for your model. Cross-referencing these details can pinpoint exact issues.
- Perform Regular Checks: Make it a habit to inspect the LED indicators periodically. Regular monitoring helps catch anomalies early before they escalate into more significant problems.
Analyze Error Codes
After checking the LED indicators, the next step is to analyze error codes displayed by your inverter to pinpoint specific issues. Error codes serve as diagnostic tools that reveal the root cause of malfunctions. Start by consulting your inverter's manual for a detailed list of error codes and their meanings. This will allow you to translate cryptic error messages into actionable insights.
Use historical data to understand whether an issue is recurring or an isolated incident. Historical data helps you identify patterns and trends, making your troubleshooting efforts more effective. For instance, if an error code appears frequently, it might indicate an underlying problem that requires immediate attention.
Don't hesitate to use advanced diagnostic tools provided by the inverter manufacturer. These tools often include software that can read and interpret error codes more accurately. Some systems even offer remote diagnostics, allowing you to monitor and troubleshoot issues from anywhere.
Analyzing error codes with technical precision enables you to solve problems quickly and effectively. This approach not only saves time but also ensures the longevity and top-notch performance of your system. Keep a log of error codes and resolutions to build a knowledge base for future troubleshooting.
Monitor Performance Metrics
Evaluate key performance metrics like output voltage, current, and efficiency to gain a thorough understanding of your inverter's status. Monitoring these metrics lets you perform a precise data analysis, guaranteeing your system operates within peak performance benchmarks.
Start by regularly recording the following:
-
Output Voltage: Measure the output voltage to make sure it aligns with your system's specifications. Deviations might indicate underlying issues requiring immediate attention.
-
Current Flow: Keep an eye on the current to detect any anomalies that could suggest inefficiencies or potential component failures.
-
Efficiency Rate: Calculate the efficiency by comparing the input and output power. A drop in efficiency can signal problems like energy losses or degradation of the inverter.
- Temperature Levels: Track the inverter's temperature, as overheating can lead to performance dips or permanent damage.
By systematically analyzing these metrics, you can quickly pinpoint problems and implement solutions, enhancing the inverter's longevity and reliability. Data analysis empowers you to understand the root causes of underperformance, helping you liberate your system from recurring issues.
Consistently monitoring these performance benchmarks ensures your inverter operates at its peak, giving you the confidence and freedom to rely on your energy system without constant worry.
Checking for Physical Damage
Start by carefully inspecting the panel for any visible signs of physical damage, such as cracks, dents, or loose components. Begin with a thorough surface crack examination. Look closely at the panel's face for any lines or fractures, as even minor surface cracks can lead to significant issues over time. Utilize a flashlight to illuminate the surface and make sure no small cracks are overlooked.
Next, conduct a frame inspection. Examine the edges and corners of the panel's frame. Check for any signs of bending, warping, or corrosion. A compromised frame can undermine the panel's integrity and its mounting security. Pay close attention to the joints where the frame connects, as these areas are particularly susceptible to stress and damage.
Don't forget to scrutinize any external fittings and fasteners. Confirm that screws and bolts are tightly secured and that there are no missing or dislodged components. Loose parts can lead to vibrations, which may exacerbate physical damage over time.
Resolving Loose Connections
With the physical damage inspection complete, focus on guaranteeing all electrical connections are secure and intact. Start by performing a thorough connector inspection. Loose connections can cause intermittent power issues, leading to inconsistent panel performance. Use a systematic approach to identify and resolve these issues.
-
Turn off the Power: Before you begin, make sure the power to the panel is completely shut off to prevent any electrical hazards.
-
Inspect Connectors: Check all connectors for signs of wear or corrosion. Corroded connectors can disrupt the electrical flow and should be cleaned or replaced.
-
Wire Tightening: Use a screwdriver to tighten any loose wires. Loose wires can cause arcing, which may lead to more significant problems down the line.
- Test Connections: Once tightened, use a multimeter to test the continuity of each connection. This ensures that electricity flows unimpeded through the circuit.
Preventing Animal Damage
Securing your panel remains free from animal interference requires proactive measures to safeguard against potential damage and system failures. Wildlife deterrents are essential for protecting your investment and maintaining peak performance.
First, install physical barriers like mesh or netting around the panel's perimeter. These barriers prevent access by birds, squirrels, and other small animals.
For rodent prevention, consider using rodent-proof materials for wiring and enclosures. Rodents are notorious for chewing through cables, which can lead to short circuits and costly repairs. Implementing metal conduit or specialized rodent-resistant cable coverings can greatly reduce this risk.
Additionally, regular inspections are critical. Schedule routine checks to identify and address any signs of animal activity promptly. Look for droppings, nests, or gnawed wires, and take immediate action if any are found.
Deploy ultrasonic repellents to create an inhospitable environment for unwanted wildlife without harming them.
Maintaining a clear area around your panel also helps in deterring animals. Trim back trees and bushes that provide easy access for climbing creatures.
Analyzing Roof Compatibility
Evaluating your roof's suitability is crucial to guaranteeing the peak performance and longevity of your solar panel system. Begin by examining the roof material. Some materials like asphalt shingles and metal are ideal, while others like wood shakes may require additional considerations.
Next, analyze the slope angle. A recommended angle ensures maximum sunlight exposure and efficient energy conversion.
To systematically evaluate your roof's compatibility, follow these steps:
-
Inspect Roof Material: Determine if your roof is made from a material that can support solar panels without compromising structural integrity.
-
Measure Slope Angle: Use a protractor or an angle finder to measure the slope. Ideally, the angle should be between 30-45 degrees for best results.
-
Check Roof Condition: Ensure your roof is in good condition. Look for signs of wear and tear that might need repairs before installation.
- Evaluate Shading: Identify any obstructions like trees or neighboring buildings that could cast shadows on your panels, reducing efficiency.
Updating System Software
To tackle software-related panel issues efficiently, you need to start by checking for software updates regularly. Installing the latest firmware guarantees that your system runs at its best and minimizes potential errors.
Make it a routine to verify and apply updates to maintain your panel's performance.
Check for Software Updates
Updating your system software is a crucial step in troubleshooting panel issues, guaranteeing that you're equipped with the latest features and bug fixes. By keeping your software up-to-date, you mitigate many common problems and enhance overall performance.
Here's how to systematically check for updates:
-
Navigate to Settings: Access your device's settings menu. This is often where you'll find software update options.
-
Check for Updates: Look for a 'Check for Updates' button. Select it to initiate the search for available updates.
-
Install Updates: If updates are found, follow the prompts to download and install them. Make sure the process completes to avoid partial updates.
- Restart Device: A restart is usually required to fully implement the updates and ensure all changes take effect.
Ensuring your system is current can resolve many compatibility issues that arise from outdated software. It also makes user training more effective, as everyone is working on the same, updated platform.
Install Latest Firmware
Your device's firmware plays a critical role in its operation, guaranteeing all hardware components function correctly and efficiently. Updating to the latest firmware isn't just a maintenance task—it's a pathway to unleashing your panel's full potential and guaranteeing firmware compatibility. Start by checking the manufacturer's website for the newest firmware version. Download it, and follow the specific instructions provided to complete the update.
Firmware updates often address bugs, improve security, and sometimes add new features. Here's a quick look at what you might gain:
| Benefit | Emotion Evoked |
|---|---|
| Enhanced Performance | Satisfaction |
| Increased Security | Peace of Mind |
| New Features | Excitement |
To guarantee a seamless update, make sure your device is connected to a stable power source and has a reliable internet connection. If your panel supports remote access, you can often update the firmware remotely, adding an extra layer of convenience.
Frequently Asked Questions
How Often Should Solar Panels Be Inspected for General Maintenance?
You should inspect your solar panels for general maintenance at least once a year. This maintenance schedule guarantees peak performance and longevity. Regular inspection frequency helps identify and address issues before they escalate, maximizing efficiency.
What Are the Signs of a Failing Solar Panel?
Spot small signs swiftly: microcrack detection and hotspot formation. You'll notice reduced energy output and uneven performance. Actively analyze these issues to maintain efficiency and guarantee your solar panels perform perfectly, liberating you from energy dependence.
Can Extreme Weather Conditions Affect Solar Panel Performance?
Extreme weather conditions can greatly impact your solar panel's performance. Hail, snow, and high winds cause performance degradation by damaging the panels or obstructing sunlight, reducing efficiency. Monitoring and maintenance mitigate weather impact and optimize energy output.
Are There Any Government Incentives for Solar Panel Repairs?
Just like searching for the Holy Grail, finding government incentives for solar panel repairs can be rewarding. Look into rebate programs and tax credits; they're often available to help you reduce repair costs and boost efficiency.
How Can I Increase the Lifespan of My Solar Panel System?
To maximize your solar panel system's lifespan, regularly use effective cleaning techniques and prioritize consistent inverter maintenance. These strategies enhance efficiency, prevent damage, and free you from frequent replacements, ensuring long-term, sustainable energy production.
Related Posts
-
Off-Grid Solar Solutions for Sustainable Farming
Off-grid solar solutions can revolutionize your farming operations by providing energy independence and significant c...
-
Energy-Efficient Home Upgrades for Cost Reduction
To reduce costs with energy-efficient home upgrades, focus on essential improvements like smart thermostats, energy-e...
-

Business Solar Investments for Cost-Effective Sustainability
Investing in solar energy is a smart move for your business, providing a solid foundation for cost-effective sustaina...


