
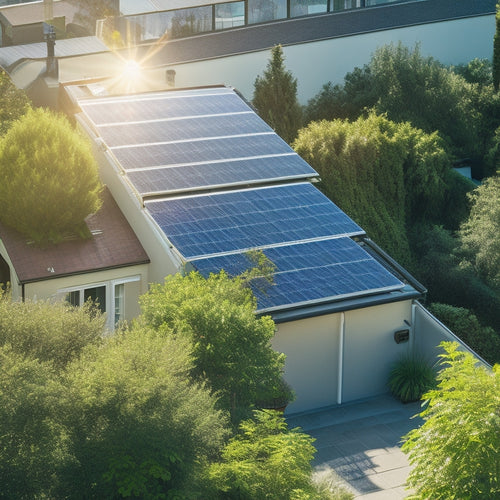
The Best Way to Install Solar Panels on Your Roof
You'll want to start by evaluating your roof's suitability for solar panels, considering factors like orientation, shading, size, and condition. Then, choose the right solar panel for your needs, balancing efficiency, durability, and budget. Prepare your roof's surface by applying weatherproofing techniques and sealants specific to your roof material. Install durable mounting hardware, securing your panels against harsh weather, and verify a safe, efficient connection with wiring and electrical connections. Finally, conduct a thorough inspection and testing to ensure a safe, efficient system. With each step carefully executed, you'll be utilizing the sun's energy in no time - and there's more to investigate in the process.
Key Takeaways
- Ensure ideal roof orientation and conduct a shading analysis to maximize energy output and identify potential obstructions.
- Choose high-efficiency solar panels that balance budget and energy needs, considering factors like durability and material quality.
- Prepare the roof surface by applying weatherproofing techniques and sealants specific to the roof material to prevent water intrusion.
- Select a durable and corrosion-resistant mounting system compatible with the roof type and solar panel frame, ensuring secure fastening and adjustability.
- Conduct a thorough final inspection and testing to verify system safety, efficiency, and proper grounding, including voltage and power output checks.
Assessing Your Roof's Suitability
Before installing solar panels, assess your roof's suitability by evaluating its size, orientation, and condition. A south-facing roof with little to no shading is ideal, as it receives the most direct sunlight throughout the day.
If your roof doesn't face south, don't worry – solar panels can still generate significant power on east- or west-facing roofs. However, you'll need to take into account the reduced energy output.
Conduct a shading analysis to identify any obstructions, such as trees, buildings, or chimneys, that could cast shadows on your roof. This will help you determine the best placement for your solar panels.
Measure your roof's size to verify you have enough space for the required number of panels. Also, inspect your roof's condition, looking for signs of wear, damage, or aging that may affect the installation or longevity of your solar panels.
Choosing the Right Solar Panel
When choosing the right solar panel for your roof, you'll want to contemplate two critical factors: panel efficiency and durability.
You'll need to select panels that can maximize energy output while withstanding various environmental conditions.
Panel Efficiency Matters
As you weigh your solar panel options, it's essential to contemplate the efficiency of each panel, since it directly impacts the amount of energy your system can produce. A more efficient panel will generate more power per hour of sunlight, making the most of your roof's real estate.
When evaluating solar panel types, consider their energy conversion rates. Monocrystalline silicon panels boast the highest efficiency rates, typically ranging from 20% to 22%. Polycrystalline silicon panels follow closely, with efficiencies between 15% and 18%. Thin-film panels, while more affordable, have lower efficiencies, typically around 7% to 14%.
Higher-efficiency panels may come at a higher upfront cost, but they'll generate more power over their lifespan, ultimately saving you money on your energy bills.
Be sure to balance efficiency with your budget and energy needs when selecting the right solar panel for your roof. By prioritizing panel efficiency, you'll maximize your energy output and get the most out of your solar investment.
Durability and Quality
You've narrowed down your solar panel options based on efficiency, but now it's time to contemplate another critical factor: durability and quality.
You want solar panels that can withstand the elements and last for years to come. After all, a solar panel system is a significant investment, and you expect it to generate power reliably for at least 25 years or more.
When evaluating durability and quality, consider the following key aspects:
-
Material longevity: Look for panels made with high-quality materials that can resist degradation over time. A durable frame, tempered glass, and weather-resistant connectors are essential.
-
Weather resistance: Verify the panels are designed to withstand extreme weather conditions, such as heavy snow loads, high winds, and intense sunlight.
-
Manufacturing quality: Research the manufacturer's reputation, quality control processes, and testing protocols to verify the panels meet industry standards.
Preparing Your Roof's Surface
Most roofs require some preparation before solar panels can be installed. You'll need to verify your roof's surface is ready for the panels by checking for damaged, rotten, or missing shingles, as well as any signs of wear around chimneys, vents, and skylights.
Next, inspect your roof's surface materials to determine the best weatherproofing techniques. This may involve applying a layer of roofing cement or sealant around flashing and vents to prevent water intrusion.
| Roof Surface Materials | Weatherproofing Techniques |
|---|---|
| Asphalt Shingles | Apply roofing cement around flashing and vents |
| Clay or Concrete Tiles | Seal gaps between tiles with polyurethane sealant |
| Metal Roofs | Apply a rust-resistant coating and sealant around seams |
| Slate Tiles | Use a slate-specific sealant to fill gaps and cracks |
| Wood Shakes | Apply a waterproofing membrane and sealant around vents |
Installing Mounting Hardware
Get ready to secure your solar panels by installing the mounting hardware. This vital step guarantees your system remains stable and efficient.
You'll need to choose the right hardware materials, such as anodized aluminum or stainless steel, that can withstand various environmental conditions.
When it comes to mounting techniques, you have several options. Consider the following:
-
Rail-based systems: These involve attaching rails to your roof and then clipping the solar panels to them. This method provides flexibility and ease of installation.
-
Rail-less systems: These systems use a single, fixed point of attachment, eliminating the need for rails. They're ideal for smaller installations or those with limited roof space.
-
Shared rail systems: A hybrid approach that combines the benefits of rail-based and rail-less systems.
Remember to always follow the manufacturer's instructions and local building codes when installing your mounting hardware.
Proper installation is essential to the performance and longevity of your solar panel system. By choosing the right hardware materials and mounting techniques, you'll be well on your way to utilizing the power of the sun.
Connecting Solar Panels Together
Hook up your solar panels by connecting them in a series or parallel configuration, depending on your system's requirements.
When connecting in series, you'll link the positive terminal of one panel to the negative terminal of another, increasing the system's voltage while keeping the current the same. This setup is ideal for systems with high voltage requirements or when you need to optimize energy production.
For parallel connections, you'll connect the positive terminals together and the negative terminals together, increasing the system's current while keeping the voltage the same. This configuration is suitable for systems with low voltage requirements or when you need to guarantee consistent energy output.
Make certain to follow the manufacturer's guidelines for connecting your specific solar panels, as the recommended configuration may vary. Use appropriate connectors and cables to guarantee secure and efficient energy transmission.
Securing Panels to the Roof
You'll need to verify your roof is ready for the solar panels by completing a roof preparation checklist, which includes inspecting for damaged or missing shingles and verifying the roof's structural integrity.
Next, you'll identify the ideal roof anchor points to securely fasten the panels, considering factors like wind direction and roof pitch.
Roof Preparation Checklist
Preparing your roof for solar panel installation involves a thorough inspection and addressing potential issues to guarantee a secure and efficient setup. You'll want to verify your roof is in good condition to support the weight of the solar panels and withstand various weather conditions.
Before the installation, you should:
-
Clear your roof of debris, such as leaves and branches, to prevent damage to the panels and guarantee a secure installation.
-
Inspect your roof for damaged, missing, or loose shingles, and repair or replace them as needed to prevent water damage and leaks.
-
Check for signs of wear and tear, such as cracks, rust, or rot, in your roof's flashing, vents, and chimneys, and address them to prevent future issues.
Proper roof maintenance is essential to guaranteeing a successful solar panel installation. Failing to address these issues can lead to increased installation costs and even void your warranty.
Roof Anchor Points
Securely fastening solar panels to your roof is essential to confirm they remain in place and function efficiently, even in harsh weather conditions.
You'll want to verify your roof can support the added weight of the panels, known as the roof load, and withstand strong winds and storms.
To achieve this, you'll need to identify suitable roof anchor points that can securely hold the panels in place.
These points should be able to resist wind uplift forces and transfer the weight of the panels to the roof's structural components.
Here's a breakdown of the key considerations for selecting roof anchor points:
| Roof Type | Anchor Point | Wind Resistance |
| Asphalt Shingle | Roof hooks or flashing | Up to 90 mph |
| Metal Roof | Clamps or brackets | Up to 120 mph |
| Clay or Concrete Tile | Tile hooks or flashing | Up to 100 mph |
| Slate Roof | Slate hooks or flashing | Up to 80 mph |
| Flat Roof | Ballasted or adhered systems | Up to 150 mph |
Remember to consult local building codes and regulations, as well as manufacturer guidelines, to verify your roof anchor points meet the necessary standards for your area.
Secure Mounting Systems
Identifying suitable roof anchor points is only half the battle - you also need to ascertain the solar panels are securely fastened to these points using a reliable mounting system.
A sturdy mounting system guarantees your solar panels withstand harsh weather conditions and last for years to come.
When selecting a mounting system, contemplate the type of roof you have, the size and weight of your solar panels, and the local building codes.
You'll want to choose mounting materials that are durable, corrosion-resistant, and designed for your specific roof type.
Some key factors to reflect on when evaluating a mounting system include:
- Compatibility with your roof type and solar panel frame
- Strength and durability of the mounting materials
- Ease of installation and adjustability for ideal panel angle and orientation
Wiring and Electrical Connections
About 90% of a solar panel installation's electrical connections occur on your roof, making this stage vital to the system's overall performance and safety.
You'll need to guarantee that all connections are secure, waterproof, and meet local electrical codes.
When it comes to wiring, you'll want to use UV-resistant cables that can withstand the harsh rooftop environment. Make sure to label each cable clearly, so you can easily identify them during maintenance or repairs.
Wiring safety is essential, so always follow the manufacturer's instructions and local electrical codes.
You'll also need to connect the solar panels to an inverter, which converts DC power to AC power for your home.
Be sure to choose an inverter that's compatible with your solar panel array and meets local electrical standards.
Finally, consider installing a monitoring system to track your solar panel's performance and identify any potential issues.
Final Inspection and Testing
Get ready to power up your solar panel system by conducting a thorough final inspection and testing. This critical step guarantees your system is safe, efficient, and ready to generate clean energy.
During the final inspection, you'll verify that all components are securely fastened, wiring is properly connected, and the system is grounded according to local electrical codes.
To guarantee an extensive testing process, follow established testing protocols, including:
- Verify the system's voltage, current, and power output match the manufacturer's specifications
- Perform a series of safety tests, such as ground fault and arc fault testing
- Conduct a visual inspection of the entire system, checking for signs of damage or wear
Frequently Asked Questions
Can I Install Solar Panels on a Metal or Tile Roof?
You can install solar panels on a metal or tile roof, but consider metal roof considerations like structural integrity and waterproofing, while tile roof advantages include ease of installation and minimal weight distribution.
How Long Does a Typical Solar Panel Installation Take?
You'll typically spend 2-5 days waiting for your solar panel installation, depending on the complexity of the job and weather considerations that can impact the installation timeline, but a professional team will get you powered up quickly and efficiently.
Will Solar Panels Affect My Roof's Warranty?
When you install solar panels, you're likely wondering if they'll void your roof's warranty. Don't worry, you won't necessarily lose your warranty; however, you'll need to take into account roof warranty implications and make certain your solar installation meets manufacturer requirements to avoid potential issues.
Can I Add Solar Panels to an Existing Roof Later?
Fast-forward to a sustainable future! You can definitely add solar panels to your existing roof later, but be prepared for cost considerations and a potentially longer installation timeline, depending on your roof's age and condition, dude!
Do Solar Panels Require Regular Cleaning and Maintenance?
You'll need to clean your solar panels regularly to maximize energy output, as dirt and debris reduce efficiency; follow maintenance tips like gentle washing and inspecting for damage to guarantee peak performance and extend their lifespan.
Conclusion
As you flip the switch, the sun's energy coursing through your home's veins, you've seized the power of a fresh chapter. Your roof, once a mere barrier, now a bridge to a cleaner, brighter future. The solar panels, like a crown of jewels, adorn your rooftop, radiating a sense of honor and accomplishment. You've revealed the secret to a sustainable tomorrow, and it's shining bright. The expedition's end marks a new beginning, illuminating the path to a greener, energy-independent you.
Related Posts
-

Solar System Installation Rebates and Tax Credits
Solar system installations offer beneficial rebates and tax credits that greatly cut your initial costs. You can bene...
-
How Solar Panels Reduce Electricity Bills
Solar panels can drastically cut your electricity bills by utilizing sunlight to generate your own energy. This decre...
-
Off-Grid Solar Solutions for Eco-Conscious Businesses
Off-grid solar solutions offer you a path to both sustainability and substantial cost savings. By adopting these syst...


