
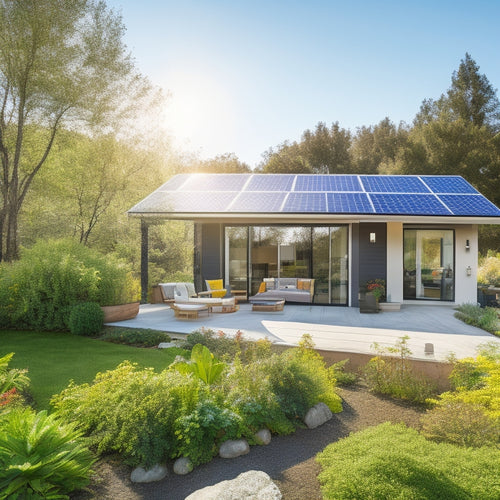
Small Roof Solar Panel Installation and Maintenance
When installing and maintaining solar panels on a small roof, you'll need to assess your roof's solar potential, considering factors like orientation, local incentives, and structural integrity. Choose the right solar panel based on energy output capacity, efficiency, and available roof space. Prepare your roof by inspecting its material, structural integrity, and confirming it can handle the added weight and wind resistance. Then, select the suitable mounting option and verify proper electrical connections and wiring. By following these guidelines and staying on top of maintenance, you'll maximize energy efficiency - and the next steps will reveal the secrets to making the most of your small roof solar panel installation.
Key Takeaways
- Assess your roof's solar potential by considering orientation, local incentives, regulations, structural integrity, and climate impact before installation.
- Choose the right solar panel by evaluating panel size, energy output capacity, efficiency, available roof space, and local solar irradiance.
- Ensure roof preparation and inspection by checking roof material, structural integrity, and weight and wind resistance before installation.
- Select suitable solar panel mounting options based on mounting materials, installation techniques, roof angles, and aesthetic considerations.
- Regularly monitor and track performance, and perform cleaning and maintenance tasks to ensure optimal energy production and extend the system's lifespan.
Assessing Your Roof's Solar Potential
Determining your roof's solar potential is an important step in the small roof solar panel installation process. You need to assess your roof's orientation, which affects the amount of sunlight your panels will receive. A south-facing roof with little to no shading is ideal, but don't worry if your roof doesn't meet these conditions - shading analysis can help you determine the best placement for your panels.
You should also research local solar incentives, as they can greatly reduce installation costs. Additionally, familiarize yourself with local regulations, guaranteeing your installation meets all necessary standards.
Your roof's structural integrity is vital, so be sure to consult with a professional to determine if your roof can support the weight of the panels. Consider the climate impact of your installation, as well as the panel durability and expected energy savings.
Choosing the Right Solar Panel
You'll need to select solar panels that fit your small roof's dimensions and meet your energy needs.
Panel size matters, as larger panels may not fit your roof, while smaller ones may not generate enough power.
When choosing the right solar panel, consider the energy output capacity you require and the available roof space to guarantee a suitable installation.
Panel Size Matters
As you prepare to install solar panels on your small roof, the size of the panels becomes a critical factor, since it directly impacts the overall performance and efficiency of your solar energy system. The right panel size can greatly affect your installation costs and the amount of energy you can generate.
When selecting the ideal panel size, you'll need to take into account your roof's dimensions and the space available for installation. Larger panels can provide more power, but may not fit on smaller roofs. On the other hand, smaller panels may be more suitable for compact spaces, but may not generate as much energy.
Here's a comparison of different panel sizes and their typical characteristics:
| Panel Size | Typical Characteristics |
|---|---|
| Small (250-300W) | Compact design, ideal for small roofs, lower installation costs |
| Medium (300-350W) | Balanced performance and cost, suitable for average-sized roofs |
| Large (350-400W) | Higher energy output, larger dimensions, higher installation costs |
| Extra Large (400-450W) | Maximum energy output, largest dimensions, highest installation costs |
| Custom | Customized to specific roof dimensions, variable energy output, variable installation costs |
Energy Output Capacity
Your roof's dimensions have led you to reflect on the ideal panel size for your small roof solar panel installation.
Now, it's time to take into account the energy output capacity of your solar panels. This is vital in determining how much electricity your system will generate. You need to evaluate your energy consumption trends to determine the required energy output capacity.
A higher energy output capacity translates to more power generated per hour of sunlight. Solar panel efficiency, measured with respect to watts per square foot, plays a significant role in energy output capacity.
Look for solar panels with high efficiency ratings to maximize energy production. For instance, a 300-watt solar panel with an efficiency rating of 20% will produce more energy than a 300-watt panel with an efficiency rating of 18%.
When choosing the right solar panel, take into account your energy needs, the available roof space, and the local solar irradiance to guarantee you get the best energy output capacity.
Roof Preparation and Inspection
Three key factors determine a successful small roof solar panel installation: a solid roof structure, a clean surface, and proper installation.
When preparing your roof for solar panels, you'll need to assess the roof material considerations and structural integrity. Check your roof's age, condition, and material to guarantee it can support the weight of the solar panels. Asphalt shingles, metal, and tile roofs are all suitable for solar panels, but you may need to replace old or damaged roofing before installation.
Conduct a structural integrity assessment to guarantee your roof can handle the added weight and wind resistance of the solar panels. Check for signs of sagging, cracking, or rotting, and inspect the roof's framing, decking, and flashing for any weaknesses.
You may need to consult with a structural engineer or roofing expert if you're unsure about your roof's condition. A thorough roof inspection will help identify any potential issues before installation, guaranteeing a safe and successful solar panel installation.
Solar Panel Mounting Options
You've guaranteed your roof is ready for solar panels, now it's time to reflect on how they'll be attached. The mounting system you choose will greatly influence the overall performance and longevity of your solar panel installation.
You'll need to assess various factors, including:
-
Mounting materials: Aluminum, stainless steel, or anodized aluminum are popular options, each with its own strengths and weaknesses.
-
Installation techniques: Will you opt for a traditional rail-based system or a more modern, clamp-free design?
-
Roof angles: The pitch and orientation of your roof will influence the type of mounting system you require.
-
Aesthetic considerations: You may want to choose a system that blends seamlessly with your roof's design.
-
Wind resistance and load capacity: Confirm your mounting system can withstand local wind speeds and snow loads.
Your chosen mounting system must meet regulatory compliance and safety standards.
It's also crucial to evaluate installation costs and reflect on the impact on your solar panel's solar orientation.
Electrical Connections and Wiring
With the mounting system in place, the focus shifts to the electrical connections and wiring, which play a vital role in ensuring a safe and efficient solar panel installation. You'll need to connect the solar panels to an inverter, which converts DC power to AC power, and then connect the inverter to your electrical panel. It's essential to follow proper wiring safety protocols to avoid electrical shock, fires, or other hazards.
When it comes to connection types, you'll encounter several options. Here are some common ones:
| Connection Type | Description |
|---|---|
| MC4 Connectors | Industry-standard connectors for solar panels |
| DC Wires | Insulated wires for connecting solar panels to the inverter |
| AC Wires | Insulated wires for connecting the inverter to the electrical panel |
| Grounding Connectors | Connectors for grounding the solar panel system to the roof |
| Junction Boxes | Enclosures for connecting multiple wires and protecting them from the elements |
Remember to always follow the manufacturer's instructions and local electrical codes when making electrical connections. Proper wiring and connections are essential for a safe and efficient solar panel installation.
Inverter Installation and Setup
Now that the electrical connections and wiring are in place, it's time to focus on the inverter installation and setup. This essential component converts DC power from your solar panels to AC power for your home.
You'll need to choose the right inverter type for your system, considering factors like efficiency, compatibility, and cost.
When it comes to installation, you'll need the following tools and materials:
- A compatible inverter mounting system, such as a wall-mounted or roof-mounted rack
- DC and AC connectors and cables
- A DC isolator switch for safety
- A grounding system to protect against electrical shock
- A monitoring system to track inverter performance and troubleshoot issues
Remember to follow the manufacturer's instructions and local electrical codes during installation. Proper setup is vital to guarantee efficient energy production and safe operation.
Monitoring and Tracking Performance
How efficiently is your solar panel system performing? To answer this, you need to track its performance metrics regularly.
Modern monitoring tools make it easy to analyze your energy consumption and system efficiency. With data analysis, you can identify performance trends, including how weather conditions impact your system's output. By studying your usage patterns, you can enhance your energy consumption to maximize your solar panel system's potential.
Monitoring apps and performance dashboards provide real-time observations into your system's performance. These tools help you detect any issues or inefficiencies, allowing you to take prompt action.
With accurate data, you can refine your system's setup to guarantee ideal energy production. By tracking your system's performance, you can also identify opportunities to reduce energy waste and lower your electricity bills.
Regular Cleaning and Maintenance
Your small roof solar panel installation requires regular cleaning and maintenance to secure peak energy production.
Dust, dirt, and debris can greatly reduce your system's efficiency, so it's crucial to stay on top of cleaning and maintenance tasks.
To keep your system running at its best, follow this maintenance schedule:
- Inspect your system monthly to identify any signs of damage or wear
- Clean your panels every 2-3 months using gentle cleaning techniques and a soft-bristled brush to remove loose debris
- Perform a thorough system inspection every 6 months to check for loose connections and signs of wear on cables and inverters
- Schedule an annual professional inspection and maintenance visit to confirm your system is running at ideal levels
- Keep a record of your maintenance activities to track performance and identify areas for improvement
Troubleshooting Common Issues
When troubleshooting your small roof solar panel installation, you'll need to identify the root cause of the issue to restore peak performance.
You'll want to start by diagnosing panel failures, checking for inverter error codes, and inspecting connections for looseness or damage.
Panel Failure Diagnosis
During routine maintenance or performance monitoring, you may encounter issues with your small roof solar panel installation. Identifying the root cause of the problem is essential to guarantee peak energy production and extend the lifespan of your system.
When diagnosing panel failure, consider the following common issues:
-
Soiling or debris accumulation: Dirt, dust, and other obstructions can reduce energy output. Inspect and clean the panels regularly to prevent this issue.
-
Panel misalignment or shading: Confirm proper alignment and positioning of panels to maximize energy production. Shading from trees, buildings, or other objects can also impact performance.
-
Loose connections or faulty wiring: Verify that all electrical connections are secure and not damaged. Faulty wiring can lead to panel failure or even system shutdown.
-
Incompatible panel types: Mixing different panel types can cause compatibility issues. Verify that all panels are compatible and installed correctly.
-
Warranty considerations: Review your warranty terms to understand what's covered and for how long. This can help you determine the best course of action for panel replacement or repair.
Inverter Error Codes
Many inverter error codes can indicate specific issues with your small roof solar panel installation, allowing you to pinpoint and address problems quickly. These codes vary depending on the inverter type, but common issues include grid faults, overheating, and DC voltage faults.
For instance, a string inverter may display an "E02" code, indicating a DC voltage fault, while a microinverter may display a "Fault 12" code, indicating an overheating issue.
Understanding these error codes is vital to maintaining your solar panel system's best performance. A prolonged inverter lifespan is contingent upon prompt issue resolution, so it's important to address these errors as soon as possible.
Failing to do so can lead to reduced energy production, system downtime, and even complete system failure. By familiarizing yourself with your inverter's error codes, you'll be better equipped to troubleshoot and resolve common issues, ensuring your small roof solar panel installation continues to generate power efficiently.
Loose Connection Checks
A significant aspect of troubleshooting your small roof solar panel installation is performing regular loose connection checks. This is essential for guaranteeing the overall performance and efficiency of your solar panel system. A loose connection can lead to reduced power output, overheating, and even system failure.
To maintain connection stability, follow these troubleshooting techniques:
-
Inspect all electrical connections, including those between panels, inverters, and mounting hardware, for signs of wear, corrosion, or damage.
-
Check for loose screws, bolts, or clips, and tighten them as needed to establish a secure connection.
-
Verify that all connectors and cables are properly seated and secured to prevent vibration or movement.
-
Look for signs of overheating, such as melted insulation or burn marks, which can indicate a loose connection.
-
Use a multimeter to measure voltage and current at each connection point to identify any anomalies or drops in performance.
Maximizing Energy Efficiency
Optimizing your small roof solar panel installation for maximum energy efficiency requires careful consideration of several key factors. You'll want to guarantee that your system is designed to maximize energy production while minimizing energy consumption.
To achieve this, focus on the following areas:
| Energy Efficiency Factor | Tips for Maximization |
|---|---|
| Energy Efficient Appliances | Replace traditional appliances with energy-efficient alternatives to reduce energy consumption. |
| Smart Home Integration | Integrate your solar panel system with smart home devices to optimize energy usage and monitor performance. |
| System Sizing and Design | Confirm your solar panel system is properly sized and designed to meet your energy needs. |
Frequently Asked Questions
Can I Install Solar Panels on a Metal or Tile Roof?
You can install solar panels on a metal or tile roof, but you'll need to ascertain metal roof compatibility with specialized mounting systems and consider tile roof considerations, such as waterproofing and weight distribution, to achieve a secure and efficient installation.
Are Solar Panels Resistant to Extreme Weather Conditions?
You'll be relieved to know that solar panels are designed to withstand extreme weather conditions, boasting impressive durability and resilience in the face of heavy rain, hail, high winds, and scorching heat, ensuring uninterrupted power generation.
Do Solar Panels Void My Roof's Warranty?
When installing solar panels, you'll want to review your roof's warranty to ascertain compliance with the manufacturer's guidelines, as improper installation can void the warranty, so it's crucial to follow solar panel installation guidelines to avoid roof warranty implications.
Can I Install Solar Panels Myself to Save Money?
You can attempt a DIY installation to reap cost savings, but be aware that it requires electrical and roofing proficiency, and mistakes can lead to system inefficiency, safety hazards, and even void your warranty.
Will Solar Panels Increase My Property Taxes?
As you utilize the sun's energy, you wonder if your property's value will shine brighter, too, increasing your tax burden; fortunately, solar panel assessments typically don't greatly impact property tax implications, so you can bask in the glow of savings.
Conclusion
You've successfully installed and maintained your small roof solar panel system, utilizing the power of the sun to reduce your carbon footprint. Did you know that a typical residential solar panel system can save up to $500 per year on electricity bills? With proper maintenance, your system can last for decades, providing a significant return on investment. By following these guidelines, you'll be well on your way to enjoying the benefits of clean, renewable energy.
Related Posts
-
Green Home Improvements Using Solar Power
Investing in solar power alters your home into a sustainable haven while slashing energy costs. You can greatly reduc...
-

Business Solar Investments for Cost-Effective Sustainability
Investing in solar energy is a smart move for your business, providing a solid foundation for cost-effective sustaina...
-
Solar Energy Solutions for Small Businesses
Switching to solar energy can be a game changer for your small business. You'll enjoy significant cost savings on mon...


