
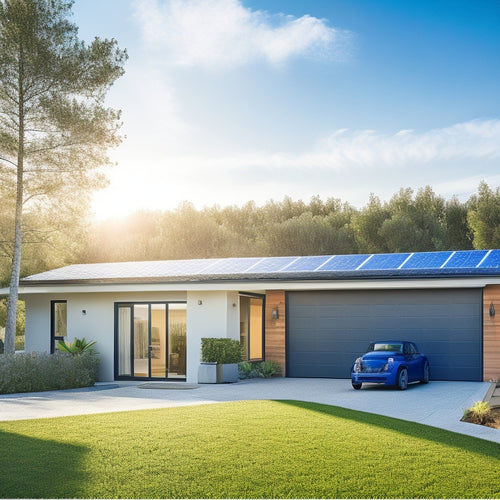
Self Installation Solar Panels in 5 Easy Steps
You're about to take the first step in utilizing renewable energy and saving on your electricity bills by installing solar panels on your own property. To guarantee a successful self-installation, start by preparing your roof for solar, then choose the right solar kit customized to your energy needs. Next, install mounting hardware securely, following local building codes and manufacturer's instructions. After that, connect solar panels correctly, making sure of a safe and efficient energy transmission. Finally, inspect and test your system to validate its performance, and you'll be ready to start generating clean energy - now it's time to explore the specifics.
Key Takeaways
- Prepare your roof for solar panels by conducting thorough maintenance, assessing solar orientation, and evaluating age and condition.
- Choose the right solar kit based on energy requirements, roof size, and local building codes, and ensure necessary tools are included.
- Install mounting hardware securely, following manufacturer's instructions and local building codes to ensure compliance and safety.
- Connect solar panels correctly, verifying insulation on wires and connections, and grounding panels to protect against electrical surges.
- Inspect and test your system, verifying electrical connections, inspecting solar panels, and conducting voltage, current, and insulation resistance tests.
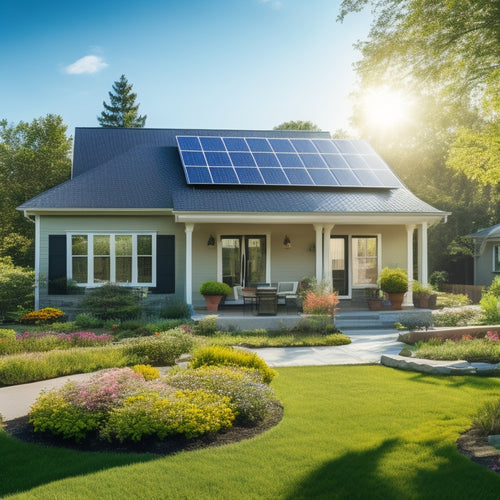
Prepare Your Roof for Solar
Frequently, homeowners overlook the importance of preparing their roof for solar panel installation, which can lead to costly mistakes down the line. Before you start installing your solar panels, you must verify your roof is ready for the task. Conduct thorough roof maintenance to identify and address any issues, such as damaged or missing shingles, curled or buckled shingles, or signs of wear around chimneys, vents, or skylights.
You'll also need to assess your roof's solar orientation, which refers to the direction your roof faces in relation to the sun. Ideally, your roof should face south, with a slope between 15 and 40 degrees, to maximize energy production. If your roof doesn't meet these criteria, you may need to adjust your solar panel installation accordingly.
Additionally, consider the age and condition of your roof, as solar panels can last up to 30 years, and you'll want to verify your roof can support them for their entire lifespan. By taking these essential steps, you'll guarantee a safe and efficient solar panel installation that meets your energy needs.
Choose the Right Solar Kit
With your roof prepared for solar panel installation, it's time to select the right solar kit to meet your energy needs. When choosing a solar kit, you'll need to take into account factors like your energy requirements, roof size, and local building codes. There are three main solar kit types to take into account: grid-tie, off-grid, and hybrid.
| Solar Kit Type | Description | Ideal For |
|---|---|---|
| Grid-Tie | Connects to the grid, sells excess energy | Homes with high energy demands |
| Off-Grid | Independent system, no grid connection | Remote locations, cabins |
| Hybrid | Combines grid-tie and off-grid capabilities | Homes with high energy demands and backup needs |
You'll also need to verify your solar kit comes with the necessary installation tools, such as wiring, connectors, and mounting hardware. Don't forget to check the warranty, durability, and certifications of the solar panels and components. By selecting the right solar kit, you'll be able to utilize the power you need while verifying a safe and efficient installation.
Install Mounting Hardware Securely
Your solar kit's mounting hardware is the backbone of your installation, guaranteeing your panels are securely fastened to your roof. To guarantee a safe and efficient installation, you'll need to install the mounting hardware correctly.
Begin by unpacking and organizing the mounting hardware components, including the rails, clamps, and brackets. Next, use your installation tools, such as a level and a drill, to secure the rails to your roof. Make sure to follow the manufacturer's instructions and local building codes to guarantee a secure and compliant installation.
Once the rails are in place, attach the clamps and brackets to hold the solar panels. Remember to tighten all bolts and screws firmly to prevent any shifting or movement during installation.
Connect Solar Panels Correctly
Now that the mounting hardware is securely in place, it's time to connect the solar panels. You'll need to verify the connections are secure, efficient, and safe. Start by connecting the positive terminal of one panel to the negative terminal of the next, creating a series circuit. This will increase the voltage while keeping the current the same.
Wiring Techniques and Safety Precautions
| Technique | Description | Importance |
|---|---|---|
| Series Connection | Connect positive to negative terminals | Increases voltage, efficient energy transmission |
| Insulation Check | Verify insulation on wires and connections | Prevents electrical shock, fire hazards |
| Cable Management | Organize and secure cables | Reduces tripping hazards, improves system appearance |
| Grounding | Connect panels to grounding system | Protects from electrical surges, lightening strikes |
| Voltage Check | Verify voltage output before connecting to inverter | Guarantees safe and efficient energy transmission |
Remember to follow proper wiring techniques and safety precautions to guarantee a reliable and efficient solar panel system. In the next step, you'll inspect and test your system to verify it's functioning as expected.
Inspect and Test Your System
Get set to inspect your system, guaranteeing every component is functioning as expected.
You've successfully installed your solar panels, but it's essential to verify that they're performing at their best. Start by checking the electrical connections, confirming they're secure and not damaged. Next, inspect the panels for any signs of physical damage or debris accumulation. Clean the panels if necessary, as dirt and grime can reduce energy output.
Now, it's time to test your system. Turn on the inverter and monitor the output voltage, current, and power. Compare these readings to the manufacturer's specifications to confirm they're within the recommended range.
Perform a series of tests to validate the system's performance, including a voltage test, current test, and an insulation resistance test. Record the results to track your system's performance over time, facilitating system maintenance and performance monitoring.
This data will help you identify potential issues early on, allowing you to take corrective action and maximize your energy harvest.
Frequently Asked Questions
Can I Install Solar Panels on a Metal or Tile Roof?
You'll need to contemplate metal roof considerations, like ensuring a watertight seal, and tile roof compatibility, which may require additional flashing, to safely and securely install solar panels on your roof.
How Long Does a Typical Solar Panel Installation Take?
You'll typically spend 1-3 days on a solar panel installation, depending on the installation timeline, which is influenced by factors like roof size, complexity, and labor efficiency.
Are Self-Installation Solar Panels Compatible With Grid-Tie Systems?
You'll find that self-installation solar panels are indeed compatible with grid-tie systems, but you'll need to guarantee compatibility concerns are addressed, meeting specific installation requirements for a seamless, efficient connection to the grid.
What Kind of Maintenance Is Required for Solar Panels?
You'll be relieved to know that maintaining your solar panels is surprisingly low-key; simply clean them periodically using gentle methods, and keep tabs on performance through monitoring - ensuring you utilize maximum power and efficiency from your system.
Do Solar Panels Work During Power Outages or at Night?
You're wondering if solar panels work during power outages or at night; the answer is, they don't, unless you have off-grid systems with energy storage, allowing you to capture and store excess energy for later use, ensuring uninterrupted power supply.
Conclusion
You've made it! Now that you've completed the 5 easy steps, remember that "Rome wasn't built in a day" - but with your DIY solar installation, you've taken a major leap towards capturing renewable energy. Pat yourself on the back for taking control of your energy costs and reducing your carbon footprint. With your new solar system up and running, you can sit back, relax, and soak up the sunshine - literally!
Related Posts
-
Solar Energy Storage Options for Homes
When considering solar energy storage options for your home, you'll find several effective solutions. Battery systems...
-
Solar Inverter Troubleshooting for Beginners
Troubleshooting your solar inverter starts with understanding its efficiency and performance metrics. Check for prope...
-
Affordable Solar Panels for Home Use
Affordable solar panels offer you a smart way to cut down on energy costs while promoting sustainability. With govern...


