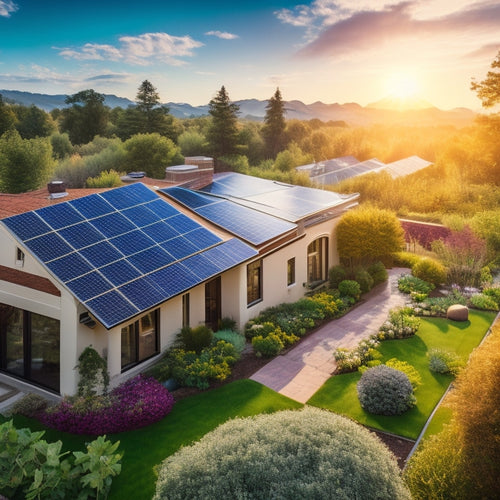
Residential Home Solar System Installation Process
As you begin your residential home solar system installation, you'll traverse a detailed process to guarantee a seamless shift to renewable energy. You'll start by evaluating your solar needs, including energy consumption patterns and roof size, to determine the ideal panel configuration. Next, you'll choose a qualified installer, conduct a site evaluation to identify potential obstacles, and select the right equipment. Obtaining necessary permits, preparing your roof, and installing the solar panels will follow. The process will conclude with connecting to the grid, testing and inspecting the system, and finalizing the installation. Now, get ready to uncover the specifics of each step and optimize your solar system's performance.
Key Takeaways
- Assess your energy needs by evaluating consumption patterns, identifying inefficiencies, and analyzing past energy bills to determine ideal solar panel configuration.
- Conduct a site assessment to ensure your roof is suitable for solar panels, considering factors like size, orientation, material, and potential shading or obstructions.
- Choose a qualified installer with certifications, a good reputation, and transparent pricing, and select high-quality equipment that meets your energy needs and budget.
- Obtain necessary permits, including building, electrical, and zoning permits, and ensure compliance with local codes and regulations to avoid installation delays.
- Ensure a secure and weather-tight installation, including proper mounting, electrical connections, and roof penetrations, to maximize energy production and system longevity.
Assessing Your Solar Needs
As you commence on the expedition to harness the power of solar energy, an essential first step is to assess your solar needs. This involves evaluating your energy consumption patterns, identifying areas of inefficiency, and determining the ideal solar panel configuration for your residential home.
You'll need to take into account factors such as your roof size, orientation, and shading, as well as local building codes and regulations.
Next, you'll want to investigate available solar incentives, such as tax credits and rebates, which can greatly reduce the upfront cost of installation. Financing options, like loans and leases, can also help make solar energy more accessible.
Be sure to research and compare different financing options to find the one that best suits your budget and energy goals.
Choosing the Right Installer
You've researched financing options and incentives, and now it's time to find a qualified professional to bring your solar vision to life. Choosing the right installer is essential to guaranteeing a successful and stress-free installation process.
When selecting an installer, consider the following key factors:
-
Installer qualifications: Look for certifications like NABCEP (North American Board of Certified Energy Practitioners) or UL (Underwriters Laboratories) to verify your installer has the necessary knowledge.
-
Customer reviews: Check online reviews, ask for referrals, and assess the installer's reputation in your local community.
-
Installation timelines: Get a clear understanding of the project schedule, including installation dates, milestones, and completion timelines.
-
Warranty options: Review the warranty offered by the installer, including the length of coverage, what's included, and any maintenance requirements.
-
Pricing transparency: Confirm the installer provides a detailed breakdown of costs, including equipment, labor, and any additional fees.
Conducting a Site Assessment
When conducting a site assessment, you'll need to evaluate your roof's size and layout to determine the ideal solar panel configuration.
You'll also need to analyze your energy usage patterns to determine how much electricity you need to generate.
Additionally, you'll have to identify any shading and obstructions, such as trees or skylights, that could impact your system's performance.
Roof Size and Layout
Your roof's size and layout play a critical role in determining the suitability of your residential home for a solar system installation. A thorough assessment of your roof's dimensions, shape, and features will help identify potential challenges and opportunities for a successful installation.
When evaluating your roof's size and layout, contemplate the following key factors:
-
Roof orientation: A south-facing roof with minimal shading is ideal for solar panels, as it receives the most direct sunlight throughout the day.
-
Roof size and available space: Confirm your roof has sufficient space to accommodate the required number of solar panels, considering obstacles like vents, skylights, and chimneys.
-
Roof material and condition: Asphalt shingles, metal, and tile roofs are suitable for solar installations, but clay or slate tiles may require additional structural support.
-
Obstacles and shading: Trees, nearby buildings, and roof features like dormers or skylights can cast shadows and affect energy production.
-
Installation aesthetics: Consider the visual impact of the solar array on your roof's appearance and how it may affect your home's resale value.
Energy Usage Patterns
A solar installation's performance is closely tied to your energy usage patterns, which is why conducting a site assessment is an essential step in the installation process. During this assessment, you'll need to analyze your household's energy consumption trends to determine the size and type of solar system required to satisfy your energy needs.
This involves evaluating your energy usage patterns, including the amount of energy you use during peak hours, your average daily energy consumption, and your overall household energy efficiency.
You'll need to provide your energy bills from the past year to help identify these patterns. A thorough analysis of your energy usage will help you identify areas where you can improve your household energy efficiency, such as upgrading to energy-efficient appliances or installing LED lighting.
This information will also help your solar installer determine the ideal system size and configuration to guarantee you're generating enough power to meet your energy needs. By understanding your energy usage patterns, you can maximize the performance of your solar installation and reduce your reliance on the grid.
Shading and Obstructions
Frequently, even the most ideal locations for solar panels can be compromised by shading and obstructions, which greatly impact the system's performance.
As you consider installing a residential home solar system, it's crucial to assess your site for any potential shading and obstructions that could affect your system's energy output.
During the site assessment, you'll need to evaluate the following factors:
-
Trees and foliage: Will branches or leaves cast shadows on your solar panels, especially during peak sun hours?
-
Roof orientation and obstructions: Are there any chimneys, vents, or skylights that could block sunlight or affect solar panel orientation?
-
Neighboring structures: Will nearby buildings or trees cast shadows on your solar panels?
-
Landscaping considerations: Will future landscaping changes, such as planting trees, impact your system's performance?
-
Local regulations: Are there any local ordinances or homeowners' association rules that restrict solar panel installation or affect system performance?
Selecting the Right Equipment
Selecting the right equipment for your residential home solar system installation is an essential step that requires careful consideration of several factors.
You'll need to choose from top-rated solar panel brands, such as Tesla, SunPower, or Panasonic, that offer high energy efficiency and durability. Inverter types, like string inverters or microinverters, also play a vital role in converting DC power to AC power for your home. If you want to store excess energy for later use, consider battery storage options like the Tesla Powerwall.
You should also evaluate installation warranties, system monitoring capabilities, and maintenance options when selecting equipment. Cost considerations, including government incentives and financing options, will also impact your decision.
Look for equipment that meets your energy efficiency goals while fitting within your budget. Additionally, consider the overall system design, including the type and quality of mounting hardware, electrical connections, and grounding systems.
Obtaining Necessary Permits
Your roof is now ready to harness the power of the sun, but before the installation begins, you need to secure the necessary permits from your local government and utility company.
To facilitate a smooth installation process, it's crucial to understand the various permit types, the application process, and local regulations.
You'll need to obtain:
- Building permits to guarantee compliance with local building codes and zoning laws
- Electrical permits to verify the system's electrical connections and safety features
- Zoning permits to confirm the system's installation meets local ordinances
- Homeowner association approvals to satisfy any community guidelines
- Environmental permits to assess the system's potential environmental impact
You should expect a timeline of several weeks to a few months for the permit application process, depending on your location and the complexity of the project.
Be prepared for cost considerations, as permit fees vary by jurisdiction. Additionally, some permits may require renewals after a certain period.
Understanding these requirements will help you plan and budget accordingly, assuring a successful solar system installation.
Preparing Your Home's Roof
You'll need to assess your roof's condition to confirm it can support the weight and stress of solar panels, so inspect for damaged, missing, or loose shingles, curled or buckled roofing, and signs of wear around chimneys, vents, and skylights.
You should also verify that your roof's structure can handle the added weight of the solar panels, as well as the equipment and wiring that comes with them.
Additionally, you'll need to confirm there's sufficient clearance around skylights, vents, and other roof features to accommodate the solar panels and allow for easy maintenance.
Roof Condition Assessment
Before installing a residential solar system, a thorough roof condition assessment is vital to determine if your home's roof is suitable for solar panels.
You'll want to evaluate the condition of your roof to guarantee it can support the weight of the solar panels and withstand various weather conditions.
During the assessment, your solar installer will examine your roof's material type, age, and overall condition.
Here are some key factors they'll take into account:
-
Roof material types: Is your roof made of asphalt shingles, clay tiles, or metal? Each material has its own unique requirements and limitations for solar panel installation.
-
Roof age evaluation: How old is your roof? If it's nearing the end of its lifespan, you may need to think about replacing it before installing solar panels.
-
Structural integrity: Are there any signs of wear, damage, or structural weaknesses that could affect the installation or performance of your solar system?
-
Obstacles and shading: Are there any obstacles, such as skylights, vents, or chimneys, that could interfere with the installation or performance of your solar panels?
-
Local building codes and regulations: Are there any local building codes or regulations that may impact the installation of your solar system?
Solar Panel Clearance
Evaluating your roof's condition is only the first step in preparing your home for a residential solar system installation.
You'll also need to make certain your roof is clear of obstructions to accommodate the solar panels. This involves removing any debris, such as leaves or branches, that may interfere with the installation or future solar panel maintenance.
Additionally, you'll need to trim back trees or shrubs that cast shade on your roof, as shade can greatly reduce the efficiency of your solar panels.
It's also essential to check for any roof vents, skylights, or other obstructions that may need to be relocated or modified to accommodate the solar panels.
You'll want to make certain that your solar panel installation doesn't compromise your roof's integrity or void your roof's warranties.
Similarly, you'll need to confirm that the solar panel warranties aren't affected by pre-existing roof conditions.
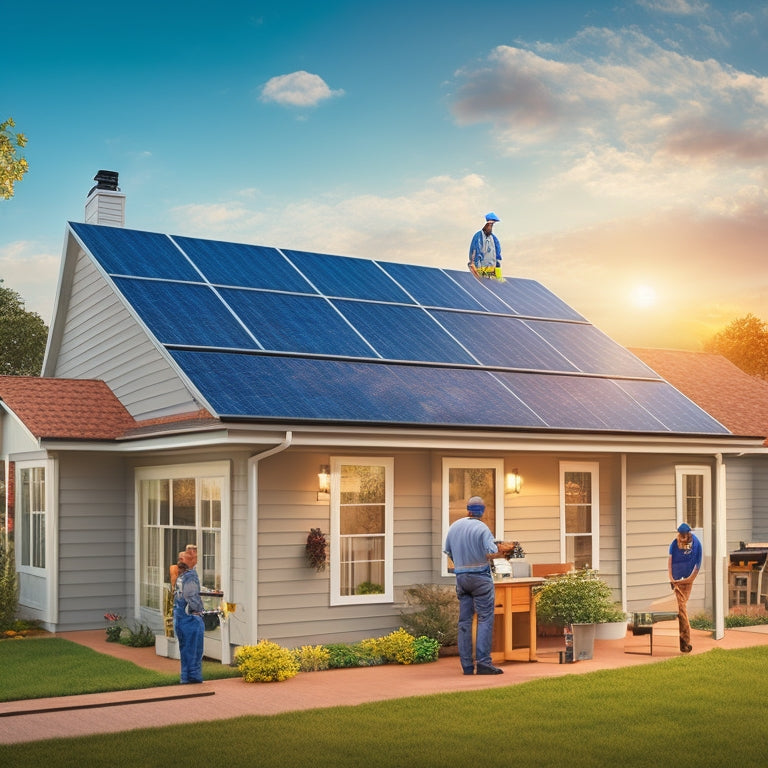
Installing the Solar Panels
As the solar panel system's foundation, a secure and precise installation is essential. You want to guarantee that your solar panels are installed correctly to maximize energy production and longevity.
During installation, your solar panels will be attached to your roof using various mounting techniques. These techniques can include rail-based, rail-less, and shared rail systems. The choice of mounting technique depends on your roof type, size, and orientation.
Here are some key considerations for installing your solar panels:
-
Panel orientation: Your solar panels should be installed at an angle that allows them to capture the most sunlight. This typically ranges from 15 to 45 degrees, depending on your location and roof pitch.
-
Structural integrity: The mounting system must be able to withstand various environmental conditions, including high winds and heavy snow loads.
-
Electrical connections: Electrical connections between panels must be secure and weather-tight to guarantee safe and efficient energy production.
-
Roof penetration: The installation team will need to create openings in your roof to secure the mounting system, which must be properly sealed to prevent water intrusion.
-
Grounding and bonding: The solar panel system must be properly grounded and bonded to guarantee safe and efficient energy production.
Connecting to the Grid
Upon completing the solar panel installation, it's time to connect your system to the grid. This involves meeting grid interconnection requirements, which vary by utility company and region. You'll need to submit an application for utility approval, providing detailed system specifications and diagrams.
Once approved, your system will be synchronized with the grid using inverter synchronization techniques, guaranteeing a seamless flow of energy.
As a homeowner, you'll enjoy net metering benefits, where excess energy generated is fed back into the grid and credited to your account. You may also choose to integrate energy storage systems, like batteries, to optimize your energy usage and reduce reliance on the grid.
However, it's important to take into account grid reliability considerations, such as potential outages and voltage fluctuations, when designing your system.
It's vital to understand solar policy implications and homeowner responsibilities, such as maintenance and repair obligations, to guarantee a successful grid connection.
Testing and Inspection Phase
You'll now enter the testing and inspection phase, where you'll verify your residential home solar system's performance, ensuring it meets the expected energy output.
This phase involves an electrical safety check to guarantee the system's safe operation and a component functionality test to confirm every part is working as intended.
System Performance Verification
During the system performance verification phase, your solar panel system undergoes a series of rigorous tests and inspections to confirm it meets the required safety and performance standards.
This critical phase guarantees your system operates efficiently, safely, and at its maximum potential.
The verification process involves a thorough examination of the system's performance metrics, including its energy output, voltage, and current. This data is collected through advanced monitoring systems, which provide real-time observations into the system's operation.
Some key aspects of the system performance verification phase include:
- Inspecting the system's electrical connections and wiring for any defects or damage
- Verifying the system's grounding and bonding to confirm safe operation
- Testing the system's inverters and other components to verify they meet manufacturer specifications
- Evaluating the system's energy output during various weather conditions, such as sunny and cloudy days
- Reviewing the system's monitoring data to identify any potential issues or areas for improvement
Electrical Safety Check
Your solar panel system's performance verification phase also includes a rigorous electrical safety check, which guarantees that the system operates safely and efficiently. This check confirms that your solar panel system meets the required wiring standards and safety protocols. During this phase, the installation team will inspect the system's electrical components, including the inverters, combiner boxes, and wiring, to identify any potential electrical hazards.
The electrical safety check involves a series of tests to verify that the system is installed correctly and operates within safe voltage and current limits. The team will also check for any signs of wear or damage on the electrical components and verify that they are properly rated for outdoor use.
| Safety Check | Description |
|---|---|
| Voltage testing | Verifies that the system operates within safe voltage limits |
| Grounding inspection | Confirms that the system is properly grounded to prevent electrical shock |
| Wiring inspection | Checks for any signs of wear, damage, or corrosion on the wiring |
Component Functionality Test
How does your solar panel system function when the sun shines brightly, and how does it respond when the skies turn cloudy? During the Component Functionality Test, your solar panel system's performance is put to the test to guarantee it's operating at its best.
This critical phase involves checking the compatibility and functionality of each component, from the solar panels to the inverters and monitoring systems.
-
The system's ability to generate electricity is evaluated under various weather conditions, including sunlight, shade, and simulated cloud cover.
-
The performance of each component is monitored and recorded to identify any potential issues or areas for improvement.
-
The system's electrical connections and wiring are inspected for integrity and proper installation.
-
The monitoring system's data collection and reporting functions are tested to guarantee accurate performance tracking.
-
The system's overall efficiency and energy output are calculated to guarantee it meets the expected standards.
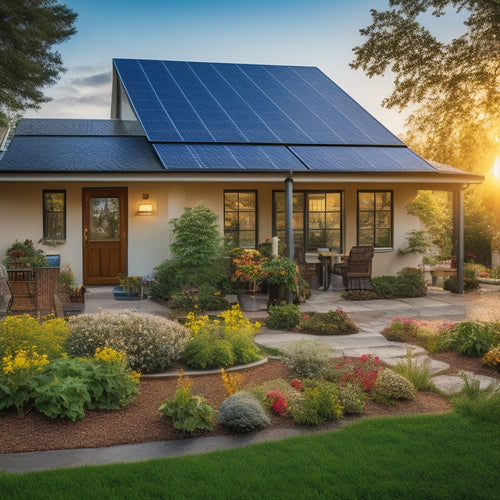
Final Inspection and Completion
Inspecting the entire solar system installation is vital to ascertain everything is functioning as intended and meets quality standards. This final inspection confirms that all components, including the solar panels, inverter, and mounting system, are properly installed and configured.
You'll verify that the system is producing electricity at the expected capacity and that all safety features are in place.
During this process, you'll also review the final documentation, including the system's electrical diagram, operation manual, and maintenance instructions. This documentation serves as a resource for you, providing important information about your solar system's performance, maintenance, and troubleshooting.
The final inspection and completion mark the end of the installation process. At this point, the installer should confirm that you're satisfied with the installation and address any concerns you may have.
Your satisfaction is vital, as you'll be relying on this system to generate clean energy for your home. With the installation complete, you can start enjoying the benefits of renewable energy and reduced energy bills.
Frequently Asked Questions
Can I Install Solar Panels on a Metal or Clay Tile Roof?
You can install solar panels on a metal or clay tile roof, but consider the metal roof advantages, like durability and ease of installation, versus clay tile considerations, such as added weight and potential waterproofing issues, before making a decision.
How Long Does It Take to Recoup My Solar Panel Investment?
You'll recoup your solar panel investment through significant solar savings, typically within 5-7 years, depending on your energy usage and local incentives, as revealed by a thorough investment analysis that considers your unique energy profile and ROI expectations.
Do I Need to Replace My Roof Before Installing Solar Panels?
Before installing solar panels, you'll need to assess your roof's condition and lifespan, ensuring it can support the added weight and last at least 10-15 years to maximize your solar investment, avoiding premature replacement.
Can I Install Solar Panels on a Shaded Roof?
When you're considering solar panels on a shaded roof, you'll need to weigh the impact of shaded roof considerations on solar panel performance, as even partial shading can considerably reduce energy output, and you may need to adjust panel placement or invest in specialized equipment to mitigate the effects.
Will Solar Panels Increase My Property Taxes?
You won't directly pay higher property taxes due to solar panels, but increased property value from the installation might lead to higher assessments; however, you'll benefit from solar tax credits, offsetting potential tax increases.
Conclusion
As you flip the switch, sunlight changes into electricity, powering your home with clean energy. The hum of silence replaces the rumble of fossil fuels, and your carbon footprint shrinks. Your residential solar system is now a symbol of sustainability, shining bright for years to come. With each passing day, you'll reap the rewards of your investment, basking in the warmth of renewable energy and the satisfaction of going green.
Related Posts
-
Sustainable Solar Energy for Cost-Effective Living
Adopting sustainable solar energy isn't just eco-friendly; it's a smart financial strategy. You'll slash your monthly...
-
How to Achieve Energy Independence at Home
To achieve energy independence at home, start by investing in renewable energy sources like solar panels, wind turbin...
-

Eco-Friendly Home Design Ideas for Beginners
If you're starting your eco-friendly home design expedition, focus on sustainable materials like recycled wood or rec...


