
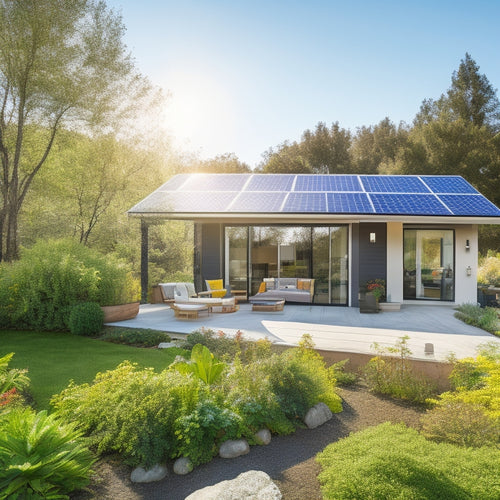
How to Attach Solar Panels to Your Roof
You'll need to assess your roof's condition and suitability before attaching solar panels, considering its age, structural integrity, and material. Choose a mounting system that's compatible with your roof type, ensuring a secure installation. Measure and mark your roof layout, taking note of obstructions and rafter locations. Install roof anchors and flashing, then assemble and secure the solar panels. Connect them to an inverter, ensuring electrical safety and code compliance. With thorough planning and execution, you'll be generating renewable energy in no time - and a closer look at each step will reveal the finer details that guarantee a successful installation.
Key Takeaways
- Assess your roof's condition, age, and structural integrity to ensure it can support solar panels.
- Choose the right mounting system based on your roof type, material, and condition.
- Measure and mark the roof layout to determine the best placement for solar panels.
- Install roof anchors and flashing securely to ensure a watertight seal and safe electrical connections.
- Ensure electrical safety and code compliance by following local regulations and guidelines.
Assessing Roof Condition and Suitability
Can your roof handle the added weight and stress of solar panels? Before installing solar panels, it's vital to assess your roof's condition and suitability. A thorough roof inspection is fundamental to identify potential issues that could compromise the structural integrity of your roof.
During the inspection, look for signs of wear and tear, such as cracked, curled, or missing shingles, rusted or corroded flashing, and damaged or rotten wood.
Check the roof's age, as most solar panels have a warranty of 25 years or more, and you'll want to guarantee your roof will last that long.
A structural assessment is also necessary to determine if your roof can support the weight of the solar panels. This involves evaluating the roof's framing, including the rafters, trusses, and sheathing, to verify they can handle the added load.
You may need to consult with a structural engineer or a licensed contractor to perform this assessment.
Choosing the Right Mounting System
When choosing a mounting system for your solar panels, you'll need to take into account the type of roof you have and the specific mounting options available.
You'll have to decide between a fixed-tilt mount, a tracking mount, or a rooftop ballasted mount, each with its own set of advantages and disadvantages.
Mounting Options Overview
Your rooftop is a complex terrain of peaks, valleys, and obstacles, and selecting the right mounting system is essential to guaranteeing a secure and efficient solar panel installation.
You'll need to evaluate the type of mounting materials suited for your roof's specific needs. For instance, you may opt for a ballasted system, which uses weighted blocks to secure the panels, or a penetrating system, which anchors the panels directly to your roof's rafters.
When it comes to installation techniques, you'll need to decide between a fixed-tilt system, which positions the panels at a static angle, or a tracking system, which adjusts the panels' angle to optimize energy production.
You may also examine a hybrid system, which combines the benefits of both.
Other factors to assess include the durability and corrosion resistance of the mounting materials, as well as the system's adjustability and flexibility.
Roof Type Considerations
Selecting the right mounting system for your solar panels requires a careful evaluation of your roof's specific characteristics.
You'll need to take into account the type of roof material, its age, and its condition to guarantee a secure and durable installation. For example, if you have an asphalt shingle roof, you'll want a mounting system with a low-profile design to minimize penetration and prevent water damage.
On the other hand, if you have a metal roof, you may opt for a clamping system that attaches directly to the roof's seams.
Roof material compatibility is essential to guarantee a safe and efficient installation.
You'll need to choose a mounting system that's specifically designed for your roof type, whether it's tile, slate, or concrete.
Additionally, take into account the solar panel orientation, as this can affect energy production. A south-facing orientation is ideal, but you may need to adjust the angle and tilt to accommodate your roof's unique features.
Measuring and Marking Roof Layout
Measuring and marking your roof's layout is a critical step in attaching solar panels. This process helps you determine the best placement of your solar panels, guaranteeing they receive maximum sunlight and generate the most power. To get started, gather your tools, including a tape measure, ladder, and marker.
When measuring your roof layout, consider the following factors:
-
Identify the roof's slope and orientation to determine the ideal solar orientation for your panels.
-
Measure the length and width of each roof section to calculate the available space for your solar array.
-
Note any obstructions, such as skylights, vents, or chimneys, that may affect panel placement.
-
Record the location of roof rafters to guarantee secure fastening of your solar panels.
-
Verify the roof's structural integrity to support the weight of your solar panel system.
Installing Roof Anchors and Flashing
With your roof layout measured and marked, the next step is to install roof anchors and flashing, which provide a secure and watertight seal for your solar panel system.
You'll need to choose the right anchor types for your roof, considering factors like roof pitch, material, and local building codes. Common anchor types include L-feet, S-hooks, and stand-offs. Select anchors that fit your roof's specific requirements and guarantee a sturdy attachment.
Once you've selected your anchors, it's time to install them. Typically, this involves drilling into the roof and securing the anchor with screws or bolts. Make sure to follow the manufacturer's instructions and take necessary safety precautions.
Next, apply flashing materials around the anchor points to create a watertight seal. Flashing materials can include rubber, plastic, or metal, and should be compatible with your roof's material. Apply a generous amount of sealant around the flashing to guarantee a tight seal.
Properly installed roof anchors and flashing will provide a solid foundation for your solar panel system, protecting it from the elements and ensuring peak performance.
Assembling and Securing Solar Panels
You're now ready to assemble and fasten your solar panels to the roof anchors. Gather your solar panel materials, including the panels themselves, clamps, and mounting hardware.
Begin by connecting the clamps to the roof anchors, verifying they're securely fastened.
Next, carefully lift the solar panels onto the clamps, taking care not to scratch or damage the panel surfaces. Secure the panels to the clamps using the mounting hardware, following the manufacturer's instructions.
Some essential installation tools to have on hand include:
- Torque wrench for tightening mounting hardware
- Level to verify proper panel alignment
- Drill for making pilot holes (if necessary)
- Safety strap for secure roof access
- Measuring tape for verifying panel spacing
Double-check that all connections are secure and panels are properly aligned.
Once you've completed this step, your solar panels are ready to be connected to the inverter.
Connecting Panels to Inverters
Now that your solar panels are securely fastened to the roof anchors, it's time to connect them to the inverter, which converts the DC power generated by the panels into usable AC power for your home.
There are several solar inverter types to choose from, including string inverters, microinverters, and power optimizers. String inverters are the most common, connecting multiple panels in a series. Microinverters, on the other hand, are attached to each individual panel, providing more flexibility and monitoring capabilities.
When it comes to inverter placement, you'll want to take into account factors like accessibility, ventilation, and proximity to your electrical panel. Typically, inverters are installed near the electrical panel or in a dedicated inverter room.
Be certain to follow the manufacturer's instructions for mounting and wiring the inverter, as well as any local building codes and regulations. Proper inverter placement and connection will guarantee efficient energy conversion and a safe, reliable power supply for your home.
Ensuring Electrical Safety and Code
When attaching solar panels to your roof, you must guarantee electrical safety by preventing shocks and complying with building codes.
You'll need to take measures to avoid electrical shock, such as turning off the main power supply and using insulated tools.
Additionally, you'll need to verify that your installation meets local building codes and electrical standards, such as those set by the National Electric Code (NEC).
Electrical Shock Prevention
The solar panel system's electrical components pose a significant risk of electrical shock, which can be fatal if not handled properly.
As you work on attaching solar panels to your roof, it's vital to prioritize electrical shock prevention to guarantee your safety.
To minimize electrical hazards, make certain you:
- Turn off the main power supply to the electrical panel before starting the installation
- Use safety gear, such as insulated gloves and safety glasses, when handling electrical components
- Verify all electrical connections are secure and meet the manufacturer's specifications
- Keep children and pets away from the installation area to avoid accidental contact with electrical components
- Consider hiring a licensed electrician if you're not familiar with electrical systems or feel uncomfortable with the installation process
Compliance With Building Codes
During the installation process, you must guarantee that your solar panel system complies with local building codes and electrical safety standards. This guarantees your system is safe, efficient, and meets the necessary requirements.
Before starting the installation, research and obtain the required building permits from your local authorities. Familiarize yourself with local regulations, such as setback requirements, roof coverage limits, and electrical connections.
Confirm your system is designed and installed according to the National Electric Code (NEC) and local electrical codes. Verify that your installation meets the requirements for grounding, bonding, and overcurrent protection.
Additionally, verify that your system is certified by a recognized testing laboratory, such as UL (Underwriters Laboratories) or ETL (Intertek).
Final Inspection and System Testing
Get ready to switch on your solar power system by wrapping up the installation with a thorough final inspection and system testing. This critical step guarantees your solar panels are installed correctly, meet safety standards, and perform at peak efficiency.
Go through your final checklist to verify:
- All electrical connections are secure and meet local building codes
- The system is grounded properly to prevent electrical shock
- The mounting system is securely fastened to your roof
- The solar panels are clean and free of debris
- The performance monitoring system is tracking energy production accurately
During system testing, you'll simulate real-world conditions to identify any potential issues. This includes checking the inverter's output, verifying the system's ability to sync with the grid, and monitoring its performance under various load conditions.
Frequently Asked Questions
Can I Install Solar Panels on a Metal or Tile Roof?
You can install solar panels on a metal or tile roof, but you'll need to contemplate specific metal roof considerations, such as ensuring a watertight seal, and follow unique tile roof installation requirements to secure the panels properly.
Will Solar Panels Void My Roof's Warranty?
When you install solar panels, you'll want to check your roof's warranty documents to see if they'll be voided; typically, manufacturers specify roof warranty implications, but it's essential you verify this before proceeding with solar panel installation to avoid costly surprises.
Are Solar Panels Affected by Roof Cleaning Products?
You've heard that roof cleaning products can damage solar panels, but is it true? Fortunately, most modern solar panels are resistant to standard cleaning products, making routine roof cleaning an essential part of solar panel maintenance.
Can I Add Solar Panels to an Existing Solar Array?
You can expand your existing solar array by adding panels, but first, verify the system's inverter and electrical infrastructure can handle the increased power output, then assess the roof's structural integrity to support the additional weight.
Do Solar Panels Increase My Property Taxes?
You're wondering if solar panels will hike your property taxes. Think of it like adding a luxurious pool to your backyard - it increases value, but not always taxes. In many states, solar panels are exempt from property tax assessments, so you won't necessarily see a spike.
Conclusion
You've successfully attached your solar panels to your roof. Now, it's time to reap the benefits of renewable energy. Take, for instance, the Johnsons, who installed a 5-kW system on their California home, saving them $1,500 in electricity costs annually. With proper installation and maintenance, your solar panels will generate clean energy for years to come. Remember to monitor performance, perform routine checks, and address any issues promptly to guarantee peak output.
Related Posts
-

Solar Power for Community Energy Independence
Solar power is essential for your community's energy independence, offering both environmental and economic benefits....
-
Green Home Improvements Using Solar Power
Investing in solar power alters your home into a sustainable haven while slashing energy costs. You can greatly reduc...
-

Business Solar Investments for Cost-Effective Sustainability
Investing in solar energy is a smart move for your business, providing a solid foundation for cost-effective sustaina...


