
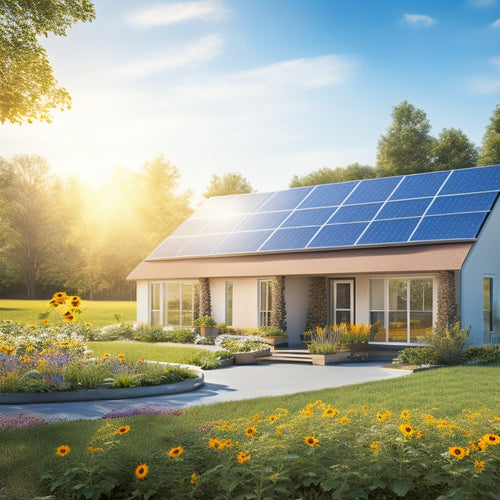
Cost Saving DIY Solar Installation
By taking on a DIY solar installation project, you can save up to 50% of the total system cost, making solar energy a more affordable and accessible option for your home. To get started, you'll need to understand the key components of a solar panel system, including solar panels, inverters, mounting systems, and monitoring systems. You'll also need to choose the right equipment for your specific needs, prepare your roof and site for installation, and guarantee a safe and successful installation process. Now that you've begun, you'll want to investigate each of these critical steps in more detail to assure a cost-saving and efficient DIY solar installation.
Key Takeaways
- Choose affordable solar panel types like polycrystalline or thin-film to reduce upfront costs.
- Opt for a string inverter, a cost-effective option, if your roof receives minimal shading.
- Conduct a thorough site assessment to optimize solar panel placement and maximize energy production.
- Ensure a safe installation by following manufacturer guidelines and local regulations.
- Consider a roof-mounted system, which is often less expensive than ground-mounted or tracking systems.
Understanding Solar Panel Systems
Most solar panel systems consist of several key components that work together to convert sunlight into electrical energy. You'll typically find solar panels, an inverter, a mounting system, and a monitoring system working in harmony.
Understanding how these components interact is essential for utilizing solar energy basics effectively.
You'll generate the most power when your solar panels are exposed to direct sunlight. The panel efficiency is measured by its ability to convert sunlight into electrical energy. Typically, commercial solar panels have an efficiency rating between 15% to 20%. This means that 15% to 20% of the sun's energy is converted into usable electricity.
As you investigate solar energy basics, you'll realize that the inverter plays an important role in converting DC power from your solar panels to AC power, which is usable in your home.
The mounting system guarantees your solar panels are securely fastened to your roof, while the monitoring system tracks your energy production and identifies potential issues.
Choosing the Right Equipment
Your solar panel system's performance hinges on selecting the right equipment for your unique setup. You'll need to choose the right solar panel type, inverter option, mounting solution, and energy storage system to guarantee maximum energy production and efficiency.
When it comes to solar panel types, you'll need to decide between monocrystalline, polycrystalline, or thin-film panels. Monocrystalline panels offer high efficiency but are more expensive, while polycrystalline panels are more affordable but less efficient. Thin-film panels are a budget-friendly option but have lower efficiency.
Inverter options include string inverters, microinverters, and power optimizers. String inverters are cost-effective but may not perform well in shaded conditions. Microinverters and power optimizers offer more flexibility and better performance in shaded conditions.
Mounting solutions vary depending on your roof type and size. You'll need to choose between roof-mounted, ground-mounted, or tracking systems.
Energy storage systems, such as batteries, are essential for storing excess energy generated during the day for use at night or during power outages.
Preparing Your Roof and Site
You're about to commence on the most critical phase of your DIY solar installation: preparing your roof and site. Before installing your solar panels, you need to verify your roof and site are ready for the installation.
Start by conducting a thorough roof inspection to identify any damaged, rotten, or missing shingles, curled or buckled shingles, and signs of animal infestation. Check for loose or missing flashing, and inspect the roof's structural integrity.
Next, perform a site assessment to determine the ideal solar panel placement. Consider the direction your roof faces, the angle of the roof, and any potential shading obstacles.
Confirm the area is clear of debris and obstacles that could hinder the installation process. Measure the roof's dimensions and calculate the available space for your solar panels.
Take note of any local building codes, regulations, and homeowners' association rules that might affect your installation. By carefully preparing your roof and site, you'll guarantee a successful and efficient DIY solar installation.
Installing Solar Panels Safely
The installation of solar panels requires careful planning and attention to safety protocols to prevent accidents and guarantee a successful outcome.
You must ascertain you have the necessary safety equipment, including a safety strap, rope, and carabiner, to secure yourself to the roof while working at heights. Always wear protective gear, such as gloves, safety glasses, and a hard hat, to prevent injuries from falling objects or electrical shock.
Before starting the installation, review the installation guidelines provided by the manufacturer and local authorities to verify compliance with regulations.
Identify potential hazards, such as fragile roofing materials, skylights, or vents, and develop a plan to mitigate these risks. Confirm you have a first aid kit on site and a phone nearby in case of emergencies.
When handling electrical components, follow proper lockout/tagout procedures to prevent accidental startup.
Connecting to the Grid
Most solar panel systems are designed to operate in tandem with the grid, feeding excess energy back into the system and drawing power when needed.
To connect your DIY solar installation to the grid, you'll need to maneuver through the interconnection process, which involves meeting utility requirements and complying with grid regulations. This process typically begins with submitting an application to your utility company, which will review your system's design and installation to guarantee it meets their standards.
You'll need to provide detailed information about your system, including its size, type, and configuration. The utility company will also inspect your installation to verify its safety and compliance with grid regulations.
Once approved, you'll be able to connect to the grid and start generating electricity. With net metering, you'll be credited for the excess energy you produce, which can offset your energy consumption during periods of low sunlight.
Be sure to familiarize yourself with the specific regulations and requirements in your area to guarantee a smooth and successful interconnection process.
Frequently Asked Questions
Can I Install Solar Panels on a Metal or Clay Tile Roof?
You can install solar panels on a metal or clay tile roof, but you'll need to take into account metal roof considerations, such as ensuring a secure attachment method, and clay tile compatibility, including verifying the tile's structural integrity and waterproofing.
How Do I Handle Solar Panel Maintenance and Repairs?
You'll be an expert in solar panel maintenance and repairs, effortlessly tackling panel cleaning with a soft-bristled brush and ensuring peak performance through careful system monitoring, guaranteeing your setup runs like a finely-tuned machine, always generating maximum power.
Are There Any Local or National Incentives for DIY Solar Installation?
You'll find federal tax credits and state rebates that can greatly offset your DIY solar installation costs; research the Database of State Incentives for Renewables & Efficiency (DSIRE) to uncover incentives applicable to your location.
Can I Add More Solar Panels to My System in the Future?
You can easily add more solar panels to your system in the future, guaranteeing future expansion is seamless, as long as you verify solar panel compatibility and follow the manufacturer's guidelines for upgrades and expansions.
Will DIY Solar Installation Void My Roof's Warranty?
You risk voiding your roof's warranty if you drill into it for DIY solar installation, as manufacturers often require professional installation to maintain validity; consider roof warranty implications and professional installation considerations before proceeding.
Conclusion
You've maneuvered the complex terrain of DIY solar installation, and now you're ready to tap into the power of the sun. Like a skilled conductor leading an orchestra, you've carefully selected and installed each component, ensuring a harmonious arrangement of energy production. With your system up and running, you'll be singing a sweet tune all the way to the bank, as you reap the rewards of significant cost savings and a reduced carbon footprint.
Related Posts
-
Home Solar Systems for Environmental Impact
Home solar systems markedly reduce your carbon footprint by utilizing renewable energy. By adopting solar energy, you...
-

Business Solar Investments for Cost-Effective Sustainability
Investing in solar energy is a smart move for your business, providing a solid foundation for cost-effective sustaina...
-
Solar Energy Efficiency Improvements for Businesses
Improving solar energy efficiency for your business can lead to considerable cost savings and enhance your sustainabi...


