Can You Save on Solar Cells Cost With DIY Installation
By taking on the installation process yourself, you can potentially save up to 20% of the total cost of a solar panel system, which can add up to thousands of dollars in savings. However, DIY installation requires you to have essential skills like electrical knowledge, construction experience, and troubleshooting skills. You'll need to assess your site, evaluate system sizing, and analyze roof layout before purchasing solar cells and equipment. With proper planning and execution, you can overcome common DIY challenges and guarantee a successful installation. Now, let's investigate the details of DIY solar cell installation to maximize your savings and avoid pitfalls.
Key Takeaways
- DIY solar cell installation can save up to 20% on overall costs by eliminating labor costs.
- Potential cost savings are offset by the need for DIYers to invest time in learning and installation.
- High-quality components with long warranties are essential for optimal system performance and cost-effectiveness.
- A thorough site assessment and system sizing calculations are crucial for optimizing energy output and reducing costs.
- DIYers must weigh the benefits of cost savings against the risks of safety hazards, subpar system performance, and extended project timelines.
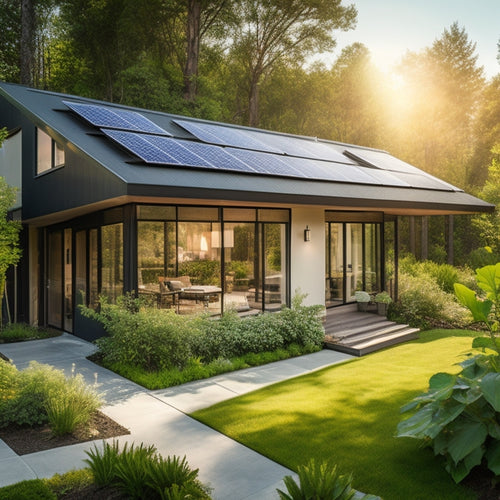
Understanding Solar Cells Cost Breakdown
When it comes to DIY installation of solar cells, understanding the cost breakdown is essential to guarantee a successful and budget-friendly project. You need to evaluate the costs of the solar panels, inverters, mounting hardware, and other components.
The cost of solar panels accounts for the majority of the total expense, typically ranging from $2.50 to $3.50 per watt. Inverters, which convert DC power to AC, add another $0.50 to $1.00 per watt. Mounting hardware, wiring, and other installation materials make up the remaining costs.
To get the best value for your money, you should stay updated on the latest solar technology trends and installation innovations. For instance, bifacial solar panels can increase energy output by up to 25% at a slightly higher cost.
Additionally, advances in inverter technology have led to more efficient and compact designs. By understanding the cost breakdown and staying informed about the latest developments, you can make informed decisions to optimize your DIY solar installation and maximize your return on investment.
DIY Installation Benefits and Drawbacks
By understanding the cost breakdown of your DIY solar installation, you're now better equipped to weigh the benefits and drawbacks of taking on the project yourself.
One significant advantage is the potential for cost savings, as you won't need to pay for labor costs. In addition, DIY installation offers installation flexibility, allowing you to customize the system to fit your specific energy needs. You'll also experience personal satisfaction from completing the project yourself.
On the other hand, consider the potential drawbacks. A DIY installation may extend your project timeline, as you'll need to dedicate time to learning and completing the installation.
You'll also need to make certain you have access to the necessary resources, including tools and equipment. Moreover, developing the required skills may take time and effort.
However, if you're willing to invest the time and energy, DIY installation can be a rewarding and cost-effective way to shift to solar power.
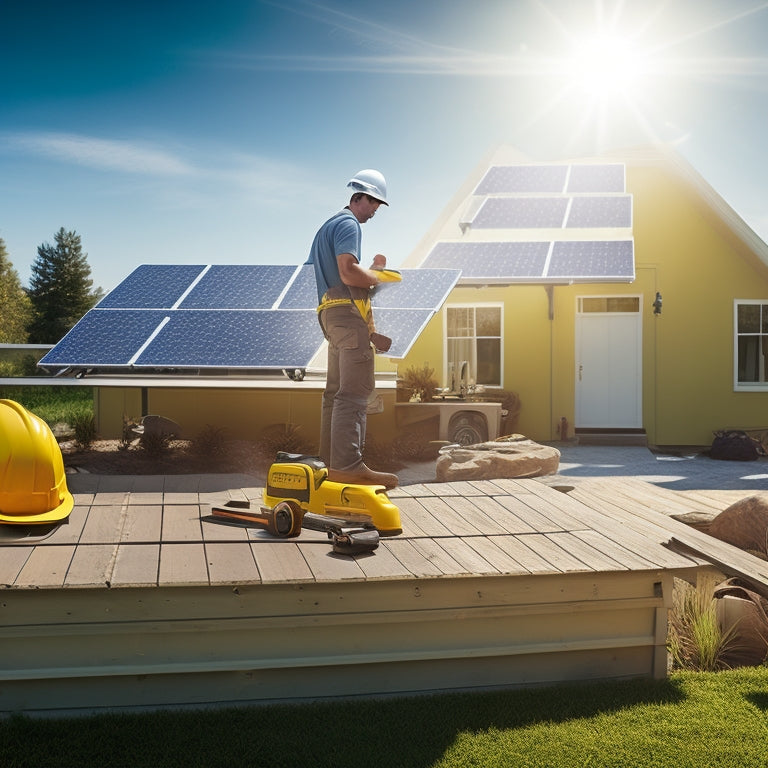
Necessary Skills and Experience Required
To tackle a DIY solar installation, you'll need a specific set of skills and experience to guarantee a successful project.
Electrical knowledge is a must, as you'll be working with high-voltage systems and ensuring safe connections. You'll need to understand circuitry, wiring, and electrical safety protocols to avoid risks.
Construction experience is also vital, as you'll be installing panels on your roof or in a freestanding array. This requires knowledge of roofing materials, structural integrity, and local building codes.
Additionally, troubleshooting skills are essential to identify and resolve any issues that may arise during or after installation. You should be able to analyze problems, identify root causes, and implement solutions efficiently.
Project management skills are also necessary to plan, coordinate, and execute the installation process within a specific timeframe and budget.
Without these skills and experience, you risk facing costly delays, safety hazards, and subpar performance from your solar cell system.
Purchasing Solar Cells and Equipment
With your DIY solar installation skills and experience in place, you're ready to purchase the necessary solar cells and equipment.
You'll need to decide on the type of solar panels that suit your needs, considering factors like efficiency, durability, and cost. Monocrystalline, polycrystalline, and thin-film solar panels are the most common types, each with its advantages and disadvantages.
When selecting equipment, look for high-quality components with long warranties. A 25-year warranty for solar panels and a 10-year warranty for inverters are standard in the industry.
Be wary of cheap options with shorter warranties, as they mightn't deliver the desired performance and reliability.
Additionally, you'll need to purchase mounting hardware, such as racking and tracking systems, to secure your solar panels to your roof or ground.
Confirm these components are compatible with your solar panels and meet local building codes.
Carefully research and compare prices from different suppliers to ascertain you get the best value for your money.
Pre-Installation Planning and Design
You'll need to conduct a thorough site assessment to identify any potential obstacles or limitations that could impact your solar cell installation.
Next, you'll perform system sizing calculations to determine the best number of solar cells and equipment required for your specific energy needs.
Site Assessment Necessary
Your property's unique characteristics considerably impact the effectiveness of your solar panel installation. To guarantee optimal energy efficiency, it's essential to conduct a thorough site assessment before installing your solar cells. This assessment helps identify potential obstacles and opportunities to maximize your system's performance.
During the assessment, you'll need to evaluate the following factors:
-
Site orientation: Determine the direction your roof or installation site faces, as this affects the amount of sunlight your solar panels receive.
-
Shading analysis: Identify any obstructions, such as trees, buildings, or chimneys, that could cast shadows on your solar panels and reduce their energy output.
-
Roof size and condition: Assess the size and condition of your roof to determine the suitable solar panel size and installation method.
- Energy efficiency goals: Establish your energy efficiency goals and determine the required system size to meet your electricity needs.
System Sizing Calculations
As solar panel installation planning progresses, accurate system sizing calculations become essential to guarantee your DIY project meets its intended energy efficiency goals.
You need to determine the right system capacity to generate the required amount of power for your home or building.
To achieve this, you'll need to calculate your energy usage patterns, evaluating your daily energy consumption in kilowatt-hours (kWh).
This will help you identify the required system capacity to meet your energy demands.
You'll also need to take into account factors like peak sun hours, panel efficiency, and inverter capacity.
Roof Layout Analysis
With your system sizing calculations complete, it's time to shift focus to the roof layout analysis, a critical pre-installation planning and design phase. This phase involves evaluating your roof's characteristics to determine the best placement of your solar panels.
You'll need to assess your roof's pitch, material, and structural integrity to guarantee it can support the weight of the solar panels. A shading analysis will also help you identify any obstructions that could impact solar exposure. Additionally, consider the installation orientation and load capacity of your roof to confirm a safe and efficient installation.
To get started, review the following key factors:
-
Roof Pitch and Material: Verify your roof's pitch and material are compatible with solar panels.
-
Shading Analysis: Identify potential shading issues from trees, buildings, or other obstructions.
-
Accessibility and Maintenance: Consider accessibility issues and maintenance access for future repairs and cleaning.
- Weather Considerations: Evaluate your roof's ability to withstand extreme weather conditions, such as high winds or heavy snowfall.
Overcoming Common DIY Challenges
As you initiate your DIY solar cell installation, you'll likely encounter technical intricacies that require careful attention to detail.
You'll need to manage safety risks, such as electrical shock and roof falls, to guarantee a safe working environment.
Additionally, you'll have to traverse local building codes and permits, which can be time-consuming and frustrating if not handled correctly.
Handling Technical Complexity
How do you plan to tackle the intricacies of solar cell installation when you're not an electrical engineer? This is an essential question to reflect on, as DIY installation requires a certain level of technical knowledge.
To overcome the technical intricacies, you'll need to access reliable technical resources, such as online tutorials, installation manuals, and manufacturer support.
Here are some strategies to help you handle technical intricacy:
-
Study the installation manual: Before starting the installation, thoroughly read and understand the manufacturer's instructions to guarantee you're familiar with the components and installation process.
-
Watch online tutorials: Supplement your knowledge with online tutorials and videos that demonstrate the installation process, troubleshooting strategies, and best practices.
-
Join online forums and communities: Participate in online forums and communities where DIY installers share their experiences, ask questions, and provide advice on overcoming technical challenges.
- Consult with specialists: If you're unsure about a particular aspect of the installation, don't hesitate to consult with a professional electrician or a solar panel specialist who can provide guidance and support.
Managing Safety Risks
While tackling technical complexity is essential, it's equally important to prioritize safety when installing solar cells. As you initiate your DIY project, you'll need to manage safety risks to avoid accidents and guarantee a successful installation.
| Safety Aspect | Description | Importance Level |
|---|---|---|
| Risk Assessment | Identify potential electrical hazards and take preventive measures | High |
| Personal Protective | Wear safety equipment such as gloves, safety glasses, and a hard hat | Medium |
| Emergency Procedures | Develop a plan for emergency situations, such as electrical shock or falls | High |
You'll need to conduct a thorough risk assessment to identify potential electrical hazards and take preventive measures to mitigate them. This includes following installation guidelines and wearing personal protective equipment to prevent accidents. Additionally, develop emergency procedures to handle unexpected situations, such as electrical shock or falls. Don't underestimate the importance of safety training to guarantee you're equipped to handle any situation that may arise during the installation process. By prioritizing safety, you'll be able to complete your DIY solar cell installation project efficiently and effectively.
Overcoming Local Codes
Get familiar with local building codes and regulations before diving into your DIY solar cell installation project.
You'll need to guarantee your installation meets local regulations, permit requirements, and zoning laws to avoid costly rework or even removal of your system.
To achieve code compliance, follow these steps:
-
Research local building codes: Familiarize yourself with local regulations, including electrical and building codes, to guarantee your installation meets requirements.
-
Obtain necessary permits: Secure permits from your local government before starting the installation to avoid fines or penalties.
-
Comply with zoning laws: Verify that your solar panel installation complies with local zoning laws, including setbacks and height restrictions.
- Schedule inspections: Arrange for inspections by local authorities to guarantee your installation meets code requirements.
Comparing DIY to Professional Installations
You're considering two routes for your solar cell installation: DIY or professional. Both options have their pros and cons, and it's crucial to weigh them carefully before making a decision.
In terms of installation types, professional installations typically involve a team of experts who handle everything from assessment to setup. DIY installations, on the other hand, put the responsibility on you, the homeowner.
Cost comparisons show that DIY installations can save you up to 20% on the overall cost, but this may come at the expense of warranty implications, as manufacturers often void warranties for DIY-installed systems.
Professional installations usually have shorter installation timelines, taking around 1-3 days, whereas DIY installations can take weeks or even months.
Homeowner experiences vary, but many report a sense of accomplishment with DIY installations. Financing options are available for both, but maintenance responsibilities fall squarely on your shoulders with DIY.
When it comes to energy efficiency, both options can provide significant savings. Don't forget to factor in local incentives and the environmental impact of your chosen installation method.
Weighing Long-Term Savings and Risks
Your solar cell installation investment comes with long-term implications, and it's essential to weigh the potential savings against the risks involved. As a DIY installer, you need to evaluate the financial incentives, environmental impact, and energy independence that come with solar cells.
However, you also need to take into account the maintenance costs, grid connection, and resale value.
Here are some key points to review:
-
Long-term investment: Solar cells can last up to 30 years, making them a long-term investment that requires careful planning.
-
Financial benefits: You can enjoy financial incentives like tax credits and rebates, but you'll need to assess the installation timeline and potential delays.
-
Environmental impact: Solar cells can considerably reduce your carbon footprint, but you'll need to guarantee that your installation is done correctly to maximize energy output.
- Maintenance and resale: Regular maintenance is vital to guarantee peak energy production, and a well-maintained system can increase your property's resale value.
Frequently Asked Questions
Can I Install Solar Cells on a Metal or Asphalt Shingle Roof?
You can install solar cells on both metal and asphalt shingle roofs, but consider metal roof's structural integrity and potential corrosion, and asphalt shingle's compatibility with solar panel footings and potential waterproofing issues.
Do DIY Solar Installations Affect My Home's Resale Value?
"Blood, sweat, and tears are worth nothing without a solid ROI," so you wonder, will a DIY solar installation enhance or bust your home's resale value? Research suggests a well-executed DIY project can increase resale value, but only if done correctly and with permits.
Are There Any Local Building Codes or Permits I Need to Obtain?
You'll need to research local regulations and permit requirements, as they vary by jurisdiction, ensuring you comply with electrical and building codes, and obtain necessary permits before commencing your DIY solar installation project.
Can I Mix and Match Different Solar Panel Brands and Models?
You're not limited to a single brand; mixing and matching solar panels is possible, but guarantee solar panel compatibility, as brand performance and voltage ratings vary, requiring careful system design to optimize energy output and avoid potential risks.
Will My Homeowner's Insurance Cover DIY Solar Installations?
You'll need to review your homeowner's insurance policy to determine if it covers DIY solar installations, as insurance coverage varies and policy limitations may apply, so it is crucial to understand your policy's terms before proceeding with the installation.
Conclusion
By taking the DIY route, you'll save on labor costs, but you'll also assume the risks of incorrect installation, voided warranties, and potential safety hazards. On the other hand, professional installations offer peace of mind, proficiency, and quality assurance, but at a higher upfront cost. Weigh your options carefully, considering your technical skills, time, and financial situation. Will you opt for short-term savings or long-term security?
Related Posts
-

Steps to Prepare for Solar Installation
To prepare for solar installation, start by evaluating your current energy consumption and future needs to determine ...
-
Integrating Solar Panels Into Home Design
Integrating solar panels into your home design greatly enhances energy efficiency and lowers utility bills while addi...
-

Sustainable Home Design for Reduced Carbon Footprint
Sustainable home design is your pathway to a smaller carbon footprint and a healthier living space. By incorporating ...


