A Step-by-Step Guide to House Solar Panel Installation
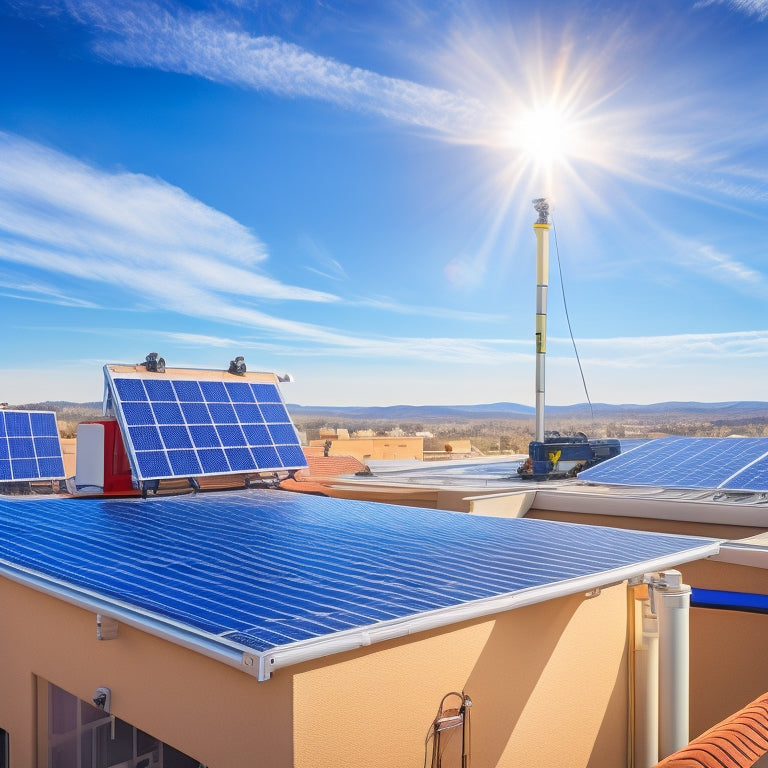
You're about to start your house solar panel installation, a process that requires careful planning and execution to guarantee a safe and efficient system. First, assess your roof's size, orientation, and condition to determine the ideal solar panel placement, and evaluate your energy consumption patterns to choose the right system size and configuration. Next, research local building codes and permits, and select durable and compatible equipment that meets safety standards. As you maneuver through the installation process, you'll need to prepare your roof structure, obtain necessary permits, and install mounting hardware, solar panels, inverters, and monitoring systems.
Key Takeaways
- Assess your roof's size, orientation, and condition to ensure optimal sunlight exposure and structural integrity for solar panel installation.
- Choose the right equipment, including solar panels, inverters, and mounting hardware, considering factors like efficiency, durability, and compatibility.
- Obtain necessary permits and comply with local regulations, building codes, and zoning requirements to avoid installation delays and penalties.
- Ensure a secure and weather-tight installation by using high-quality hardware materials and following proper wiring techniques and safety protocols.
- Conduct thorough safety inspections and testing to verify correct system functionality and implement regular maintenance for optimal energy efficiency and longevity.
Assessing Your Solar Readiness
To determine if your home is suitable for a solar panel installation, you need to assess your solar readiness by evaluating several key factors. A detailed site assessment is vital for utilizing the full potential of solar energy benefits.
You'll want to take into account the size and orientation of your roof, ensuring it receives adequate sunlight throughout the day. Shading from trees, buildings, or other obstructions can greatly impact energy production, so it's important to identify and mitigate these factors.
Next, evaluate your roof's condition, age, and material. A sturdy, durable roof is necessary to support the weight and installation of solar panels.
You should also assess your local building codes, permits, and regulations regarding solar panel installations. Additionally, reflect on your energy consumption patterns to determine the ideal system size and configuration for your needs.
Choosing the Right Equipment
With a thorough site assessment under your belt, you're now ready to focus on the next critical step: selecting the right equipment for your solar panel installation. This is where you'll decide on the type of solar panels, inverters, and mounting hardware that will maximize your energy output.
When choosing your equipment, consider the following key factors:
-
Solar panel types: Monocrystalline, polycrystalline, or thin-film panels each have their own efficiency rates and cost points. Monocrystalline panels are the most efficient but also the most expensive.
-
Equipment efficiency: Look for high-efficiency panels (above 20%) and inverters (above 95%) to guarantee you're getting the most power from your system.
-
Durability and warranty: Choose equipment with a proven track record of durability and an extensive warranty (at least 25 years) to guarantee your system lasts for decades.
-
Compatibility and integration: Confirm that all your equipment is compatible and integrates seamlessly to avoid any technical issues.
-
Certifications and compliance: Verify that your equipment meets local and national safety standards, such as UL certification and compliance with the National Electric Code (NEC).
Preparing Your Roof Structure
Preparing Your Roof Structure
Your roof structure plays a crucial role in supporting the weight of your solar panel system, so it's important to prepare it properly before installation. You'll want to verify your roof is in good condition to maintain its structural integrity and support the added weight of the solar panels.
To do this, you'll need to:
| Roof Condition | Action Required |
|---|---|
| Damaged or missing shingles | Replace before installation |
| Loose or missing flashing | Secure or replace before installation |
| Sagging or uneven roof deck | Repair or replace before installation |
| Roof age > 10 years | Consider replacing before installation |
| Active leaks or water damage | Fix before installation |
It's also crucial to perform regular roof maintenance before and after installation to prevent damage to your solar panel system. This includes cleaning your gutters, inspecting your roof for damage, and trimming trees to prevent branch damage. By preparing your roof structure properly, you'll guarantee a safe and successful solar panel installation.
Obtaining Necessary Permits
You'll need to steer through the permit application process, which typically involves submitting a detailed plan of your solar panel installation to your local government.
Be prepared to provide required documents, including a site plan, electrical diagram, and manufacturer specifications for your solar panels and inverters.
Permit Application Process
The local building authority requires a permit before commencing your solar panel installation, guaranteeing compliance with safety standards and regulations.
As the homeowner, you'll need to maneuver through the permit application process to avoid any potential issues or delays.
To guarantee a smooth process, consider the following key factors:
-
Local Regulations: Familiarize yourself with local building codes, zoning requirements, and environmental impact assessments to guarantee compliance.
-
Application Timelines: Plan ahead and submit your application well in advance of your installation date to avoid delays.
-
Permit Fees: Budget for permit fees, which vary depending on your location and installation size.
-
Installation Guidelines: Review and understand the installation guidelines outlined in your permit to guarantee a successful inspection.
-
Utility Notifications: Notify your utility company of your installation plans to guarantee a seamless connection to the grid.
Required Documents Submission
Several crucial documents must be submitted to obtain the necessary permits, marking a significant step in the solar panel installation process. You'll need to gather and prepare these documents carefully to avoid delays or rejections.
Create a document checklist to guarantee you have all the required documents, including:
| Document | Description |
|---|---|
| Building permit application | Provides details of the solar panel installation project |
| Electrical permit application | Outlines the electrical connections and wiring plans |
| Structural integrity report | Confirms the roof's ability to support the solar panels' weight |
Make certain to submit these documents within the designated submission timeline to avoid delays. Typically, this ranges from 2-4 weeks, depending on the jurisdiction. Once submitted, the authorities will review your application and issue the necessary permits.
Remember to follow the instructions carefully and provide complete information to avoid rejections. With the necessary permits in hand, you can proceed with the solar panel installation, bringing you closer to utilizing the power of the sun for your home.
Installing Mounting Hardware
You'll start by installing roof anchors, which provide a secure foundation for your solar panel system.
Next, you'll assemble the mounting hardware, including clamps, brackets, and rails, guaranteeing a sturdy and watertight connection.
Make certain to follow the manufacturer's instructions and local building codes to guarantee a safe and compliant installation.
Roof Anchor Installation
Securely fastening roof anchors is a critical step in the solar panel installation process, as it guarantees the mounting hardware can withstand various environmental conditions and supports the weight of the solar panels.
You'll need to confirm the anchors are compatible with your roof type, whether it's asphalt shingle, metal, tile, or another material.
When selecting anchor materials, consider factors such as durability, corrosion resistance, and weight capacity. Some common anchor materials include:
- Stainless steel for its high corrosion resistance
- Aluminum for its lightweight and durable properties
- Galvanized steel for its affordability and rust resistance
When installing roof anchors, follow these key steps:
- Identify the anchor points on your roof, factoring in the solar panel layout and roof structure
- Drill pilot holes for the anchors, confirming accurate placement and alignment
- Secure the anchors to the roof, using the recommended fastening method and torque specification
- Verify the anchors are level and plumb to confirm proper installation
- Test the anchors to verify they can support the weight of the solar panels and withstand environmental stresses
Mounting Hardware Assembly
With your roof anchors in place, you can now focus on assembling the mounting hardware that will support your solar panels. This involves attaching the rails to the anchors using specialized clamps and bolts. Confirm the rails are securely fastened to withstand wind and weather conditions.
Next, attach the mid-clamps and end-clamps to the rails, spacing them according to the manufacturer's instructions. These clamps will hold the solar panels in place, so it's essential to get the spacing correct. Use high-quality hardware materials that can withstand outdoor conditions and support the weight of the panels.
When assembling the mounting hardware, consider the mounting techniques recommended by the manufacturer. For example, some systems use a sliding clamp design, while others use a fixed clamp design. Follow the manufacturer's guidelines to confirm a secure and efficient installation.
Remember to tighten all bolts and screws firmly, but avoid overtightening, which can damage the hardware. With the mounting hardware assembled, you're ready to install the solar panels.
Connecting Solar Panels
When configuring a solar panel array, the electrical connections between individual panels play a critical role in guaranteeing the system's overall performance and safety.
You'll need to connect the panels in a way that maximizes energy production while minimizing potential risks.
To connect your solar panels, follow these steps:
-
Choose the right wiring technique: Depending on the type of solar panels you have, you may need to use series or parallel wiring. Series wiring connects panels in a single circuit, while parallel wiring connects multiple circuits in parallel.
-
Select the correct gauge wire: The wire gauge you choose will depend on the distance between panels and the current output of your system.
-
Use weather-resistant connectors: Confirm that all connectors are rated for outdoor use and can withstand environmental factors like rain and snow.
-
Follow proper safety protocols: Always turn off the power to the system before making any connections, and make sure you're wearing protective gear like gloves and safety glasses.
-
Double-check connections: Verify that all connections are secure and meet local electrical codes before proceeding with the installation.
Setting Up Inverters and Monitoring
Configuring inverters and monitoring systems is an important step in solar panel installation, as it facilitates the efficient conversion of DC power into AC power and provides real-time observations into system performance.
You'll need to choose the right inverter type for your system, considering factors like efficiency, reliability, and compatibility. String inverters, microinverters, and power optimizers are popular options, each with their own advantages and disadvantages.
Next, you'll set up monitoring solutions to track your system's performance. This can be done using software or hardware-based monitoring systems, which provide real-time data on energy production, consumption, and system health.
You may opt for a wired or wireless monitoring system, depending on your specific needs and preferences. Confirm that your monitoring system is compatible with your inverter and solar panel configuration.
Accurate monitoring is vital for identifying potential issues, optimizing system performance, and maximizing your return on investment. By configuring your inverters and monitoring systems correctly, you'll be able to utilize the full potential of your solar panel system.
Performing Safety Inspections
How thoroughly have you prepared your solar panel system to withstand potential hazards and guarantee a safe operating environment?
Before flipping the switch, it's vital to perform a thorough safety inspection to identify and mitigate risks.
To verify a safe and successful installation, inspect the following:
-
Safety gear: Verify that you have the necessary personal protective equipment (PPE), such as hard hats, gloves, and safety glasses, to protect yourself from electrical hazards and physical harm.
-
Electrical hazards: Check for exposed wiring, loose connections, and damaged cables that could cause electrical shock or fires.
-
Roof stability: Confirm the roof can support the weight of the solar panels and that the installation won't compromise its structural integrity.
-
Weather conditions: Assess the impact of weather conditions, such as high winds, heavy snowfall, or extreme temperatures, on the system's performance and safety.
-
Emergency procedures: Develop and practice a plan for emergency situations, such as a fire or electrical shock, to minimize risks and confirm a swift response.
Finalizing the Installation Process
What's left to do before you can flip the switch and start generating clean energy? Now that the solar panels are installed, it's vital to finalize the installation process to guarantee peak system performance and energy efficiency.
First, connect the solar panel system to your electrical panel. Make sure all wiring is secure, and the system is grounded properly.
Next, install the net meter, which measures the excess energy produced by your solar panel system and feeds it back into the grid.
You'll also need to install a monitoring system to track your energy production and consumption in real-time. This will help you identify areas for improvement and enhance your system's performance.
Finally, perform a series of tests to verify the system is functioning correctly and safely. This includes testing the electrical connections, inspecting the system for any signs of wear or damage, and confirming that the system is meeting the required safety standards.
Regular system maintenance is vital to guarantee the longevity and energy efficiency of your solar panel system.
Frequently Asked Questions
Can I Install Solar Panels on a Metal or Asphalt Shingle Roof?
You can install solar panels on both metal and asphalt shingle roofs, but you'll need to take into account metal roof-specific mounting systems and asphalt shingle compatibility with flashing and sealing to guarantee a watertight installation.
How Do I Ensure My Solar Panels Are Bird and Rodent Proof?
You'll want to guarantee your solar panels are bird and rodent proof by installing bird deterrent options like netting or spikes, and rodent barriers such as sealants or hardware cloth to prevent nesting and chewing damage.
Will My Homeowners Insurance Cover My Solar Panel System?
As you traverse the intricate terrain of solar panel ownership, you're wise to question if your homeowners insurance has your back, shielding you from financial storms; review your insurance policy to verify coverage limits encompass your precious solar panel system.
Can I Add More Solar Panels to My Existing System Later?
You can expand your solar panel system later, but you'll need to guarantee system compatibility during the solar panel expansion, considering factors like inverter capacity, electrical connections, and roof space to avoid potential integration issues.
Do I Need to Clean My Solar Panels Regularly for Optimal Performance?
You'll want to prioritize solar panel maintenance to guarantee maximum energy output, and that means cleaning them regularly; experts recommend doing so every 6-12 months, depending on your location and environmental conditions.
Conclusion
As you flip the switch, the hum of electricity flows through your home, powered by the sun's radiant energy. Your newly installed solar panels stand tall, a sleek and modern addition to your rooftop. With every ray of sunlight, you're capturing a cleaner, greener future. You've taken the first step towards energy independence, and the savings will shine bright for years to come. Your home, now a guiding light of sustainability, is illuminated by the power of the sun.
Related Posts
-

How to Finance Home Solar Panels
Financing home solar panels offers several strategies to lighten your initial costs while maximizing long-term benefi...
-
Solar Energy Efficiency Improvements for Businesses
Improving solar energy efficiency for your business can lead to considerable cost savings and enhance your sustainabi...
-
Solar Energy Grants and Incentives for Homeowners
Maneuvering solar energy grants and incentives is essential for reducing your installation costs. You can benefit fro...


