A Comprehensive DIY Guide to Commercial Solar PV Panel Installation
You're about to initiate a thorough DIY project to install commercial solar PV panels, which demands careful planning and execution. Start by evaluating your property's suitability, considering factors like location, physical characteristics, energy usage patterns, and financial incentives. Next, choose the right solar panels based on efficiency, cost, and warranty considerations. Plan your system, taking into consideration site evaluation, energy consumption, and oversizing strategy. Then, prepare the installation site, install mounts, connect panels and inverters, and conclude with a final inspection and testing. Now, get ready to plunge deeper into the specifics of each step to guarantee a successful installation.
Key Takeaways
- Assess your commercial property's suitability for solar PV installation by evaluating location, physical characteristics, energy usage patterns, and financial incentives.
- Choose the right solar panels by considering types, efficiency ratings, cost comparisons, warranties, and installation and maintenance requirements.
- Plan your solar panel system by conducting a site assessment, calculating system size, and analyzing energy consumption and load to ensure optimal performance.
- Prepare the installation site by evaluating the roof condition, conducting a site assessment, and researching local regulations and permits.
- Ensure a safe and efficient installation by following proper wiring techniques, adhering to electrical safety guidelines, and conducting a final inspection and testing.
Assessing Your Commercial Property
Three key factors will determine the suitability of your commercial property for solar PV panel installation: its location, physical characteristics, and energy usage patterns.
First, consider your property's location. Is it situated in an area with high levels of sunlight throughout the year? If so, you're off to a great start.
Next, examine your property's physical characteristics. Are there any obstructions, such as trees or buildings, that could cast shade on your PV panels? Additionally, what's the condition of your roof? Is it sturdy enough to support the weight of the panels?
Your energy usage patterns are also essential. Analyze your energy consumption to determine how much power you can offset with solar energy. This will help you determine the ideal size of your solar PV system.
Don't forget to research the financial incentives available to you. Governments often offer generous rebates and tax credits to businesses investing in renewable energy.
Choosing the Right Solar Panels
Now that you've assessed your commercial property's suitability for solar PV panel installation, it's time to focus on selecting the right solar panels for your project.
With so many options available, it's vital to evaluate factors like solar panel types, efficiency ratings, and cost comparisons. Monocrystalline silicon panels offer high efficiency ratings but come at a higher cost, while polycrystalline silicon panels provide a more affordable option with slightly lower efficiency. Thin-film panels, on the other hand, are the most budget-friendly but have lower efficiency ratings.
When making your selection, warranty considerations are significant. Look for manufacturers that offer thorough warranties covering performance, materials, and workmanship.
Installation techniques and maintenance requirements should also be taken into account, as they can impact the overall performance and longevity of your solar panel system.
Planning Your Solar Panel System
You'll need to conduct a thorough site assessment to identify potential installation obstacles and determine the ideal system layout.
Next, you'll perform system sizing calculations to determine the required number of panels, inverters, and other components based on your energy needs and available roof space.
Site Assessment Needed
During the planning phase of your solar panel system, a thorough site assessment is crucial in determining the feasibility and ideal performance of your installation.
You'll need to evaluate your site's conditions to guarantee peak energy harvesting.
First, assess the site orientation, taking note of the direction your roof or installation surface faces. A south-facing orientation is ideal, as it receives the most direct sunlight throughout the day.
East- and west-facing orientations can also work, but north-facing orientations are less desirable due to reduced sunlight exposure.
Next, conduct a shading analysis to identify any obstacles that may cast shadows on your solar panels. This includes trees, buildings, and other structures that may block sunlight.
You'll need to trim or remove obstructions to minimize shading and guarantee maximum energy production.
System Sizing Calculations
With your site assessment complete, you're ready to determine the ideal size of your solar panel system. This involves calculating your energy consumption and conducting a load analysis to guarantee your system meets your power needs.
Start by gathering your energy bills from the past year to determine your average daily energy consumption in kilowatt-hours (kWh). Next, identify the appliances and equipment that will be powered by your solar panel system, including their wattage and usage hours. This information will help you determine your total daily energy load.
Using this data, you can calculate your required system size in watts. A general rule of thumb is to oversize your system by 10-20% to account for losses and variability in solar radiation.
You'll also need to take into account factors like inverter efficiency, temperature derating, and wiring losses when sizing your system. By accurately determining your energy consumption and conducting a thorough load analysis, you'll be able to design a solar panel system that meets your power needs and maximizes your return on investment.
Preparing the Installation Site
You'll need to conduct a thorough site assessment to identify potential issues that could impact your solar PV panel installation.
Start by evaluating your roof's condition, considering factors such as its age, material, and structural integrity.
Next, work through a site assessment checklist to guarantee you've accounted for shading, ventilation, and other key factors that will affect your system's performance.
Site Assessment Checklist
Your roof is about to become a power-generating asset, but first, it's crucial to confirm the installation site is suitable for solar PV panels. This site assessment checklist will help you identify potential issues that may affect the performance of your solar PV system.
| Category | Assessment Item | Notes |
|---|---|---|
| Shading | Identify any obstacles that could cast a shadow on the solar panels, such as trees, buildings, or vents | Document the shading patterns and their impact on energy production |
| Orientation | Determine the orientation of your roof and its impact on energy production | Consider the ideal orientation for your solar PV system |
| Local Regulations | Research local building codes, permits, and solar incentives | Confirm compliance with local regulations and maximize energy efficiency |
Roof Condition Evaluation
Most residential roofs aren't designed to support the additional weight and stress of solar PV panels, so it's essential to evaluate your roof's condition before installation.
You need to assess whether your roof can handle the extra load and verify it's structurally sound to prevent any damage or safety hazards.
When evaluating your roof's condition, consider the following factors:
-
Roof materials: Are they durable and compatible with solar panels? Asphalt shingles, for instance, may not be suitable for solar installations.
-
Structural integrity: Is your roof strong enough to support the weight of the solar panels, mounting hardware, and additional snow loads (if applicable)?
-
Drainage systems: Are they functioning properly to prevent water accumulation, which can lead to structural damage or electrical issues?
- Potential shading: Are there any obstructions, such as chimneys, vents, or skylights, that could cast shadows on the solar panels and affect their performance?
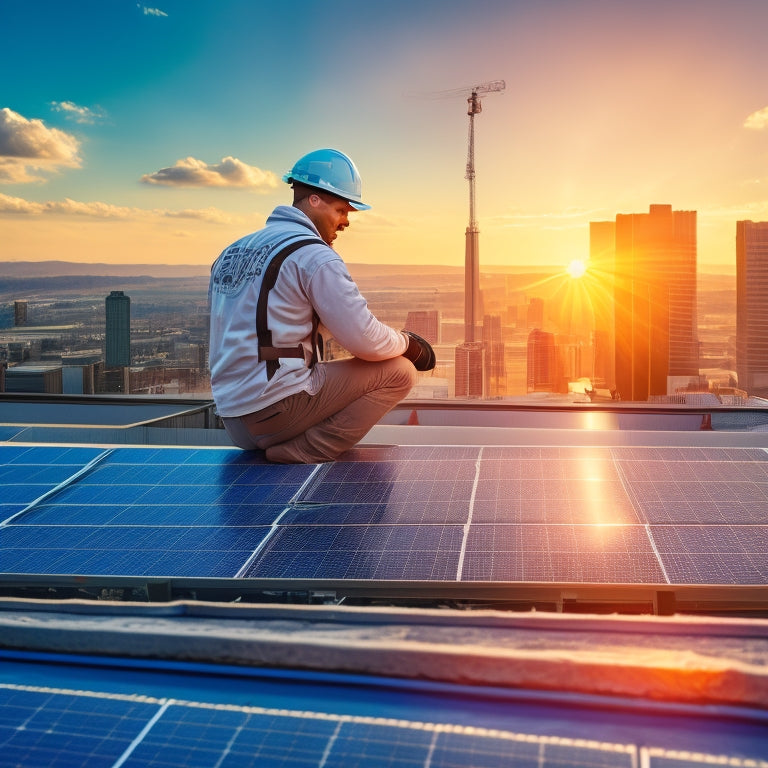
Installing Solar Panel Mounts
The rooftop's rugged terrain, marked by ridges and valleys of asphalt shingles, is about to become the foundation for your solar panel array.
You've evaluated the roof's condition, and now it's time to install the solar panel mounts. You'll need to choose the right mount type for your roof: rail-based, ballasted, or attached. Rail-based mounts are ideal for pitched roofs, while ballasted mounts work well for flat roofs. Attached mounts are suitable for both.
Before you begin, gather your installation tools: a drill, impact driver, socket set, and torque wrench. Confirm you have the manufacturer's instructions and a clear understanding of the mounting system.
Start by marking the location of the mounts on the roof, taking care to avoid obstructions and maintain even spacing. Then, secure the mounts to the roof using the recommended fasteners and torque settings.
Verify the mounts are level and plumb to confirm a stable platform for your solar panels. With the mounts in place, you're ready to install the solar panels and begin utilizing the power of the sun.
Connecting Solar Panels and Inverters
Six strings of solar panels, each comprising five to fifteen modules, now await connection to the inverter, the brain of your solar PV system.
You'll need to verify the connections are secure, efficient, and meet the inverter's specifications.
- Your wiring techniques will depend on the inverter type: string inverters, microinverters, or power optimizers.
- String inverters require series connections, while microinverters connect each module independently.
- Power optimizers, like DC-DC converters, optimize energy output at the module level before sending it to a string inverter.
- Always follow the manufacturer's guidelines for wire sizing, insulation, and termination to prevent electrical shock, overheating, or system failure.
You must select the correct inverter type for your system, considering factors like panel configuration, system size, and energy output.
A well-designed connection guarantees maximum energy harvest, reduces losses, and prolongs the system's lifespan.
Final Inspection and Testing
Your carefully planned and installed solar PV system now awaits its final inspection and testing, an important step guaranteeing your system operates safely, efficiently, and at its peak performance.
This stage is vital in identifying and addressing any potential issues before commissioning the system.
Conduct a thorough inspection using an extensive checklist, verifying that all components are properly connected, secured, and meet safety protocols.
Confirm regulatory compliance by reviewing installation permits and relevant documentation.
Perform testing procedures to validate the system's performance, including voltage, current, and power output.
Monitor the system's performance using performance monitoring tools to identify any anomalies.
If issues arise, employ system troubleshooting techniques to diagnose and rectify problems.
Once the system is deemed operational, prepare final documentation, including system specifications, installation records, and maintenance schedules.
This documentation will serve as a significant resource for future maintenance and upgrades.
Frequently Asked Questions
Can I Install Solar Panels on a Metal or Clay Tile Roof?
You'll need to contemplate metal roof considerations, ensuring a secure attachment method, and verify clay tile compatibility, checking for weight and waterproofing concerns, before installing solar panels on either type of roof.
Do I Need a Building Permit for a Commercial Solar Installation?
Ha! You think you can just slap solar panels on your commercial property without permission? Think again! You'll need to steer through building permit requirements and installation regulations, so buckle up and get ready for a bureaucratic journey!
How Often Should I Clean My Commercial Solar Panels?
You should clean your commercial solar panels every 6-12 months, depending on environmental factors, to maintain peak energy output; establish a regular cleaning schedule and follow maintenance tips to guarantee maximum power generation and prolong system lifespan.
Can I Use Solar Panels to Power My Business's Electric Vehicle?
As you're already utilizing the sun's power, it's no coincidence you're considering solar charging for your business's electric vehicle - a perfect collaboration! Yes, you can use solar panels to power your EV, enhancing energy efficiency and reducing your carbon footprint.
Are There Any Tax Incentives for Commercial Solar Installations?
You'll be pleased to know that you can capitalize on federal tax credits covering up to 30% of your commercial solar installation costs, plus additional state incentives, markedly reducing your upfront investment and yielding long-term savings.
Conclusion
You've finally made it! Congratulations on surviving the grueling process of installing commercial solar PV panels on your own. Pat yourself on the back, take a selfie, and bask in the glory of saving thousands on your energy bill. Just kidding, you're probably exhausted, covered in sweat, and questioning your life choices. But hey, at least you learned something new, right? Now go enjoy your newly powered commercial property and try not to electrocute yourself.
Related Posts
-
Solar Energy Storage Options for Homes
When considering solar energy storage options for your home, you'll find several effective solutions. Battery systems...
-
Long-Term Cost Savings With Solar Panels
Investing in solar panels offers substantial long-term savings on energy costs. You'll benefit from federal tax credi...
-
Solar Energy Grants and Incentives for Homeowners
Maneuvering solar energy grants and incentives is essential for reducing your installation costs. You can benefit fro...


