
A Beginner's Guide to a DIY Home Solar Panel in 10 Steps
You're about to commence on an expedition to utilize the power of the sun and convert your home into a sustainable energy haven. To get started, you'll need to understand photovoltaic technology, assess your energy needs, and design a system that meets those needs. You'll need to choose the right materials, build a solar panel frame, and add a charge controller and inverter. Then, you'll mount the solar panel array, connect it to your home's electrical system, and test and maintain the system. With careful planning and execution, you can successfully install a DIY home solar panel system and start reaping the financial and environmental benefits; now, let's explore the specifics.
Key Takeaways
- Assess your energy needs by calculating daily energy usage in kilowatt-hours to determine the required system size.
- Choose the right solar cell type, considering efficiency, cost, and durability, and ensure proper connection for maximum energy output.
- Design a solar system that balances energy production with home aesthetics, complying with local regulations and safety precautions.
- Select durable materials, such as anodized aluminum or stainless steel, for the mounting hardware and frames to withstand outdoor conditions.
- Install a charge controller and inverter that meet safety standards, and ensure a safe and efficient connection to your home electrical system.
Understanding Solar Panel Basics
Your expedition to utilizing renewable energy begins with understanding the fundamentals of solar panels. Solar energy fundamentals revolve around capturing the sun's energy through photovoltaic technology. This technology converts sunlight into electrical energy, providing a clean and sustainable power source for your home.
To grasp the basics, you need to understand how solar panels work. Solar panels comprise multiple photovoltaic cells, made from semiconducting materials like silicon. These cells are arranged in a grid-like pattern to maximize energy absorption. When sunlight hits the cells, it excites the electrons, generating an electrical current.
This current is then channeled through an inverter, which converts the DC power into AC, making it usable for your home. It's essential to understand the components that make up a solar panel system, including the panels themselves, mounting hardware, and inverters.
Assessing Your Energy Needs
Now that you've grasped the solar panel basics, it's time to evaluate your energy requirements to determine the ideal solar panel system for your home. This assessment is essential in ensuring you install a system that meets your energy needs, reduces your utility bills, and maximizes your solar incentives.
Start by calculating your energy consumption. Review your past utility bills to determine your average daily energy usage in kilowatt-hours (kWh).
Consider your lifestyle habits, such as the number of people living in your home, the type and number of appliances you use, and your daily energy usage patterns. This information will help you determine the size of the solar panel system you need.
Choosing the Right Materials
Choosing the right materials for your DIY solar panel project is essential to guarantee peak performance, durability, and safety.
You'll need to select components that can withstand outdoor conditions, convert sunlight efficiently, and meet your energy requirements.
When evaluating material types, consider the following key factors:
-
Photovoltaic cells: Monocrystalline, polycrystalline, and thin-film cells vary in efficiency, cost, and durability. Monocrystalline cells offer high efficiency but are pricier, while thin-film cells are more budget-friendly but less efficient.
-
Mounting hardware: Anodized aluminum or stainless steel frames provide durability and corrosion resistance. Confirm your mounting system is compatible with your roof type and local building codes.
-
Inverters and charge controllers: These components convert DC power to AC and regulate energy flow. Look for high-efficiency models with built-in monitoring and safety features.
Conduct a cost comparison of different material types to find the best balance of performance, durability, and affordability for your project.
Designing Your Solar Panel System
How can you guarantee your DIY solar panel system maximizes energy production and integrates seamlessly with your home's electrical infrastructure? By carefully designing your system, you'll secure peak performance and compliance with local regulations.
Start by evaluating your home's energy efficiency, identifying areas for improvement to minimize energy waste. Next, analyze your roof's sunlight exposure, considering factors like shading, orientation, and slope to determine the ideal panel placement.
When selecting your solar panel layout, balance energy production with aesthetics, choosing a design that complements your home's design. You'll also need to decide on battery storage options, considering the benefits of grid connection against the independence of off-grid systems.
Research local regulations and confirm your design complies with relevant codes and standards. Don't forget to prioritize DIY safety precautions, taking necessary measures to prevent electrical shock and other hazards.
Building the Solar Panel Frame
You'll need to carefully consider the design of your solar panel frame, bearing in mind factors like the type of mounting system you'll use and the structural integrity of the entire structure.
When selecting a mounting system, you'll have options like roof-mounted, ground-mounted, and tracking systems, each with its own set of benefits and drawbacks.
As you build your frame, you'll need to perform regular structural integrity checks to guarantee it can withstand environmental stresses like wind and snow loads.
Frame Design Considerations
The solar panel frame serves as the backbone of your DIY solar panel, providing structural support and protection for the photovoltaic cells. When designing your frame, you'll need to take into account several key factors to guarantee peak performance and durability.
-
Aerodynamic design: A sleek, aerodynamic frame design will help reduce wind resistance and prevent damage from strong gusts.
-
Material durability and weather resistance: Choose materials that can withstand the elements, such as anodized aluminum or stainless steel, to make certain your frame lasts for years to come.
-
Frame aesthetics and heat dissipation: Reflect on a frame design that allows for airflow and heat dissipation, while also providing a clean, modern look that complements your home's exterior.
In addition to these factors, you'll also need to think about assembly techniques, cost estimation, and weight distribution to make certain your frame is both functional and cost-effective.
Mounting System Options
Three essential mounting system options are available for building your DIY solar panel frame: clamping, bonding, and screw-mounted systems. Each option has its pros and cons, and the choice largely depends on your specific installation requirements and material choices.
Clamping systems are ideal for roof mounts, offering a secure and adjustable fit. Bonding systems, on the other hand, provide a strong and durable bond between the frame and the mounting surface. Screw-mounted systems are suitable for ground mounts, pole mounts, and roof mounts, offering flexibility in angle adjustments.
When selecting a mounting system, consider the type of installation you're doing. Fixed mounts are suitable for installations where the solar panel remains stationary, while adjustable mounts allow for seasonal angle adjustments. Tracking systems can be used to optimize energy output by following the sun's movement.
DIY kits are available for each mounting system, providing installation tips and guidance. Regardless of the option you choose, make sure you follow proper installation procedures to guarantee a secure and efficient solar panel system.
Structural Integrity Checks
Before building your DIY solar panel frame, make certain it can withstand various environmental stresses by performing structural integrity checks. This vital step guarantees your solar panel system remains stable and functional over its lifespan.
You need to verify that your frame design can handle the weight of the solar panels, mounting hardware, and any additional components. This is known as load bearing capacity. Additionally, you must assess the frame's weather resistance to confirm it can withstand harsh outdoor conditions like rain, snow, and extreme temperatures.
Some key factors to evaluate during structural integrity checks include:
-
Load calculations: Calculate the total weight of your solar panel system and verify the frame can support it.
-
Material selection: Choose materials that provide the necessary strength, durability, and weather resistance for your frame.
-
Frame design: Optimize your frame design to minimize stress points and guarantee even weight distribution.
Installing Solar Cells and Wiring
Installing solar cells and wiring requires attention to detail and a solid understanding of electrical connections. You'll need to guarantee that your solar cells are properly connected to maximize energy output. There are two primary solar cell types: monocrystalline and polycrystalline. Monocrystalline cells are more efficient but also more expensive, while polycrystalline cells are more affordable but less efficient.
When it comes to wiring, you'll need to decide on a wiring technique. The most common techniques are series and parallel connections. Here's a breakdown of the two:
| Wiring Technique | Description |
|---|---|
| Series Connection | Cells are connected end-to-end, increasing voltage but not current. |
| Parallel Connection | Cells are connected side-by-side, increasing current but not voltage. |
| Series-Parallel Connection | A combination of series and parallel connections to balance voltage and current. |
Choose a wiring technique based on your system's voltage and current requirements. Properly connect your solar cells and wiring to guarantee a safe and efficient energy output.
Adding a Charge Controller and Inverter
As you've successfully connected your solar cells and wiring, you're now ready to add the essential components that will regulate and convert the energy generated by your solar panel system.
You'll need to install a charge controller, which guarantees that your battery is charged safely and efficiently. There are three main types of charge controllers: PWM (pulse width modulation), MPPT (maximum power point tracking), and shunt controllers. PWM controllers are simple and cost-effective, while MPPT controllers offer higher efficiency. Shunt controllers are ideal for smaller systems.
Next, you'll need to install an inverter, which converts the DC power from your solar panel system to AC power for your home. Look for an inverter with high efficiency (>95%) to minimize energy loss.
Consider the following key factors when selecting your charge controller and inverter:
- Compatibility with your solar panel system's voltage and current output
- Maximum power handling capacity
- Operating temperature range and environmental durability
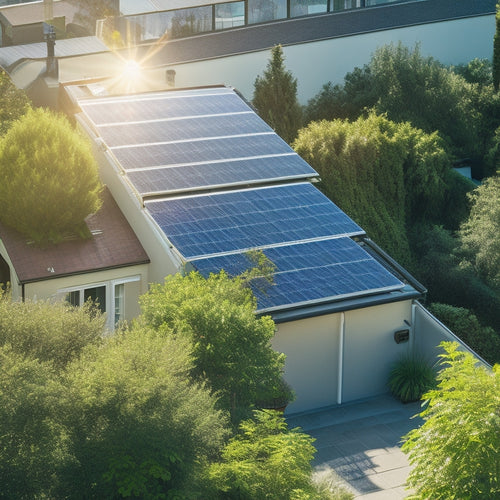
Mounting the Solar Panel Array
You're now ready to fasten your solar panel array to a mounting system, which will hold it firmly in place and guarantee peak energy harvesting.
Make certain the solar panel orientation is ideal for your location, considering the time of day and season. Weather considerations, such as high winds and heavy snowfall, must also be factored in when selecting a mounting system.
For installation safety, always follow the manufacturer's instructions and take necessary precautions to avoid electrical shock.
You can choose between ground mounting or installing on various roof types, including asphalt shingle, metal, and tile. Aesthetic integration is essential, so select a mounting system that complements your home's design.
Before installation, verify that your chosen system complies with local regulations and building codes.
Finally, consider maintenance access when positioning the array, guaranteeing easy cleaning and repairs.
Connecting to Your Home's Electrical
With your solar panel array securely mounted, attention turns to connecting it to your home's electrical system. This is a critical step that requires careful planning and execution to guarantee a safe and efficient energy supply.
You'll need to take into account local regulations, safety precautions, and the type of grid connection you want to establish.
- Familiarize yourself with local building codes and permits required for grid connection
- Verify your system meets safety standards, including proper grounding and surge protection
- Determine the type of grid connection: net metering, grid-tie with energy storage, or off-grid with energy storage
Remember to consult with local authorities and experts if you're unsure about any aspect of the connection process.
Proper connection won't only confirm your safety but also optimize energy production and reduce your reliance on the grid.
Testing and Maintaining Your System
You'll need to verify your system's performance regularly to guarantee it's generating power efficiently.
To do this, you'll perform routine system performance checks, monitor your daily energy output, and conduct quarterly deep cleaning of your panels.
System Performance Checks
Regular system performance checks are essential to guarantee your DIY solar panel system operates at its maximum potential.
You need to verify that your system is performing as expected, and identify any potential issues before they affect your energy production.
To ascertain system efficiency, you should monitor the following performance metrics:
-
Voltage and current output: Verify that the voltage and current output of your solar panels are within the specified range.
-
Energy production: Check the total energy produced by your system and compare it to the expected output based on your location and system size.
-
System temperature: Monitor the temperature of your solar panels and verify it's within the recommended range to prevent overheating and reduce energy production.
Daily Energy Monitoring
Track your system's daily energy production to catch any glitches before they snowball into major issues. This is essential in ensuring your DIY solar panel system operates at peak performance.
You'll need monitoring tools that provide real-time tracking of your energy consumption and production. This data analysis will help you identify usage patterns, optimize efficiency metrics, and pinpoint areas for improvement.
Set up system alerts to notify you of any anomalies or drops in performance. This proactive approach enables you to tackle issues promptly, minimizing downtime and maximizing energy output.
Regularly review your system's performance data to refine your energy usage and optimize your solar panel's efficiency. By doing so, you'll be able to make data-driven decisions to optimize your system's performance, ensuring you're generating the maximum amount of clean energy possible.
Effective daily energy monitoring is key to maintaining a high-performing DIY solar panel system that meets your energy needs.
Quarterly Deep Cleaning
As you've been monitoring your system's performance, you're now equipped to take a closer look at its physical components.
It's time for a quarterly deep cleaning, a vital step in maintaining your DIY home solar panel's efficiency. Think of it as a spring cleaning for your solar panel system, guaranteeing it runs smoothly and efficiently throughout the year.
During this deep cleaning, focus on the following areas:
-
Dust and debris removal: Use a soft-bristled brush or a specialized solar panel cleaning tool to remove any dust, dirt, or debris that may have accumulated on the panels. This will guarantee maximum energy absorption.
-
Inverter and component inspection: Inspect the inverter, charge controller, and other components for signs of wear, damage, or malfunction. Perform any necessary repairs or replacements to prevent system downtime.
-
Cable organization and securing: Organize and secure cables to prevent damage from weather, animals, or accidental disconnection. This deep organization will also improve the overall appearance of your system.
Frequently Asked Questions
Can I Install Solar Panels on a Metal or Clay Tile Roof?
You can install solar panels on a metal roof, but metal roof installation requires specialized brackets and flashing to guarantee a watertight seal. For clay tile roofs, you'll need to take into account additional structural support and waterproofing measures to avoid damage during installation.
Will DIY Solar Panels Void My Roof's Warranty?
When you install DIY solar panels, you risk voiding your roof's warranty, as improper installation can compromise the roof's structural integrity, leading to costly repairs and potential roof warranty implications, so it's essential to weigh the solar panel installation risks.
Can I Use Car Batteries for My Solar Panel System?
Ha! You think your car battery's got what it takes to power your pad? Think again! Car batteries lack the capacity for a solar system, and their efficiency would be laughable - you need deep-cycle batteries designed for renewable energy, not road trips.
Can I Install Solar Panels on a Rented Property?
You'll need to review your rental agreements and obtain your landlord's permission before installing solar panels on a rented property, ensuring you understand any restrictions or requirements to avoid potential disputes or lease violations.
Are DIY Solar Panels Eligible for Government Incentives?
You're wondering if DIY solar panels qualify for government goodies? Think of it like a seedling growing into a tree - with the right nurturing, it thrives! Yes, your DIY solar panels are eligible for incentive programs, including tax credits, which can help your investment bloom.
Conclusion
You've reached the finish line, and your DIY home solar panel system is now a shining light, illuminating your path to energy independence. Like a skilled designer, you've carefully crafted each component, ensuring a harmonious arrangement of energy production. As the sun rises, your system springs to life, generating power and satisfaction. You've tamed the wild energy of the sun, capturing its might to fuel your daily life. Congratulations, you're now a solar pioneer, blazing a trail towards a brighter, more sustainable future.
Related Posts
-
How Solar Panels Reduce Electricity Bills
Solar panels can drastically cut your electricity bills by utilizing sunlight to generate your own energy. This decre...
-
Long-Term Cost Savings With Solar Panels
Investing in solar panels offers substantial long-term savings on energy costs. You'll benefit from federal tax credi...
-
Solar Energy Solutions for Small Businesses
Switching to solar energy can be a game changer for your small business. You'll enjoy significant cost savings on mon...


