A 10-Step Guide to Residential Solar Panel Installation
You're about to initiate a life-changing expedition to utilize the power of the sun, and a successful residential solar panel installation requires a careful 10-step process to guarantee a safe, efficient, and cost-effective shift to renewable energy. You'll start by evaluating your solar readiness, choosing the right installer, and selecting the ideal system for your home. From there, you'll obtain necessary permits, prepare your roof, and install the mounting system and solar panels. Next, you'll focus on system safety and configuration, followed by performance evaluation and a final inspection and testing. Now, get ready to reveal the details of each step and uncover how to make your solar vision a reality.
Key Takeaways
- Assess your home's solar readiness by evaluating energy consumption patterns, roof size, and orientation, and identifying potential obstructions.
- Choose a qualified installer by researching certifications, licenses, and customer reviews, and verifying installation warranties and financing options.
- Select the ideal system by calculating energy needs, evaluating upfront costs and financing options, and choosing a system that complements your home's design.
- Obtain necessary permits by submitting detailed plans and specifications, paying permit fees, and anticipating review process duration.
- Ensure a safe and efficient installation by following manufacturer's instructions, local codes, and safety regulations, and conducting thorough inspections and testing.
Assessing Your Solar Readiness
Optimism about solar energy is rising, and for good reason: utilizing the sun's power can greatly reduce your carbon footprint and energy bills.
As you consider shifting to solar energy, it's crucial to assess your solar readiness. Start by evaluating your energy consumption patterns to determine how much energy you need to generate. Review your past utility bills to identify your average daily energy usage. This will help you determine the size of the solar panel system required to meet your energy needs.
Next, consider your roof's solar potential. Verify your roof receives sufficient sunlight throughout the day, and that there are no obstructions such as trees or buildings that could cast shadows.
You can use online tools to estimate your roof's solar potential based on its size, orientation, and location.
Choosing the Right Installer
Your solar panel installation expedition is about to take a significant turn. Choosing the right installer is vital to guarantee a successful and stress-free experience.
You'll want to research and evaluate potential installers based on their qualifications, such as certifications, licenses, and industry affiliations. Check online customer reviews and ask for referrals from friends, family, or neighbors who've installed solar panels.
Verify the installer's installation warranties, including the duration and scope of coverage. Also, inquire about financing options, such as loans or power purchase agreements, and compare the terms and conditions.
Obtain project timelines, including the installation schedule and expected completion date. Confirm the installer is familiar with local regulations and permitting requirements.
Ask about their installation experience, including the number of projects completed and the type of equipment used.
Selecting the Ideal System
As you've narrowed down your installer options, it's time to focus on selecting the ideal solar panel system for your residential needs. This decision will depend on several factors, including your energy needs, budget considerations, and aesthetic preferences.
| System Type | Efficiency Rating | Warranty Options |
|---|---|---|
| Monocrystalline | 20-22% | 25-year warranty |
| Polycrystalline | 15-18% | 20-year warranty |
| Thin-Film | 7-14% | 15-year warranty |
| Hybrid | 18-22% | 25-year warranty |
| Bifacial | 20-24% | 25-year warranty |
When selecting a system, consider the following:
- Energy needs: Calculate your energy usage to determine the required system size.
- Budget considerations: Evaluate the upfront cost, financing options, and potential energy savings.
- Aesthetic preferences: Choose a system that complements your home's design and style.
- Installation timelines: Plan for the installation process, including preparation and completion dates.
- Warranty options: Review the warranty terms and conditions to guarantee you're protected.
Obtaining Necessary Permits
Before installing your residential solar panel system, you'll need to secure necessary permits from local authorities. This step is essential to guarantee your system meets local building codes and regulations.
There are several permit types you'll need to obtain, including electrical, building, and zoning permits. The specific permits required may vary depending on your location and the type of solar panel system you're installing. Your solar panel installer or local government can provide guidance on the necessary permits.
The application process typically involves submitting your permit applications along with detailed plans and specifications of your solar panel system. You may need to provide information on the system's size, location, and electrical output. Additionally, you may need to pay permit fees, which can vary depending on the jurisdiction.
Once your applications are submitted, the local authorities will review them to confirm compliance with local regulations. This process can take several weeks to a few months, so be sure to plan accordingly.
After your permits are approved, you can proceed with the installation of your residential solar panel system.
Preparing Your Roof
With permits in hand, attention turns to preparing your roof for solar panel installation.
You'll need to assess your roof's condition, taking note of any damaged, rotten, or missing shingles, as well as signs of sagging or unevenness. Inspect the roofing materials, confirming they're compatible with the solar panels and can support their weight.
Consider the roof orientation, as a south-facing roof receives the most sunlight. Conduct a shading analysis to identify any obstacles, such as trees or neighboring buildings, that could impact energy production.
Verify the structural integrity of your roof, checking for any signs of weakness or damage. Confirm maintenance access is possible, as you'll need to clean and inspect the panels regularly.
Weather considerations, like high winds or heavy snowfall, should also be factored into your preparation.
Finally, identify your roof type, whether it's asphalt shingle, metal, or tile, as this will influence the installation process.
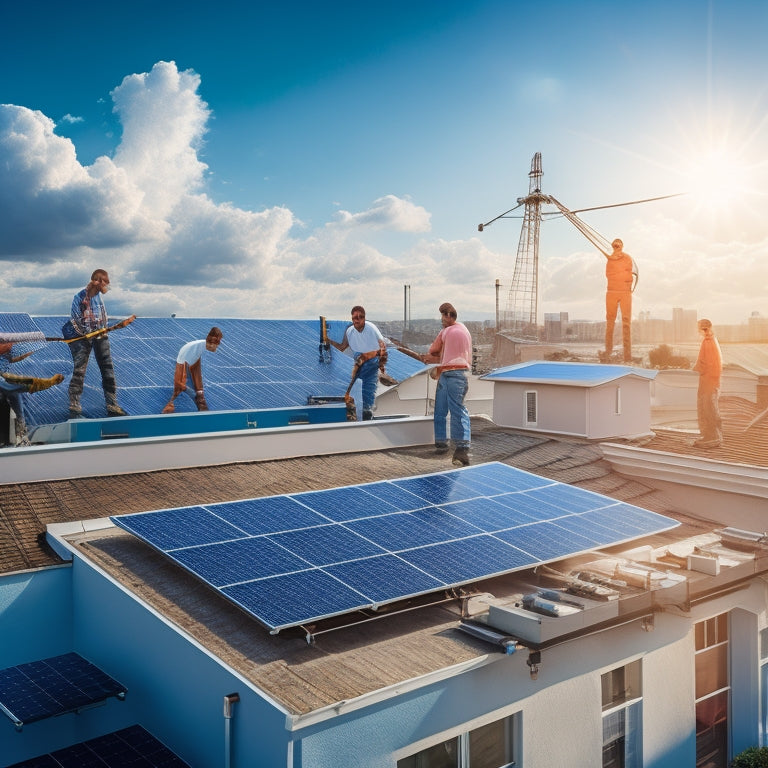
Installing the Mounting System
You'll need to attach a mounting system to your roof to secure the solar panels. This system will hold the panels in place, guaranteeing they're oriented at the best angle to maximize energy production.
There are several mounting types to choose from, including roof-ground mounts, ballasted mounts, and tracking mounts. Each type has its own set of benefits and drawbacks, so it's critical to select the one that best suits your roof's size, shape, and material.
To install the mounting system, you'll need a range of installation tools, including a drill, screwdriver, and wrench.
Start by marking the locations where the mounting brackets will be attached to the roof. Next, use your drill to create holes for the brackets, taking care not to damage the roofing material.
Then, secure the brackets to the roof using the appropriate screws or fasteners. Once the brackets are in place, you can attach the mounting rails, which will hold the solar panels.
Make certain to follow the manufacturer's instructions and local building codes to guarantee a safe and secure installation.
Connecting the Solar Panels
Once the mounting system is securely in place, it's time to connect the solar panels, an indispensable step that requires attention to detail to guarantee a safe and efficient energy production.
You'll need to verify the panels are properly wired, using approved wiring techniques to prevent electrical shock or fire hazards.
Begin by connecting the positive and negative terminals of each panel, following the manufacturer's instructions and industry standards. Make sure the wiring is securely fastened to the mounting system to prevent damage from wind or weather.
It's vital to maintain the correct panel orientation to maximize energy output, considering your location's latitude and the roof's pitch and azimuth. Confirm the panels are aligned to face the best direction, usually south in the northern hemisphere, and tilted at an angle that allows snow to slide off easily.
As you connect the panels, double-check the wiring and connections to verify they're secure and meet electrical codes.
Properly connecting the solar panels is fundamental to generating clean, reliable power for your home.
Final Inspection and Testing
As the solar panel installation nears completion, a thorough final inspection and testing phase becomes essential to confirm the system operates safely and efficiently. During this phase, you'll verify that all electrical connections are secure, and all components are properly mounted and configured.
You'll also inspect the system's grounding and bonding, verifying they meet safety regulations.
Next, you'll conduct a series of tests to evaluate system performance. This includes checking the voltage, current, and power output of each string and the entire system.
You'll also test the inverter's functionality, confirming it's operating within the manufacturer's specifications. Additionally, you'll inspect the electrical panel and circuit breaker to verify they're properly sized and configured.
The final inspection and testing phase is critical to confirming your solar panel system operates at peak levels, providing you with reliable and efficient power.
Frequently Asked Questions
Can I Install Solar Panels on a Metal or Clay Tile Roof?
You can install solar panels on a metal or clay tile roof, but consider metal roof considerations like structural integrity and waterproofing, and guarantee clay tile compatibility with specialized mounts that won't damage your roof.
How Long Does It Take to Pay off My Solar Panel Investment?
You'll likely break even on your solar panel investment in 5-7 years, considering the payback period, thanks to financial incentives like tax credits and rebates, which greatly reduce your upfront costs and enhance your long-term savings.
Are Solar Panels Covered Under My Homeowner's Insurance Policy?
Imagine a storm ravaging your neighborhood, leaving your solar panels shattered; you'll breathe easier knowing you're likely covered. Your homeowner's insurance policy typically includes insurance coverage for solar panels, but review your policy limits to guarantee you're adequately protected.
Can I Add More Panels to My Existing Solar Panel System?
You can add more panels to your existing system, but you'll need to guarantee panel compatibility and consider installation limitations, such as available roof space, electrical capacity, and local building codes, to avoid voiding your warranty or compromising performance.
Do Solar Panels Generate Electricity During a Power Outage?
As you utilize the power of the sun, you wonder: do solar panels generate electricity during a power outage? Not typically, but you can flip the script with backup battery systems, which store excess energy for later use, maximizing solar panel efficiency when the grid goes dark.
Conclusion
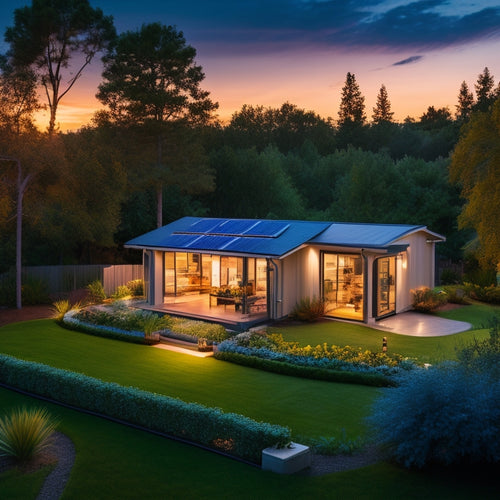
You've gone from darkness to light, literally. Just a few weeks ago, you were reliant on the grid, but now you're utilizing the power of the sun. Your residential solar panel installation is complete, and you're ready to reap the benefits of renewable energy. The expedition was long, but the payoff is immense. You've reduced your carbon footprint, increased your property value, and slashed your energy bills. Welcome to the bright side – where sustainability meets savings.
Related Posts
-

Evaluating Solar Power Options for Businesses
Evaluating solar power options for your business can greatly reduce energy costs and enhance sustainability. Start by...
-
Solar Power Backup Solutions During Outages
Solar power backup solutions guarantee you have reliable energy during outages, providing essential power when the gr...
-
Comparative Analysis of Top Solar Brands
To conduct a comparative analysis of top solar brands, focus on key metrics like durability, energy efficiency, and s...


