
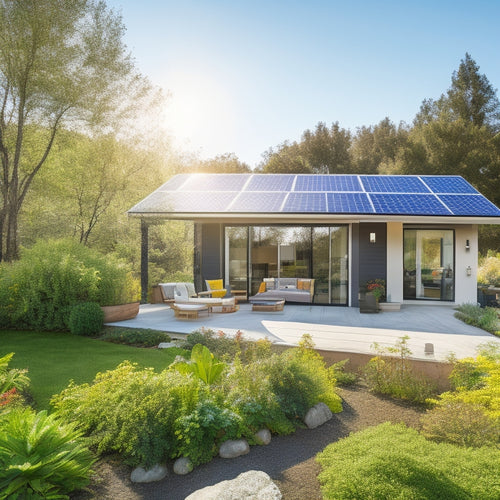
5 Essential Steps for Installing Solar Panels on Your House Roof
You'll need to follow five essential steps to successfully install solar panels on your house roof. First, assess your roof's solar potential by evaluating its orientation, shading analysis, and energy output estimation to determine its viability. Next, prepare your roof for installation by verifying its condition, removing debris, inspecting shingles, and maintaining structural integrity. Then, choose the right solar panels based on your energy needs, panel type, efficiency ratings, and certifications. After that, install the solar panel system, connecting panels to an inverter and ensuring adherence to local building codes. Finally, connect and inspect the system, verifying secure connections and monitoring performance - and that's just the beginning of maximizing your energy savings.
Key Takeaways
- Assess your roof's solar potential by evaluating orientation, shading, and energy output to determine feasibility and optimal panel placement.
- Prepare your roof for installation by verifying its condition, removing debris, inspecting shingles, and ensuring structural integrity.
- Choose the right solar panels by considering energy needs, panel type, efficiency ratings, certification, and warranty, and durability.
- Install the solar panel system by acquiring permits, mounting panels, connecting to the inverter, and implementing a monitoring system.
- Connect and inspect the system by verifying connections, performing visual inspections, monitoring performance, and conducting multimeter testing.
Assess Your Roof's Solar Potential
Your roof's solar potential is a critical factor in determining the feasibility of installing solar panels. To accurately assess it, you'll need to evaluate several key factors.
First, evaluate your roof's orientation. A south-facing roof receives the most sunlight, making it ideal for solar panels. East- and west-facing roofs can also work well, but north-facing roofs are generally not suitable.
Next, conduct a shading analysis to identify any obstructions that could impact energy production. This includes trees, buildings, and even roof features like skylights or vents. You can use online tools or consult with a solar professional to create a detailed shading report.
This report will help you determine the best placement for your solar panels and estimate their energy output.
A thorough assessment of your roof's solar potential will give you a clear understanding of whether solar panels are a viable option for your home. By evaluating roof orientation and conducting a shading analysis, you'll be able to make an informed decision about investing in solar energy.
Prepare Your Roof for Installation
A solid roofing foundation is vital for a successful solar panel installation. Before installing solar panels, you need to verify your roof is in good condition to support the added weight and withstand various weather conditions.
-
Remove any debris, such as leaves or branches, that may be obstructing your roof or gutters.
-
Inspect your roof for damaged, missing, or loose shingles, and replace them as needed.
-
Check for signs of wear around chimneys, vents, and skylights, and seal any gaps or cracks.
Proper roof maintenance is imperative to maintain the structural integrity of your roof.
You should also confirm that your roof is designed to support the weight of the solar panels, which can range from 2-5 pounds per square foot, depending on the type and quality of the panels.
Additionally, you may need to reinforce your roof's framing or install additional support structures to guarantee it can handle the added weight.
Choose the Right Solar Panels
Selecting the ideal solar panels for your installation involves considering several factors, including your energy needs, budget, and local building codes.
You'll want to determine how much electricity you need to generate and how much space you have available on your roof. This will help you decide on the size and number of solar panels required.
There are several solar panel types to choose from, each with its own advantages and disadvantages.
Monocrystalline silicon panels are highly efficient but expensive, while polycrystalline silicon panels are more affordable but less efficient. Thin-film panels are lightweight and flexible but have lower efficiency ratings.
You should also consider the efficiency ratings of each panel, which range from 15% to over 20%. Higher efficiency ratings mean more power per hour of sunlight.
When evaluating solar panels, look for certifications from reputable organizations like UL (Underwriters Laboratories) or IEC (International Electrotechnical Commission).
These guarantee the panels meet safety and performance standards. Additionally, consider the warranty and durability of the panels, as well as the manufacturer's reputation and customer support.
Install the Solar Panel System
With your solar panels chosen, it's time to bring your system to life by installing the solar panel system on your roof.
The installation process requires careful planning and execution to guarantee a safe and efficient system.
Before you begin, make sure you have obtained the necessary installation permits from your local authorities. This is vital to avoid any legal issues or penalties.
Here's what the installation process entails:
- Mounting the solar panels on your roof using a racking system, which varies depending on your roof type and solar panel types.
- Connecting the solar panels to an inverter, which converts DC power to AC power for your home's electrical system.
- Installing a monitoring system to track your energy production and identify any potential issues.
Remember to follow the manufacturer's instructions and local building codes to guarantee a successful installation.
Connect and Inspect the System
You've completed the installation of your solar panel system, and now it's time to connect and inspect the system to verify it's functioning as expected. This critical step guarantees the system performance meets your energy requirements and adheres to safety considerations.
Begin by connecting the solar panels to the inverter, which converts DC power to AC power usable in your home. Next, connect the inverter to the electrical panel and the grid tie. Confirm all connections are secure and meet the manufacturer's specifications.
Perform a visual inspection of the system, checking for signs of damage, wear, or corrosion. Verify that all components are properly grounded and that the system is properly configured.
Turn on the system and monitor its performance, checking the inverter's display for any error messages or anomalies. Use a multimeter to measure the voltage, current, and power output of the system. Compare these values to the manufacturer's specifications to verify the system is operating within the expected parameters.
Frequently Asked Questions
Can I Install Solar Panels on a Metal or Tile Roof?
You can install solar panels on a metal or tile roof, but you'll need to take into account specific requirements for metal roof installation, such as clamping systems, and tile roof considerations, like waterproofing and structural integrity, to guarantee a secure and efficient setup.
Will Solar Panels Increase My Property Taxes?
You'll be interested to know that 80% of homeowners see a significant increase in property value after installing solar panels. Now, about property tax implications: in most states, a solar panel appraisal won't increase your property taxes, but it's crucial to check local laws.
Can I Install Solar Panels Myself to Save Money?
You're considering a DIY installation to reap cost-saving benefits, but be aware that it can be complex and potentially dangerous, requiring electrical and roofing knowledge, so assessing the risks against the savings is essential.
How Do I Clean and Maintain My Solar Panels?
You're not alone in neglecting solar panel cleaning, as 25% of panels are underperforming due to dirt and grime. To maximize energy output, you'll want to clean your panels every 6 months and follow maintenance tips like inspecting for loose connections and debris.
Are Solar Panels Covered by My Homeowner's Insurance?
You'll be glad to know that your homeowner's insurance likely covers solar panels, but review your policy to confirm; also, check your solar panel warranties, as they often overlap with insurance policy coverage, ensuring you're fully protected.
Conclusion
You've finally reached the finish line! Now that you've installed your solar panel system, you're ready to reap the benefits of utilizing the sun's energy. Don't count your chickens before they hatch, though - guarantee a smooth shift by keeping an eye on your system's performance and addressing any hiccups promptly. With proper maintenance, you'll be generating clean energy and saving money in no time. Pat yourself on the back - you've taken a significant step towards a sustainable future!
Related Posts
-
Green Home Improvements Using Solar Power
Investing in solar power alters your home into a sustainable haven while slashing energy costs. You can greatly reduc...
-
Off-Grid Solar Solutions for Eco-Conscious Businesses
Off-grid solar solutions offer you a path to both sustainability and substantial cost savings. By adopting these syst...
-
Green Energy Alternatives for Independent Living
To enhance your independent living, consider green energy alternatives like solar panels and wind turbines. These opt...


