10 Essential Steps for Roof Solar Panel Installation
You'll need to complete 10 essential steps to successfully install solar panels on your roof. First, assess your roof's condition and size to guarantee it can support the panels, then choose the right ones for your energy needs. Next, prepare the roof surface by cleaning and repairing it, and install roof anchors and mounts. Lay out the solar panel array, considering orientation and shading. Run electrical wiring and conduit, and install inverters and monitoring systems. Connect to the electrical grid, and inspect and test the system to verify it's safe and efficient. By following these steps, you'll be well on your way to utilizing the power of solar energy - and that's just the beginning of your expedition.
Key Takeaways
- Assess the roof's condition, size, and structure to ensure it can support the weight of solar panels and receive sufficient sunlight.
- Select the right solar panels based on efficiency, durability, and warranty, and lay out the array to maximize energy production.
- Install roof anchors and mounts securely, and connect solar panels to inverters correctly to ensure safe and efficient energy transmission.
- Set up electrical wiring and conduit properly, and install inverters in a suitable location to minimize energy losses and ensure safety.
- Monitor the system's performance regularly to identify potential issues, and test the system to ensure it meets safety and interconnection standards.
Assess Roof Condition and Size
Your roof's surface is the foundation of your solar panel installation, so it's vital to evaluate its condition and size carefully. You need to guarantee that your roof structure is sturdy enough to support the weight of the solar panels and withstand various environmental factors like wind, rain, and snow.
A thorough inspection will help you identify any damaged, rotten, or missing shingles, curled or buckled shingles, and signs of animal infestation or wear around chimneys, vents, and skylights.
When reviewing the size of your roof, consider the available space for solar panels and the amount of sunlight exposure your roof receives. Ideally, you want a roof that receives direct sunlight for at least five hours a day.
Keep in mind that obstructions like trees, buildings, or other structures can affect sunlight exposure, so it's important to evaluate the surrounding environment as well.
Choose the Right Solar Panels
Several factors come into play when selecting the right solar panels for your installation. You need to take into account the type of solar panel, its efficiency rating, and its compatibility with your roof's size and condition.
When choosing the right solar panels, take into account the following:
-
Solar panel types: Monocrystalline, polycrystalline, and thin-film solar panels each have their own advantages and disadvantages. Monocrystalline panels are the most efficient but also the most expensive.
-
Efficiency ratings: Look for solar panels with high efficiency ratings (measured in percentage) to maximize energy production. Higher efficiency ratings translate to more power per hour of sunlight.
-
Wattage: Choose solar panels with the right wattage to meet your energy needs. A higher wattage means more power output, but it also increases the cost.
- Durability and warranty: Select solar panels with a long lifespan (25 years or more) and an extensive warranty that covers defects and performance.
Prepare the Roof Surface
Now that you've selected the right solar panels for your installation, it's time to prepare the roof surface to guarantee a secure and efficient installation. A clean and well-prepared roof surface is essential for a successful solar panel installation.
Before starting the installation, you need to assess your roof's condition. This involves:
| Task | Description | Importance |
|---|---|---|
| Roof Cleaning | Remove debris, dirt, and moss to guarantee a smooth installation | High |
| Surface Preparation | Check for damaged or missing shingles, and repair or replace them | High |
| Moisture Assessment | Inspect the roof for signs of water damage or leaks | High |
| Structural Integrity | Verify the roof's structural integrity to support the solar panels | Critical |
| Visual Inspection | Conduct a thorough visual inspection to identify potential issues | High |
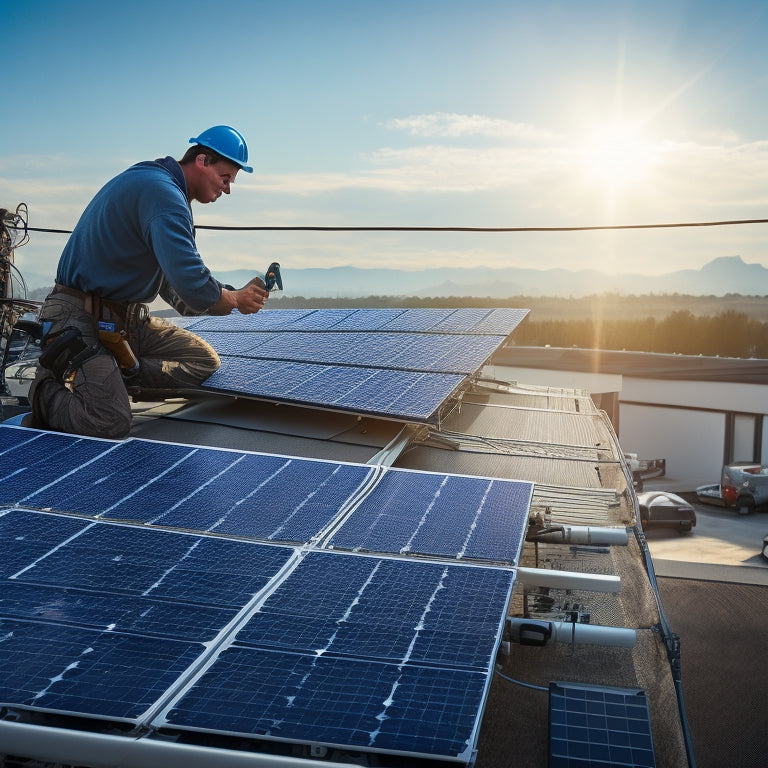
Install Roof Anchors and Mounts
Frequently, the installation of roof anchors and mounts marks a critical milestone in the solar panel installation process.
At this stage, you're ensuring the solar panels will be securely fastened to your roof, maintaining roof safety and withstanding various environmental conditions.
To accomplish this, you'll need the right installation tools.
Here's a rundown of what you'll need to do:
-
Select the appropriate anchors: Choose anchors that are compatible with your roof type and can support the weight of the solar panels.
-
Drill into the roof: Use a drill bit specifically designed for your roof material to create holes for the anchors.
-
Secure the mounts: Attach the mounts to the anchors, ensuring they're level and securely fastened.
- Verify the installation: Double-check that the anchors and mounts are properly installed to prevent any potential risks or damage.
Lay Out the Solar Panel Array
You'll need to plan the array configuration to guarantee maximum energy output, considering factors like roof size, obstructions, and local building codes.
A well-thought-out panel placement strategy will also help you avoid shading issues and optimize energy production.
Array Configuration Planning
Configuring the solar panel array involves strategically planning its layout to maximize energy production while guaranteeing a safe and efficient installation.
You'll need to evaluate several factors to optimize your system's performance.
To get started, evaluate the following key aspects:
-
Solar array orientation: Determine the ideal orientation of your solar panels to capture the most sunlight throughout the day.
-
Shading analysis: Identify potential shading obstacles, such as trees or buildings, and plan your array accordingly to minimize energy losses.
-
Energy production estimation: Estimate your energy production based on your location, array size, and system efficiency to ascertain you're meeting your energy needs.
- System efficiency optimization: Choose the right mounting structure type, such as roof-mounted or ground-mounted, to optimize system efficiency and reduce installation costs.
Panel Placement Strategy
With your array configuration plan in hand, it's time to strategically lay out the solar panel array to maximize energy production and guarantee a safe installation. You'll need to evaluate factors like ideal sun exposure, shading analysis, and roof obstacles to ascertain your panels are positioned for peak energy harvesting.
To achieve this, divide your roof into sections, keeping in mind any obstructions like vents, skylights, or chimneys. Identify the areas with the most favorable sun exposure and allocate your panels accordingly. Be mindful of potential shading from surrounding trees, buildings, or roof features.
| Panel Placement Considerations | Optimization Strategies |
|---|---|
| Roof Obstacles | Divide roof into sections, allocate panels around obstacles |
| Shading Analysis | Identify shading patterns, prioritize unshaded areas |
| Sun Exposure | Position panels in areas with ideal sun exposure |
| Panel Orientation | Align panels to maximize energy production |
| Structural Integrity | Verify secure mounting and anchoring to withstand wind and weather |
Connect Solar Panels to Inverters
You'll need to verify the inverter is compatible with your solar panel array's voltage and current output before making the connection.
Next, you'll connect the solar panels directly to the inverter using DC connectors, confirming to match the positive and negative terminals.
This direct DC connection allows the inverter to convert the DC power from the solar panels to AC power for your electrical system.
Inverter Compatibility Check
During this essential stage, every solar panel installation requires a thorough inverter compatibility check to guarantee seamless integration.
You need to confirm that your inverter is compatible with your solar panels to maximize energy production and prevent potential system failures.
When selecting an inverter, consider the following key factors:
-
Inverter types: Choose from string inverters, microinverters, or power optimizers, depending on your system's requirements and layout.
-
Efficiency ratings: Opt for an inverter with a high efficiency rating (>95%) to minimize energy losses and maximize your ROI.
-
DC input voltage range: Verify the inverter's DC input voltage range matches your solar panel array's voltage output.
- Certifications and compliance: Verify that the inverter meets local and national electrical codes, such as UL and IEEE certifications.
Direct DC Connection
Your solar panel array is now ready to be connected to the inverter, marking an essential step in the installation process. This direct DC connection enables the efficient transfer of solar energy from your panels to the inverter, which converts it into usable alternating current (AC) power for your home or business.
The direct current advantages of this connection include:
| Advantage | Description |
|---|---|
| Higher Efficiency | Direct DC connection minimizes energy loss, guaranteeing maximum solar energy efficiency |
| Simplified Installation | Fewer components and connections reduce installation complexity and cost |
| Enhanced Safety | Reduced risk of electrical shock and fire hazards due to lower voltage and current |
When connecting your solar panels to the inverter, ascertain the DC cables are securely fastened, and the connectors are tightened properly. Verify the DC voltage and current match the inverter's specifications to avoid damage or inefficient operation. By following these steps, you'll maximize your solar energy efficiency and enjoy a safe, reliable, and efficient power supply.
Run Electrical Wiring and Conduit
The electrical wiring and conduit installation process marks a critical phase of your solar panel setup, as it enables the safe and efficient transmission of electrical power from the panels to your home's electrical system.
To guarantee wiring safety, you'll need to select the right conduit types for your installation. Here's what you should consider:
-
Choose the correct conduit size: Select a conduit that can accommodate the required wire size and meets local electrical codes.
-
Select the right conduit material: Options include PVC, metal, or flexible conduit, each with its own benefits and limitations.
-
Plan for proper wire routing: Route wires to minimize damage, abrasion, and exposure to environmental elements.
- Comply with local electrical codes: Verify your wiring and conduit installation meets local regulations and industry standards.
Install Inverters and Monitoring
You'll now focus on installing the inverters and monitoring system, which convert DC power from the solar panels to AC power for your home.
When determining where to place the inverters, you'll need to evaluate factors like accessibility, temperature, and proximity to the main electrical panel.
You'll also set up the monitoring system to track your solar panel performance and identify any potential issues.
Inverter Placement Options
During the solar panel installation process, inverters play an essential role in converting DC power into AC power that's usable in homes and businesses.
When it comes to inverter placement, you'll need to evaluate several factors to guarantee peak performance, safety, and maintenance.
You'll want to choose an inverter location that's easily accessible for maintenance and troubleshooting, while also protecting it from environmental factors like heat, moisture, and physical damage.
Here are some inverter placement options to evaluate:
- Wall-mounted inverters: These are ideal for small to medium-sized systems and can be installed indoors or outdoors, depending on the inverter type and brand.
- Ground-mounted inverters: Suitable for larger systems, these inverters are typically installed on a concrete pad or rack, providing easy access for maintenance.
- Roof-mounted inverters: These inverters are installed directly beneath the solar panels, reducing DC wiring losses and increasing inverter efficiency.
- Inverter enclosures: These are weather-resistant enclosures that house the inverter and other electrical components, providing an additional layer of protection and safety.
Remember to consult with a licensed solar installer to determine the best inverter placement option for your specific solar panel installation.
Monitoring System Setup
Once your inverter is securely in place, it's time to set up the monitoring system that will track your solar panel installation's performance. This system is essential for optimizing your energy production and identifying potential issues.
You'll need to install monitoring software that provides data analytics and performance metrics, such as energy output, voltage, and temperature. This software will enable you to receive system alerts and notifications in case of any malfunctions or underperformance.
Through a user-friendly interface, you'll have remote access to monitor your system's performance in real-time, making it easier to identify and address any installation challenges that may arise.
Regular monitoring will also help you stay on top of maintenance tips, ensuring your system operates at peak efficiency. With a well-set-up monitoring system, you'll be able to maximize your energy production, reduce downtime, and extend the lifespan of your solar panel installation.
Connect to the Electrical Grid
With the solar panel system up and running, it's time to connect it to the electrical grid. This critical step allows you to tap into the power grid and start generating electricity for your home or business.
To connect to the grid, you'll need to meet the grid interconnection requirements, which vary by utility company and region. You'll need to submit an application to the utility company, providing detailed information about your solar panel system, including its size, capacity, and installation details.
Here are the key steps to connect to the electrical grid:
-
Submit an application: Provide detailed information about your solar panel system to the utility company, including its size, capacity, and installation details.
-
Obtain utility approval: Wait for the utility company to review and approve your application, which may involve an on-site inspection.
-
Install a grid tie inverter: Connect your solar panel system to the grid using a grid tie inverter, which synchronizes your system's output with the grid's frequency and voltage.
- Schedule a final inspection: Once the installation is complete, schedule a final inspection with the utility company to verify your system meets all safety and interconnection requirements.
Inspect and Test the System
Now that you've successfully connected your solar panel system to the electrical grid, it's time to verify it's functioning safely and efficiently. This vital step guarantees your system meets safety regulations and operates at peak energy efficiency.
Begin by inspecting the entire system, checking for any signs of damage or wear. Verify that all electrical connections are secure and meet safety standards.
Next, test the system's performance to identify any potential issues. Check the energy output, monitoring system performance, and review maintenance requirements to make sure you're aware of any necessary upkeep.
This step also allows you to assess the system's environmental impact and energy efficiency. Additionally, review your financing options and warranty coverage to confirm you're protected in case of any issues.
Frequently Asked Questions
Can I Install Solar Panels on a Metal Roof?
You can install solar panels on a metal roof, leveraging its benefits like durability and ease of installation, but be prepared to overcome challenges like ensuring secure fastening and avoiding electrical conductivity issues.
Are Solar Panels Resistant to Hail and Extreme Weather?
You're right to wonder if solar panels can withstand harsh weather; have confidence, they're built to resist hail damage and extreme conditions, boasting impressive weather durability that guarantees consistent power generation, even in tough climates.
Can I Install Solar Panels Myself to Save Money?
Like a skilled builder, you're considering a DIY solar project to save a pretty penny, but don't get ahead of yourself - without proper installation tips, you might end up with a system that's more glitch than green energy goldmine.
Will Solar Panels Affect My Roof's Warranty?
You'll want to review your roof's warranty before installing solar panels, as improper installation can void it; follow solar installation guidelines to avoid roof warranty implications, ensuring a smooth and successful integration of renewable energy into your home.
Can I Add More Solar Panels Later if Needed?
You'll join the 70% of homeowners who upgrade their solar systems within 5 years; yes, you can add more panels later if needed, allowing for future expansion and increased solar capacity to meet your growing energy demands.
Conclusion
As you flip the switch, the hum of electricity coursing through your home's veins is music to your ears. You've successfully captured the sun's energy, and your roof is now a power-generating powerhouse. The sleek solar panels blend seamlessly into your roof's surroundings, a proof of your eco-friendly savvy. With each kilowatt-hour generated, you're reducing your carbon footprint and saving on energy bills. Pat yourself on the back – you've just joined the clean energy revolution!
Related Posts
-

How to Finance Home Solar Panels
Financing home solar panels offers several strategies to lighten your initial costs while maximizing long-term benefi...
-
Long-Term Cost Savings With Solar Panels
Investing in solar panels offers substantial long-term savings on energy costs. You'll benefit from federal tax credi...
-

Eco-Friendly Home Design Ideas for Beginners
If you're starting your eco-friendly home design expedition, focus on sustainable materials like recycled wood or rec...


