
How to Make No-Sew Sock Worms – Video Tutorial
One of my very favourite things about crafting with my kids is that it’s so often an opportunity to do a little bit of upcycling as well as a chance to get creative and spend time with them. Repurposing and reusing things that might otherwise be thrown away or that are just taking up space unused around my house is one of my very favourite things to do because it makes me feel very satisfied in how I’m using things! That’s why, when my youngest grew out of some socks and had to go up a size, I started trying to think of cute ways to turn those old socks, which were still in good condition, into fun crafts. That’s how we found ourselves making these bendy little sock caterpillars together!
I’ve always loved seeing other crafty moms’ ideas and watching tutorials about how they created certain crafts with their kids, so I’m always tempted to document and share what we make as well. I like the idea of sharing those things so everyone can try them out, which is why I created a small tutorial for these caterpillars. Check out these step by step instructions complete with photos! If you’d rather follow along with a video tutorial instead of written words, scroll to the bottom of this post to find just what you’re looking for.
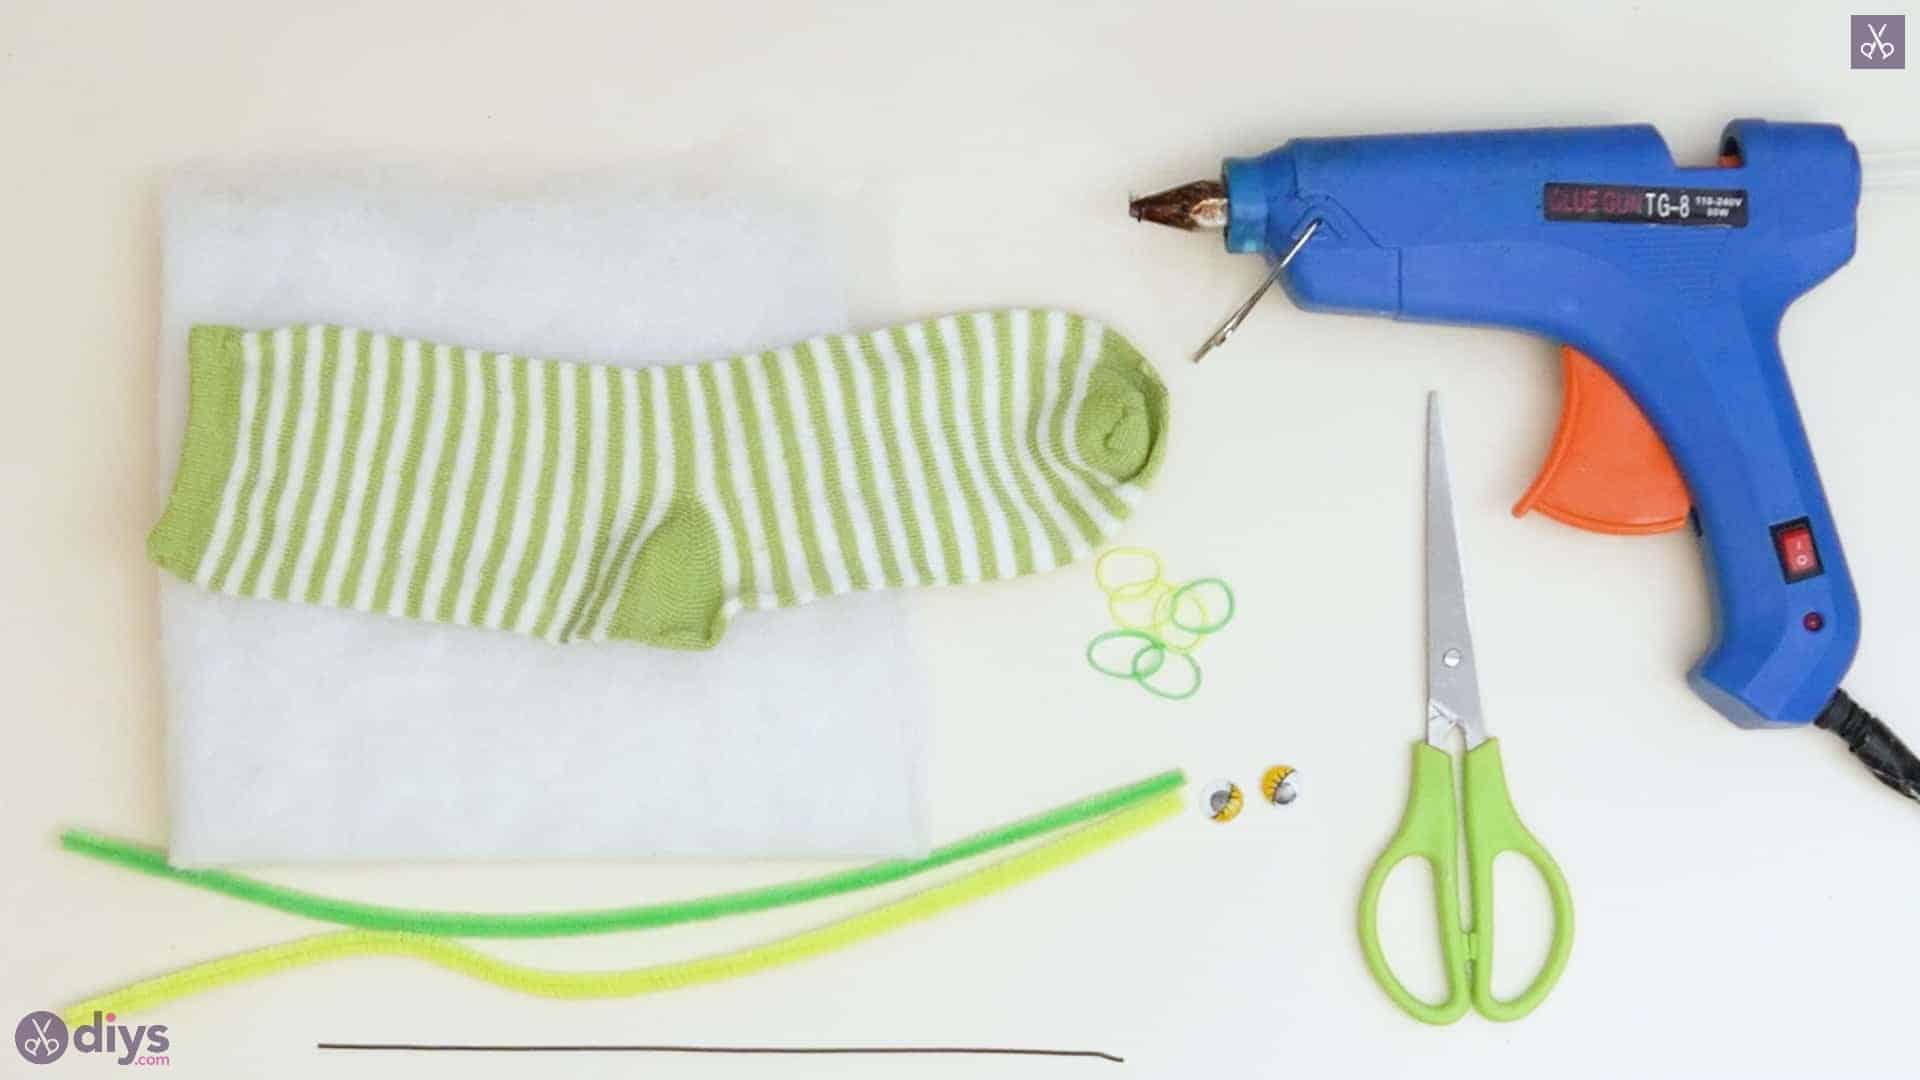
For this project, you’ll need:
- Socks
- Polyester Stuffing
- Crafting wire
- Green pipe cleaner
- Small hair elastics
- Hot glue
- Scissors
- Googly eyes
Step 1:
Gather your materials!
Step 2:
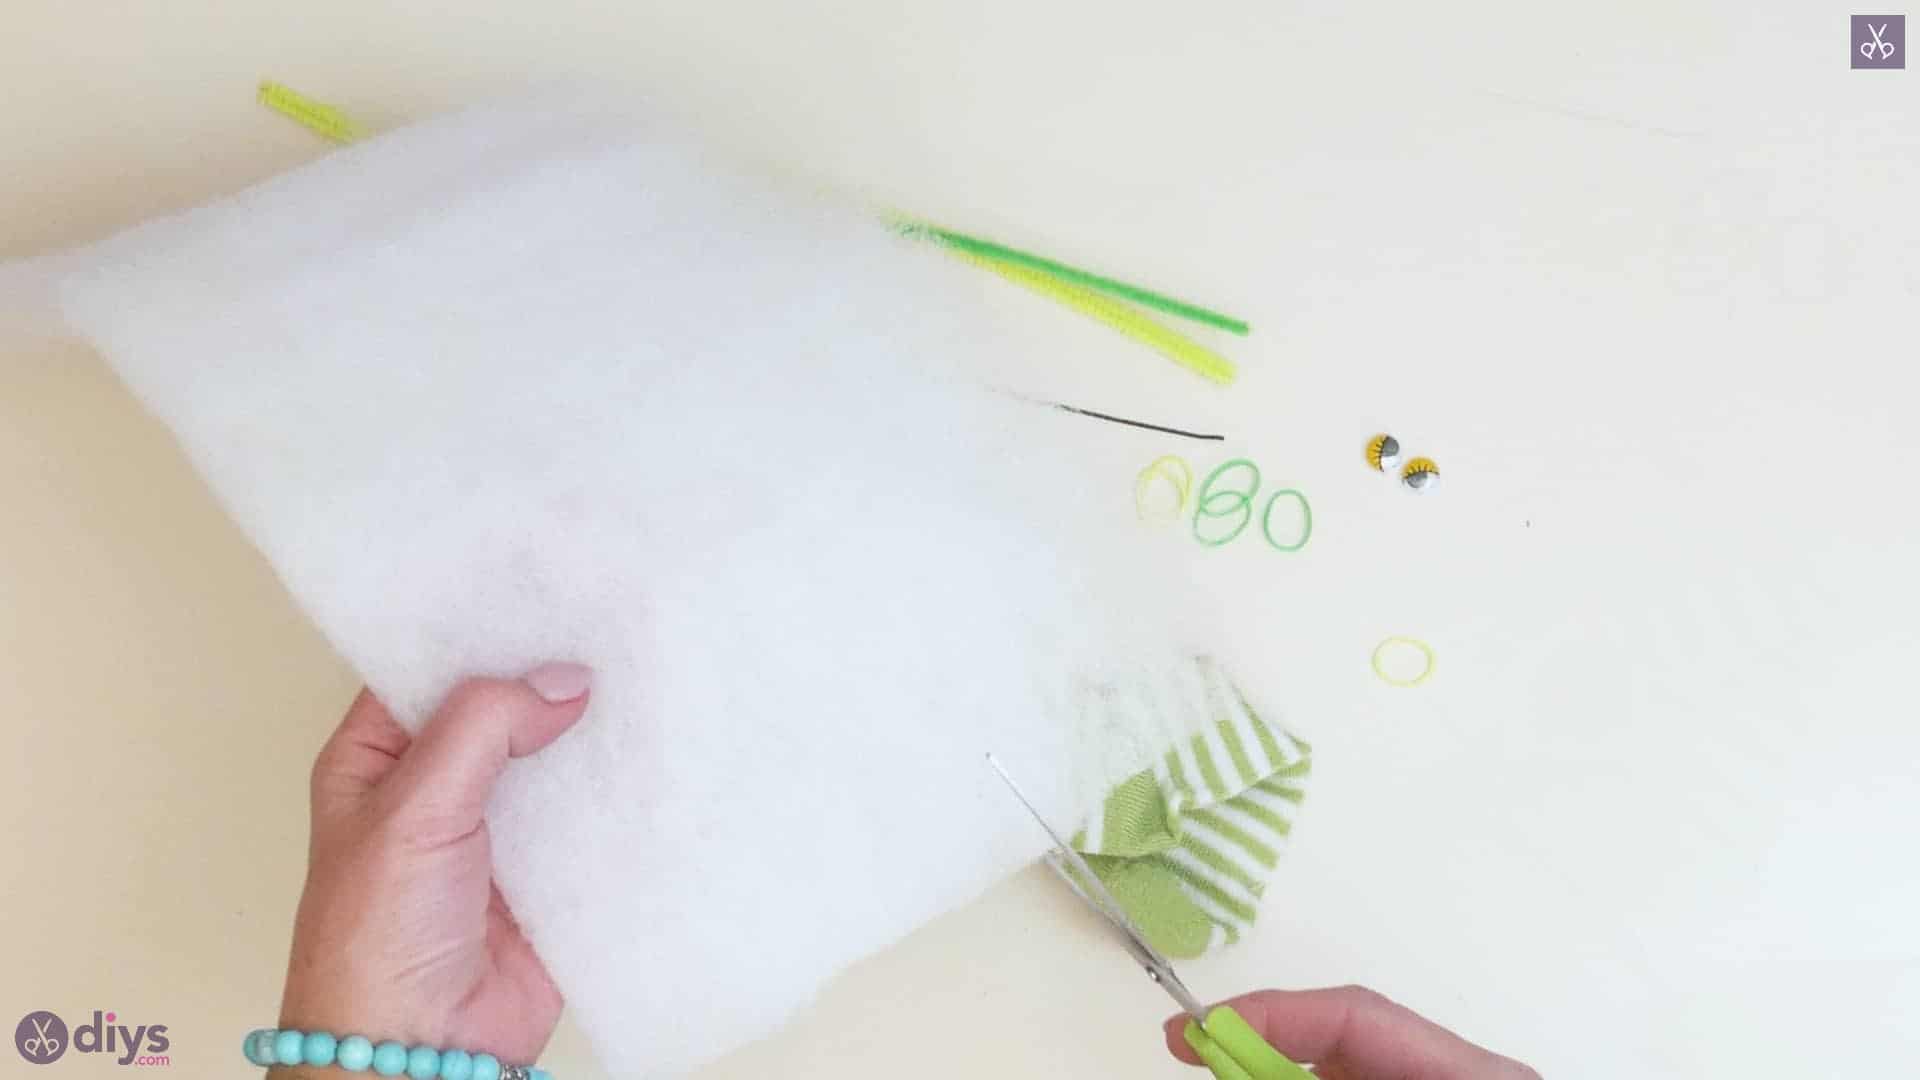
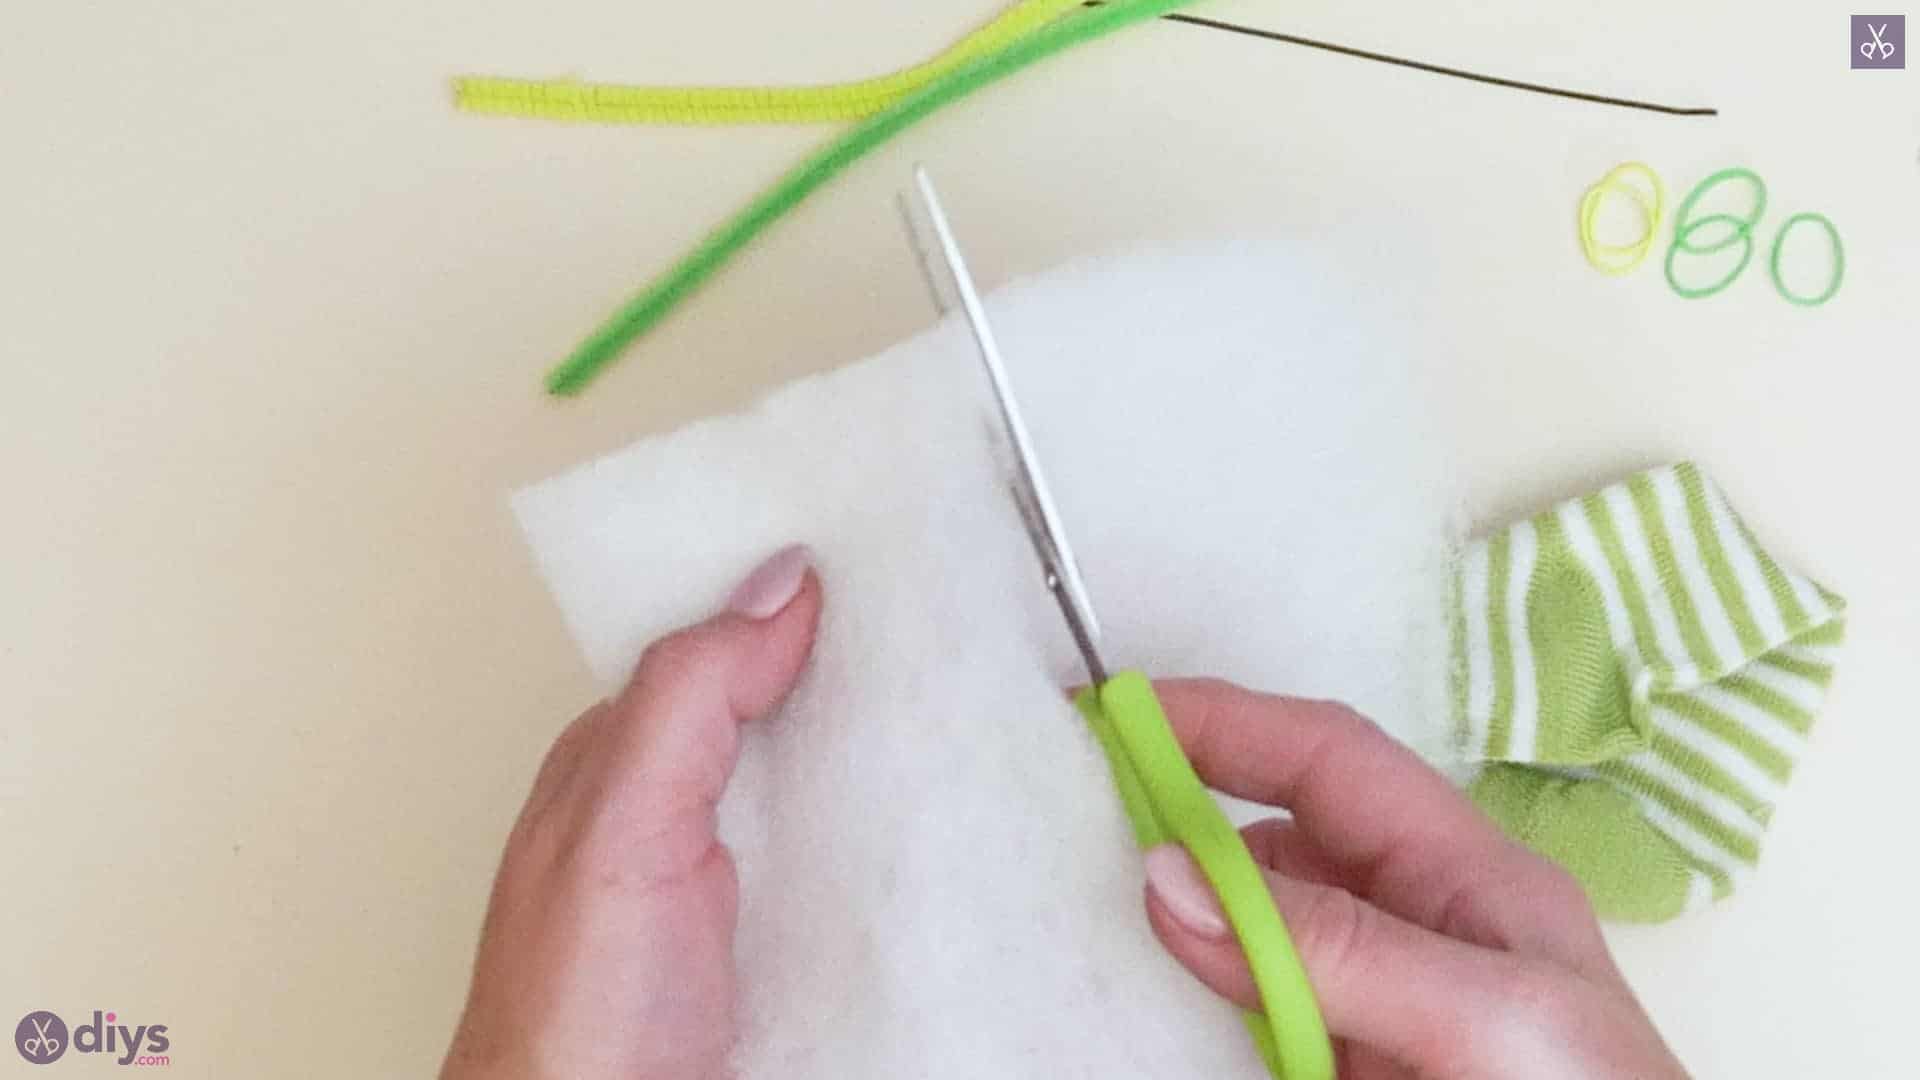
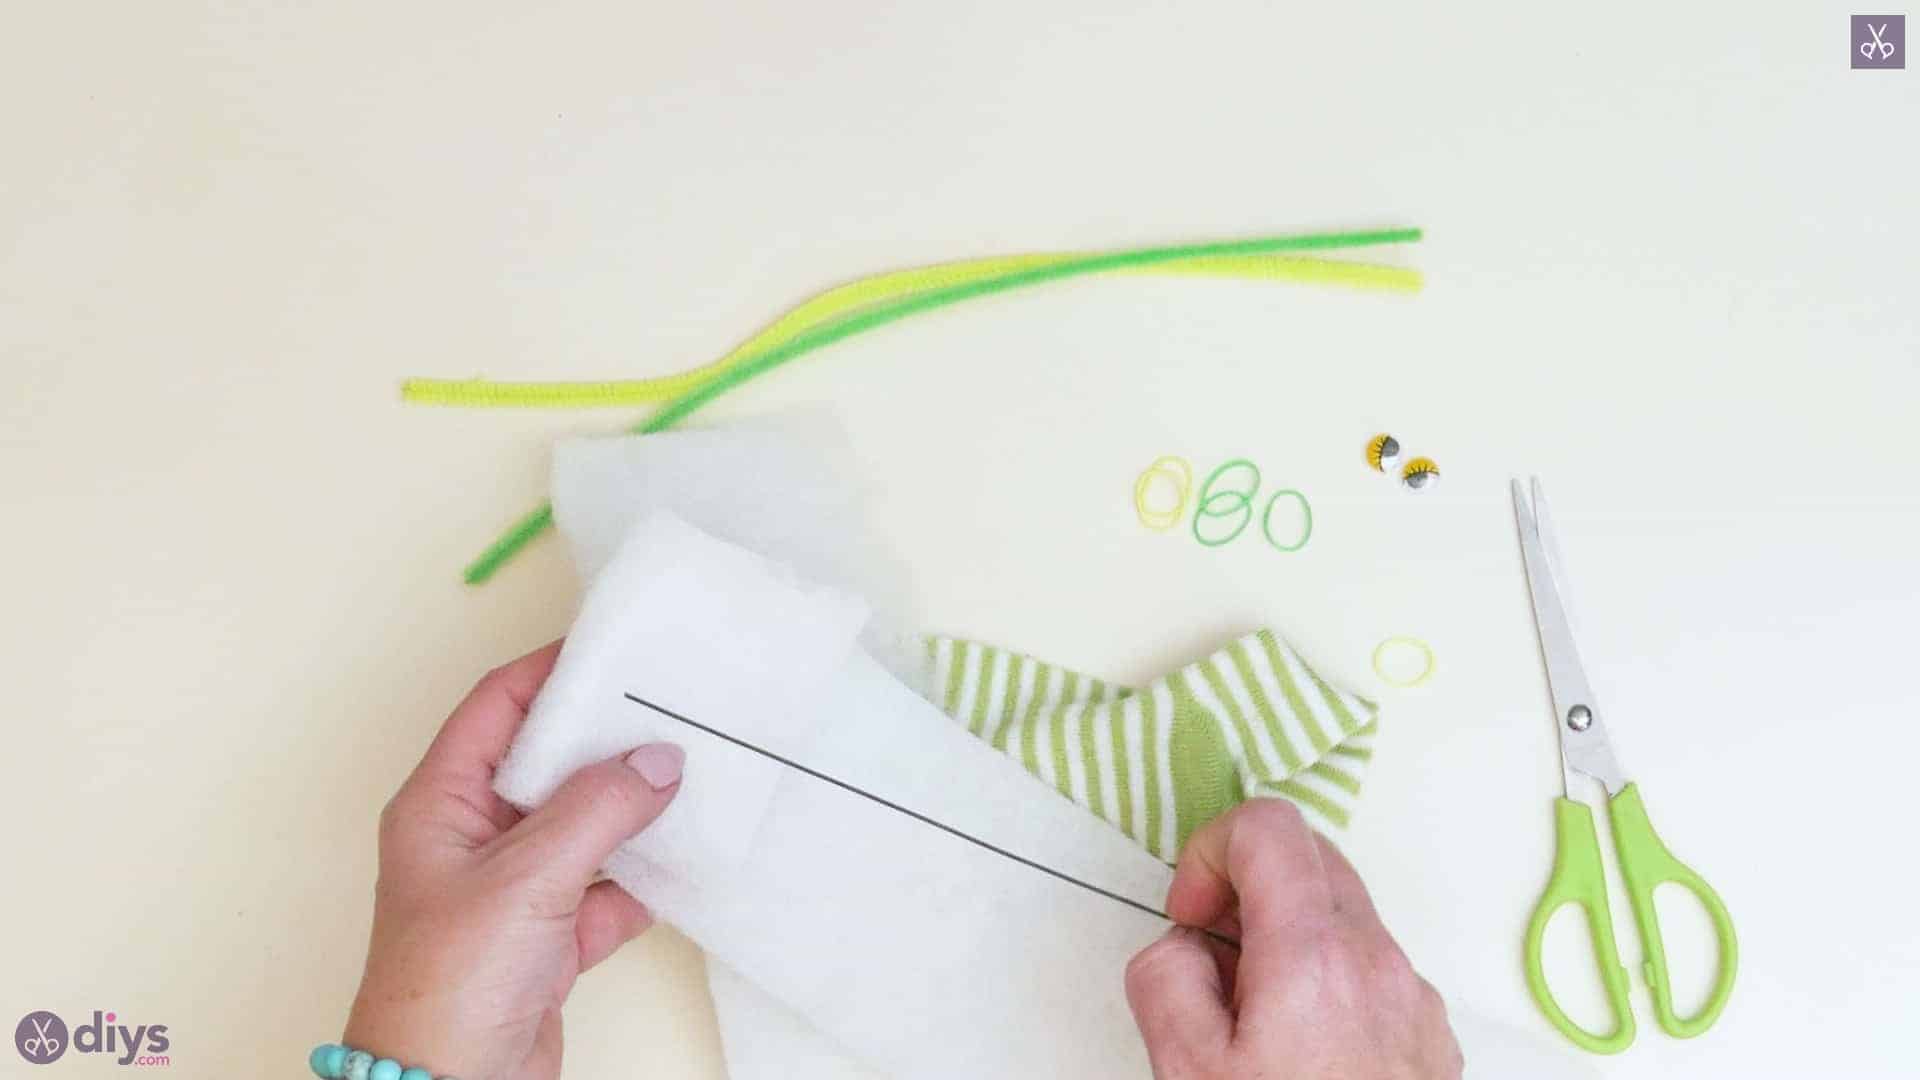
Cut your sheet of stuffing down the middle from one short edge to the other so you have two thinner rectangles. Fold one end of the first one over an inch and rest the end of your crafting wire (mine was pre-cut to a length of five inches but you can cut a piece that long here if you need to)into the folded part, a little lower down than the crease. You want to cut a length that is shorter than your stuffing piece’s length, which should be a touch shorter than the full length of your sock. Now, wrap your second rectangle from the stuffing sheet around this first one so the piece of wire is fully covered and nestled between the two.
Step 3:
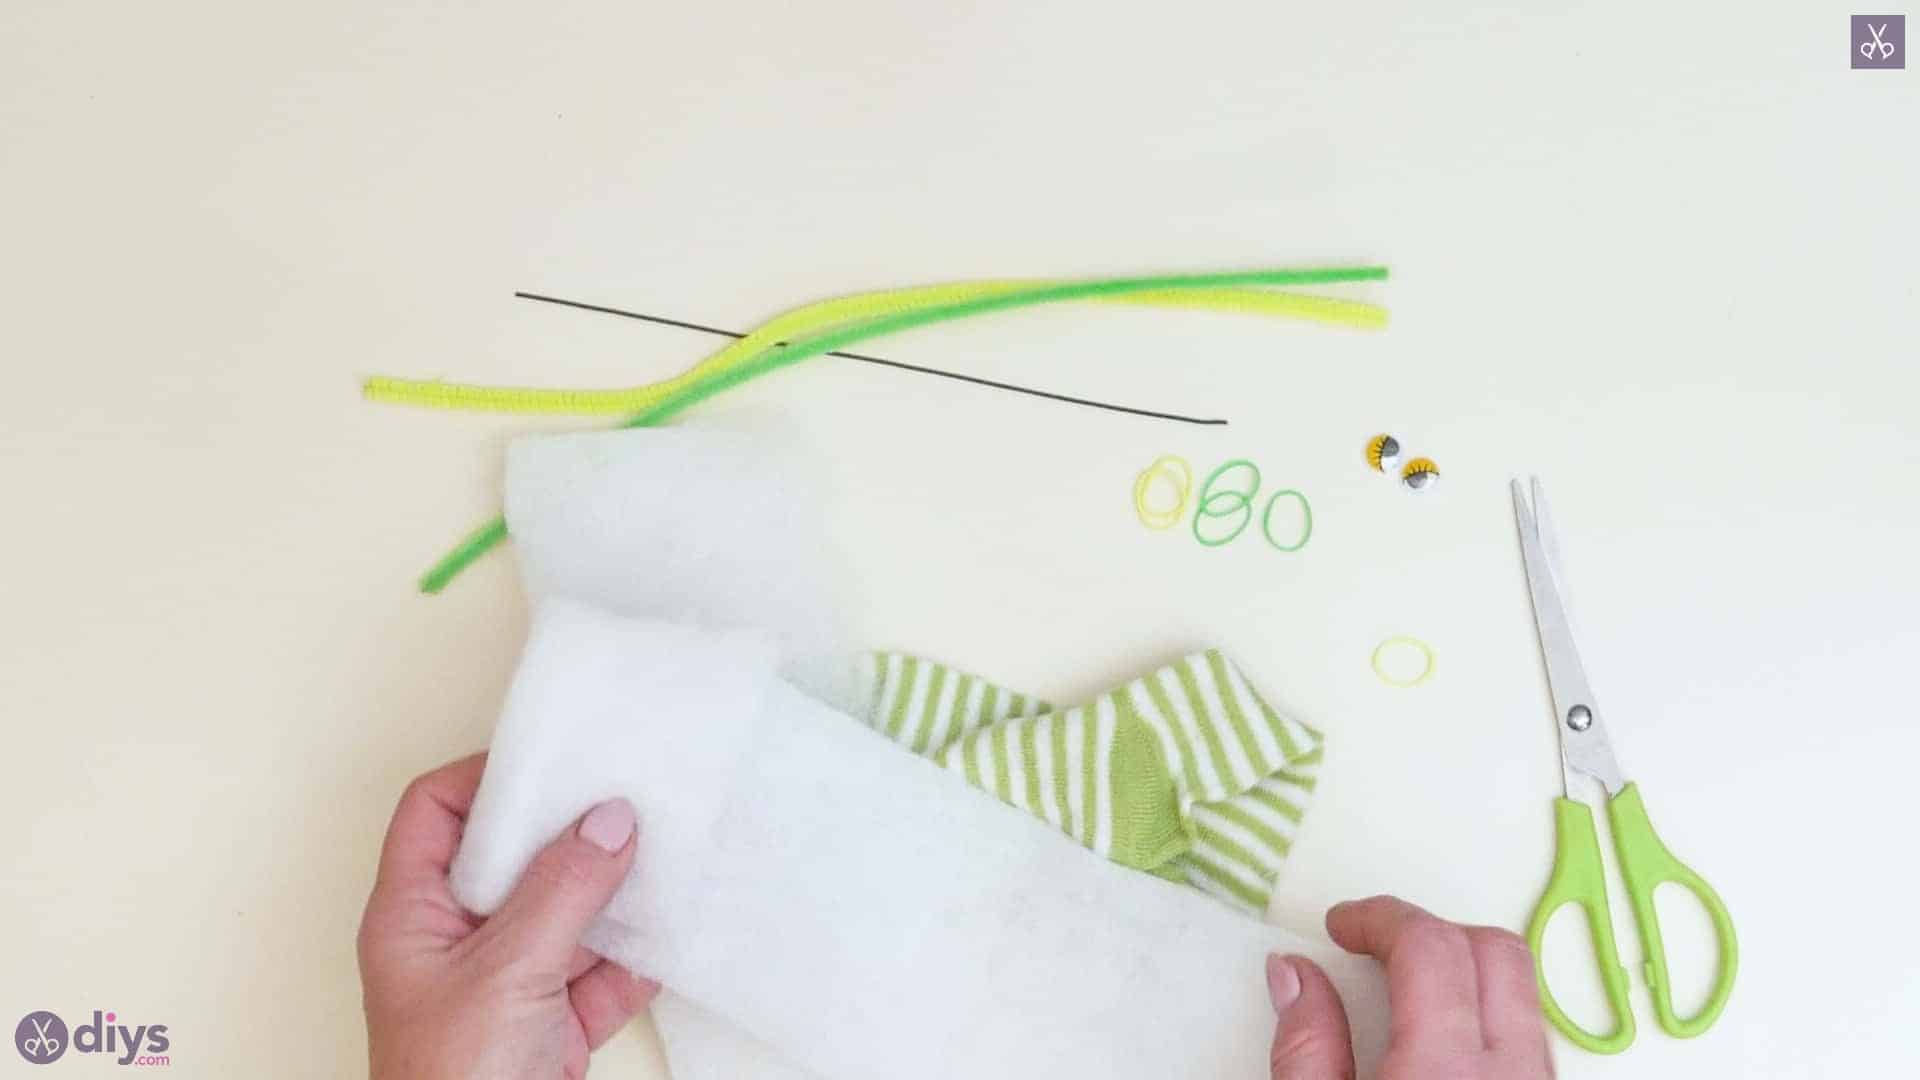
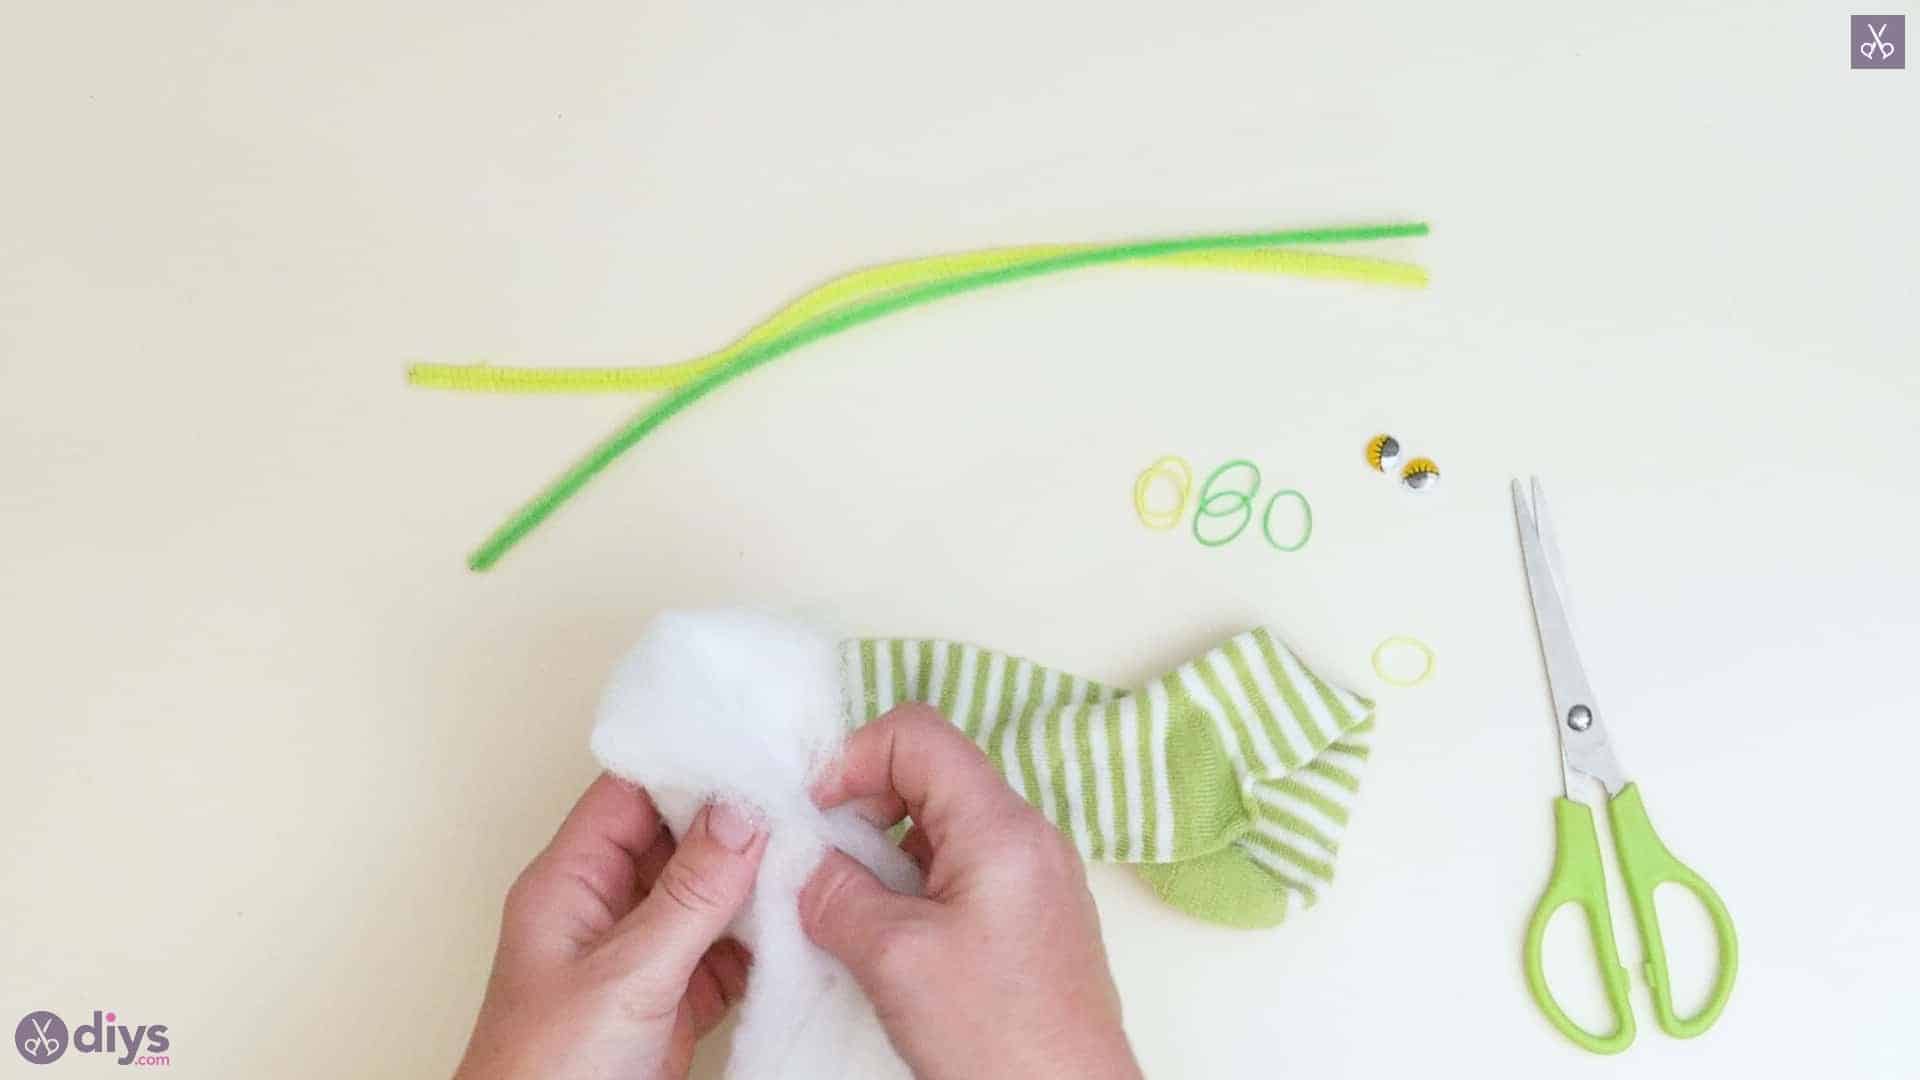
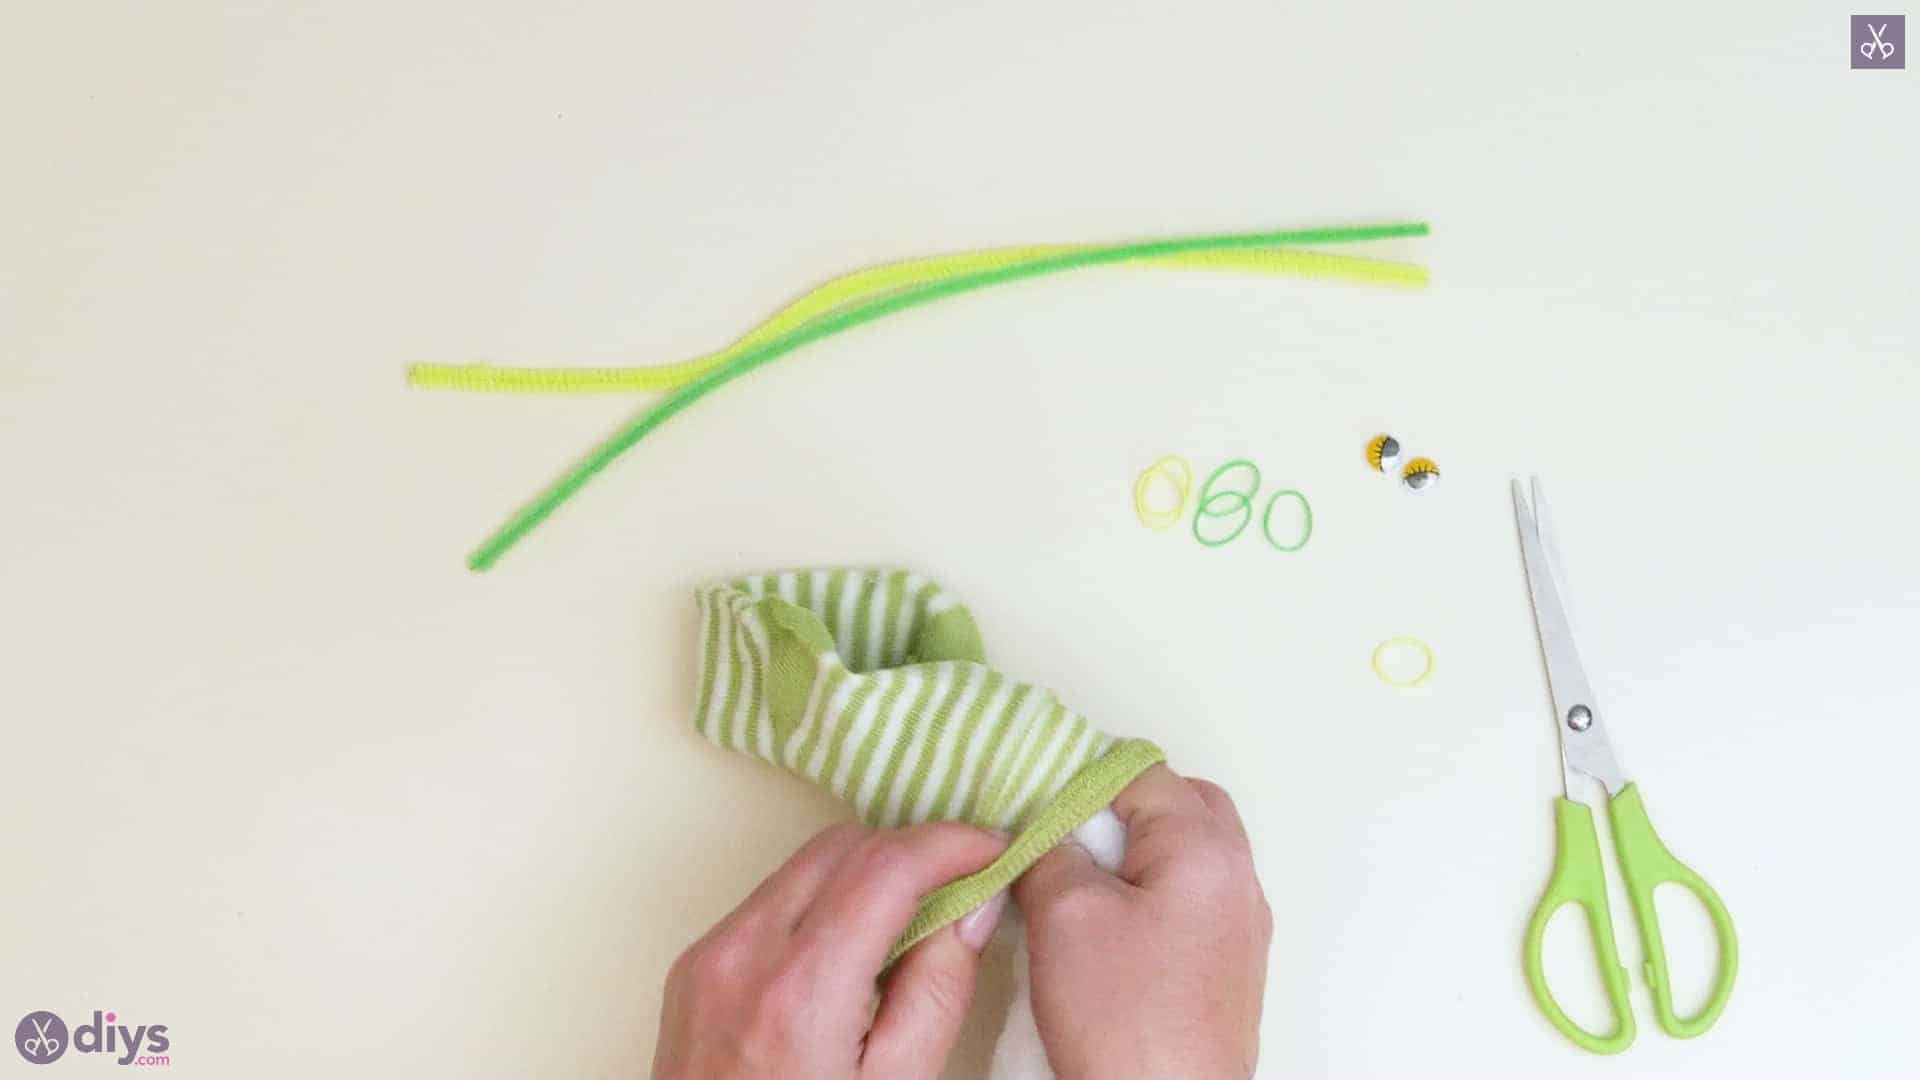
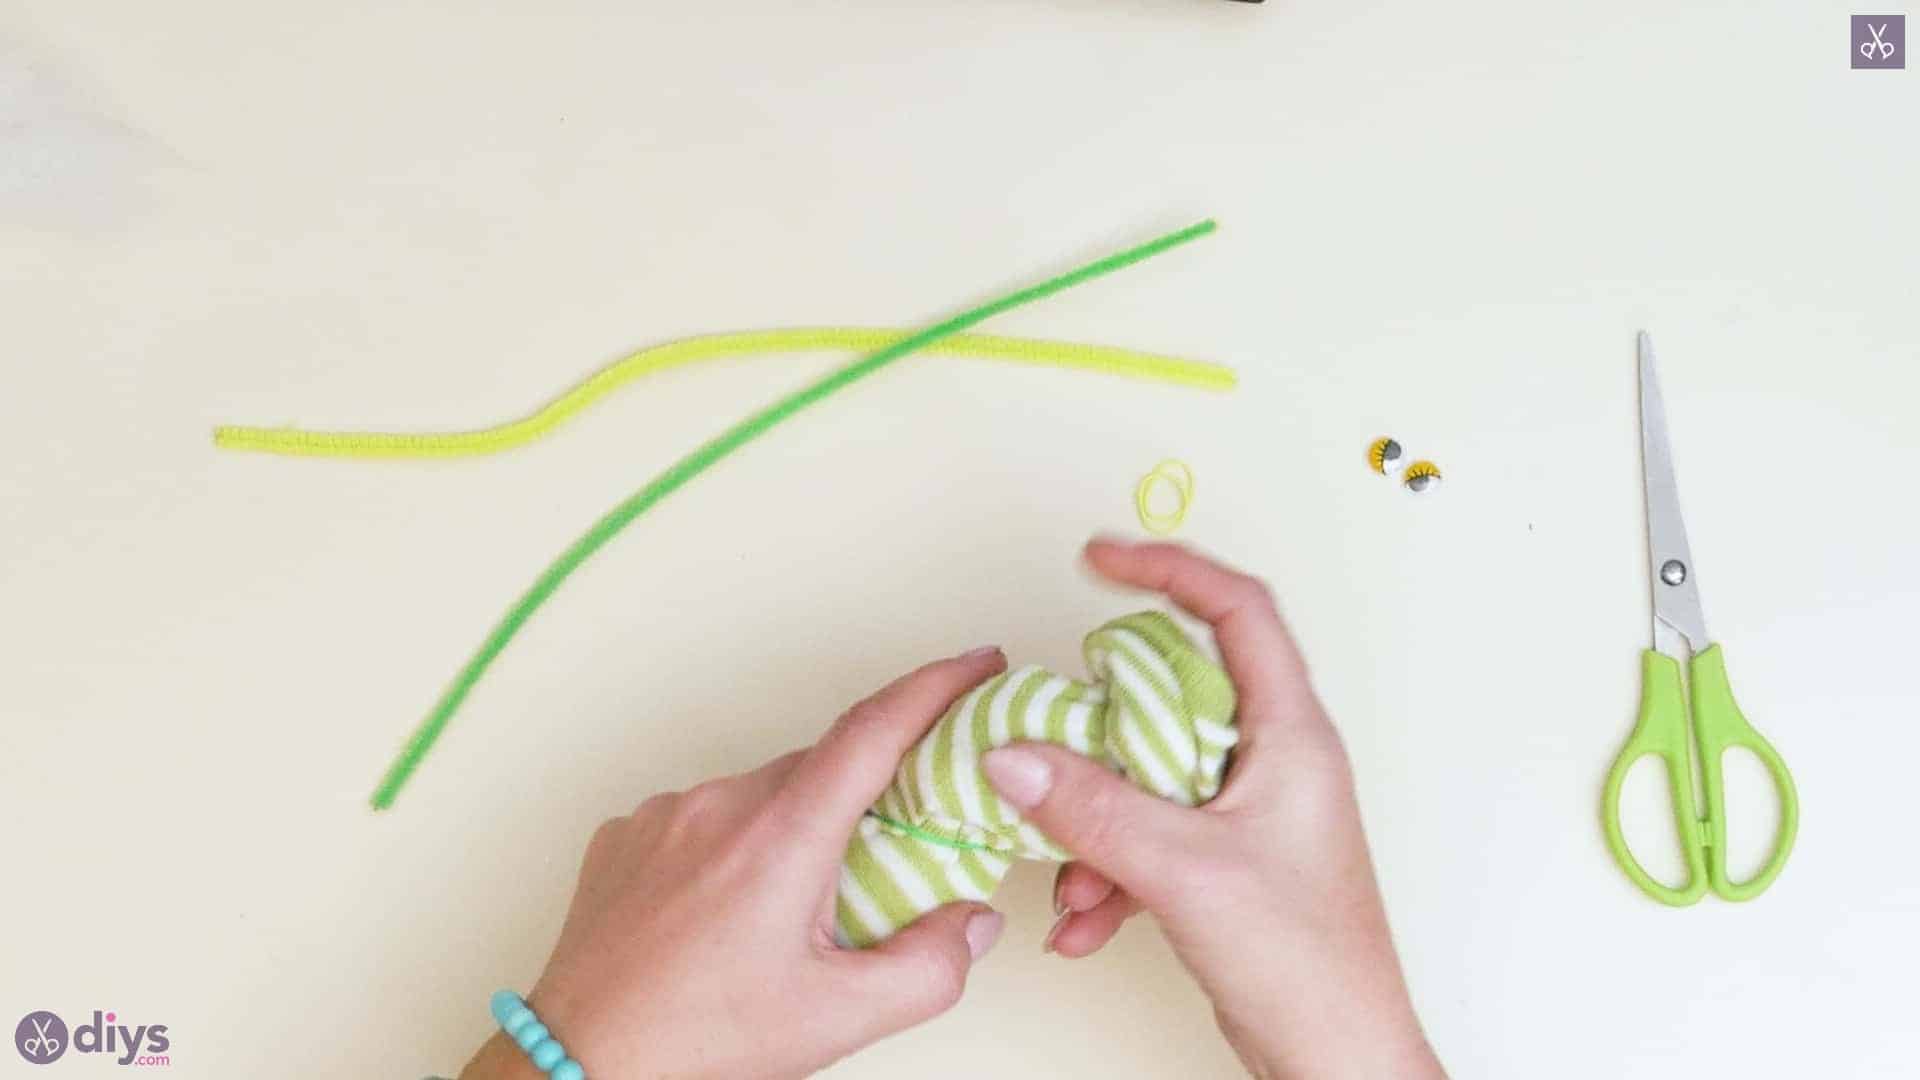
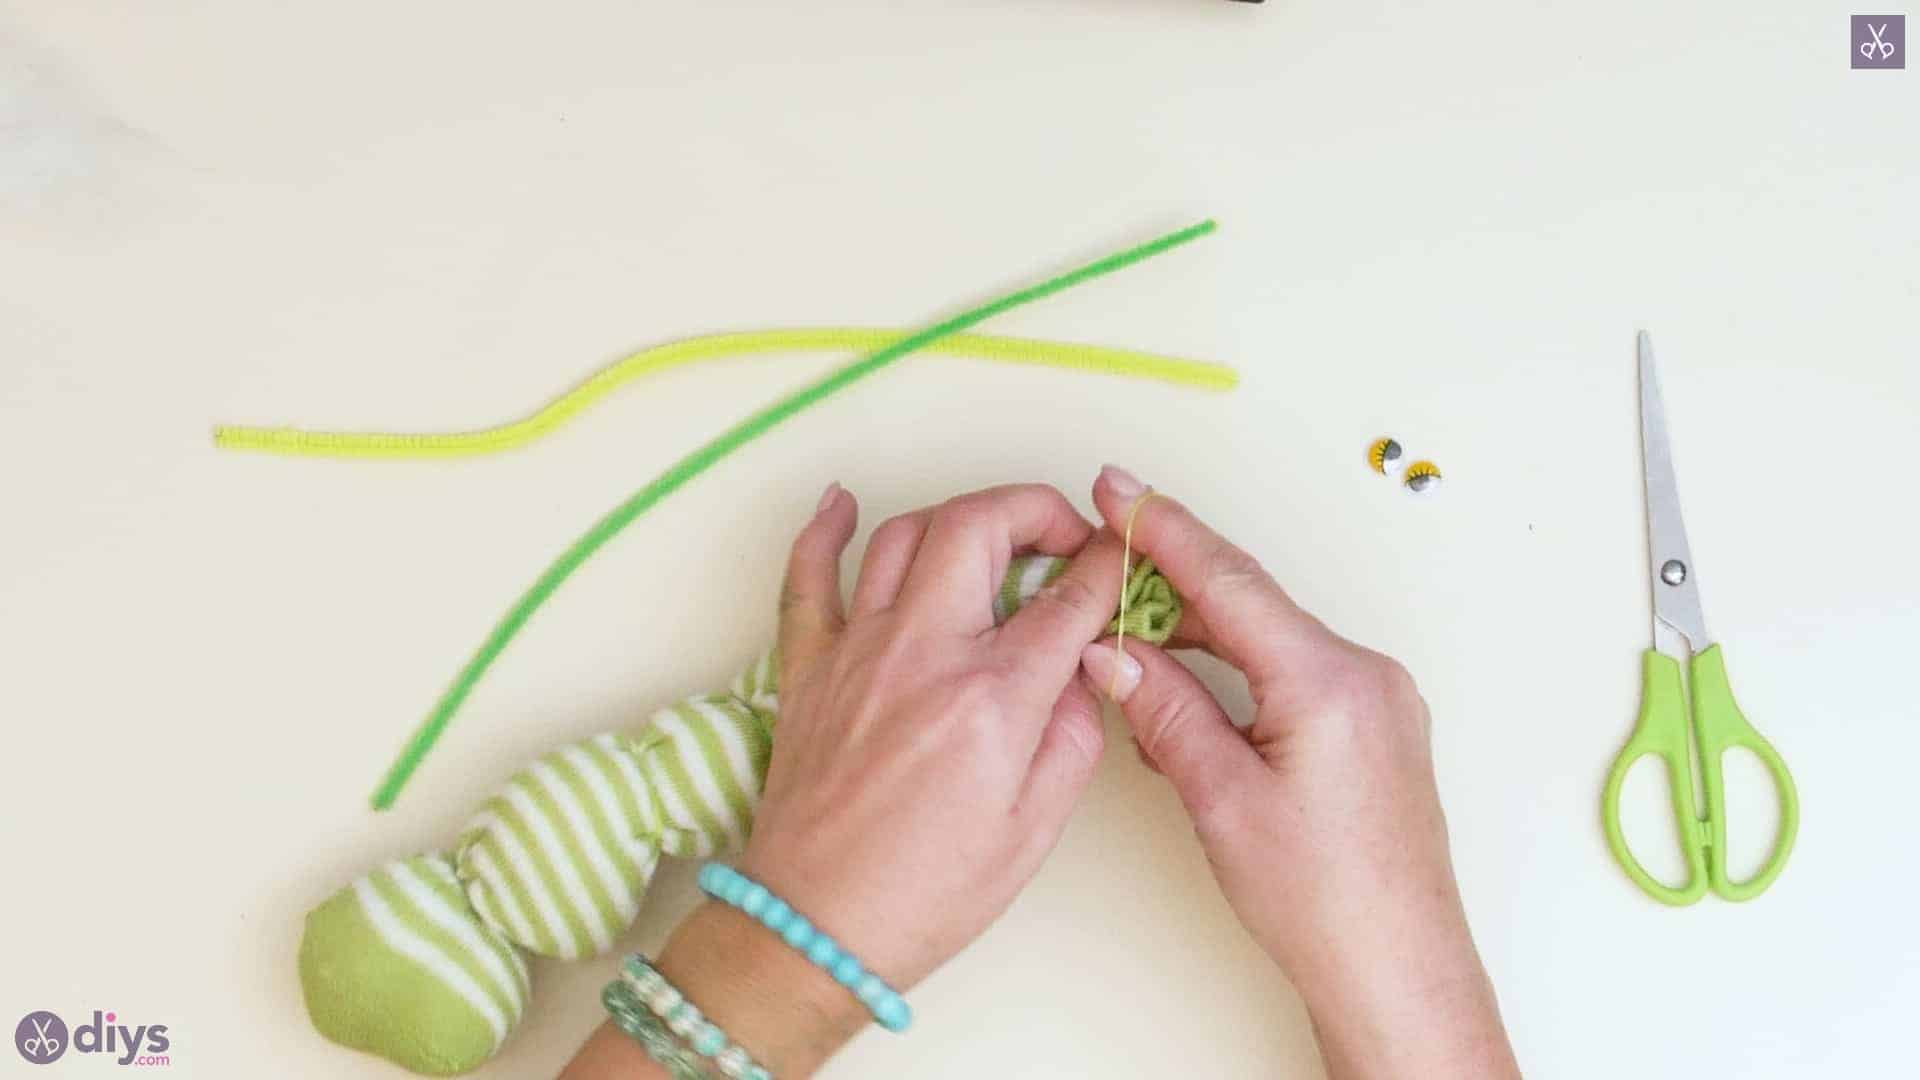
Slide the end of your stuffing with the fold in it down the length of your sock so it nestles right into the toe, then pull the rest of your sock down over the length of the rest of your stuffing and wire so it slips right inside. Take a small hair elastic and tie it around the open end of the sock, past where the stuffing and wire end, to close things off and keep the new fillings in.
Step 4:
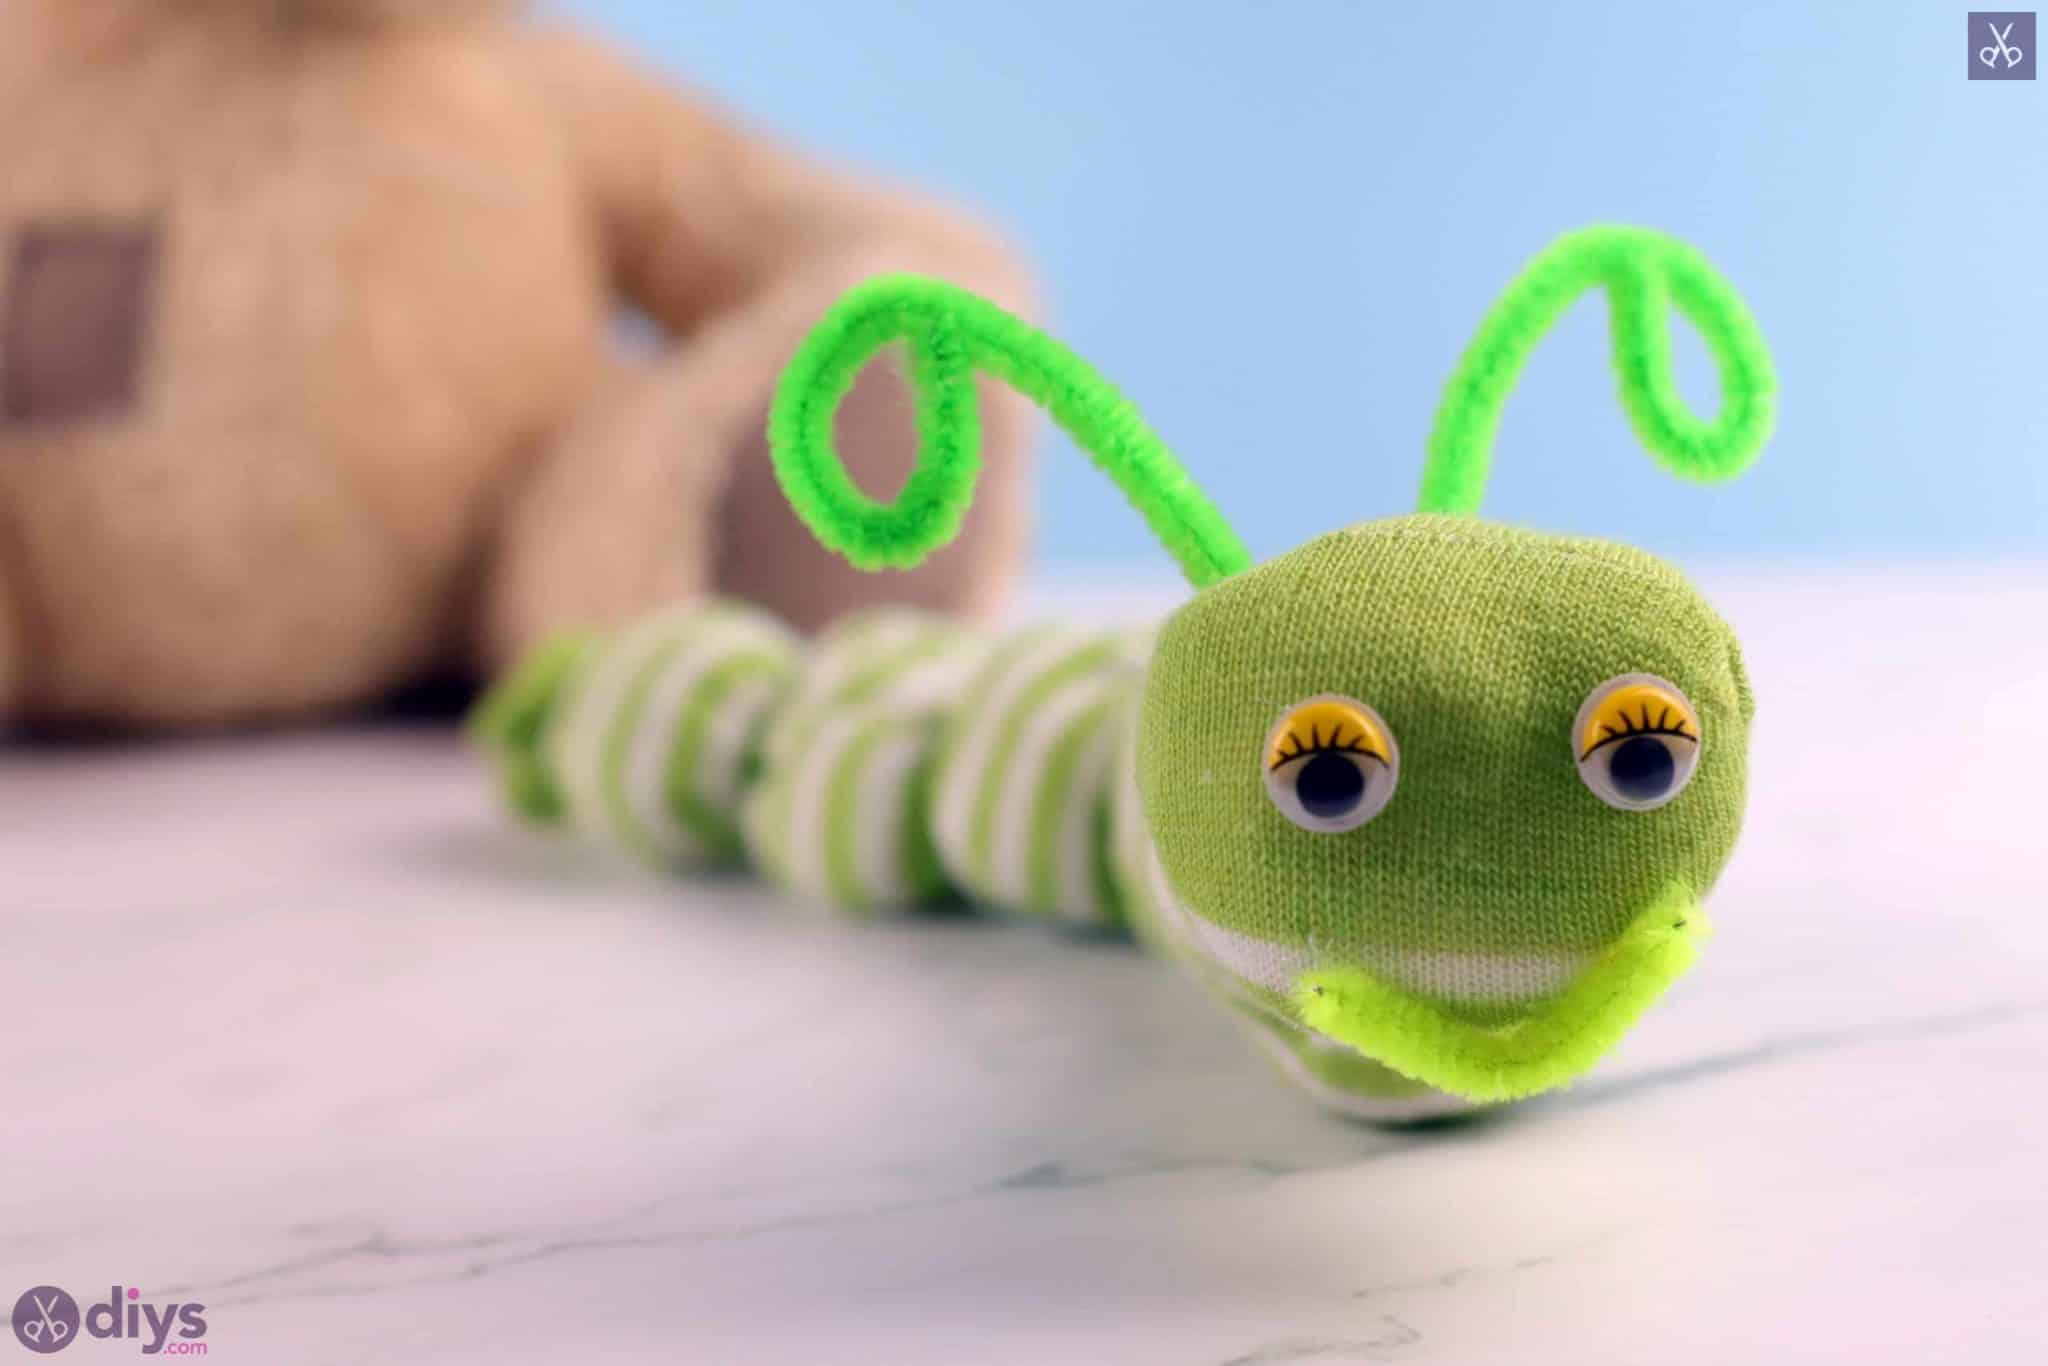
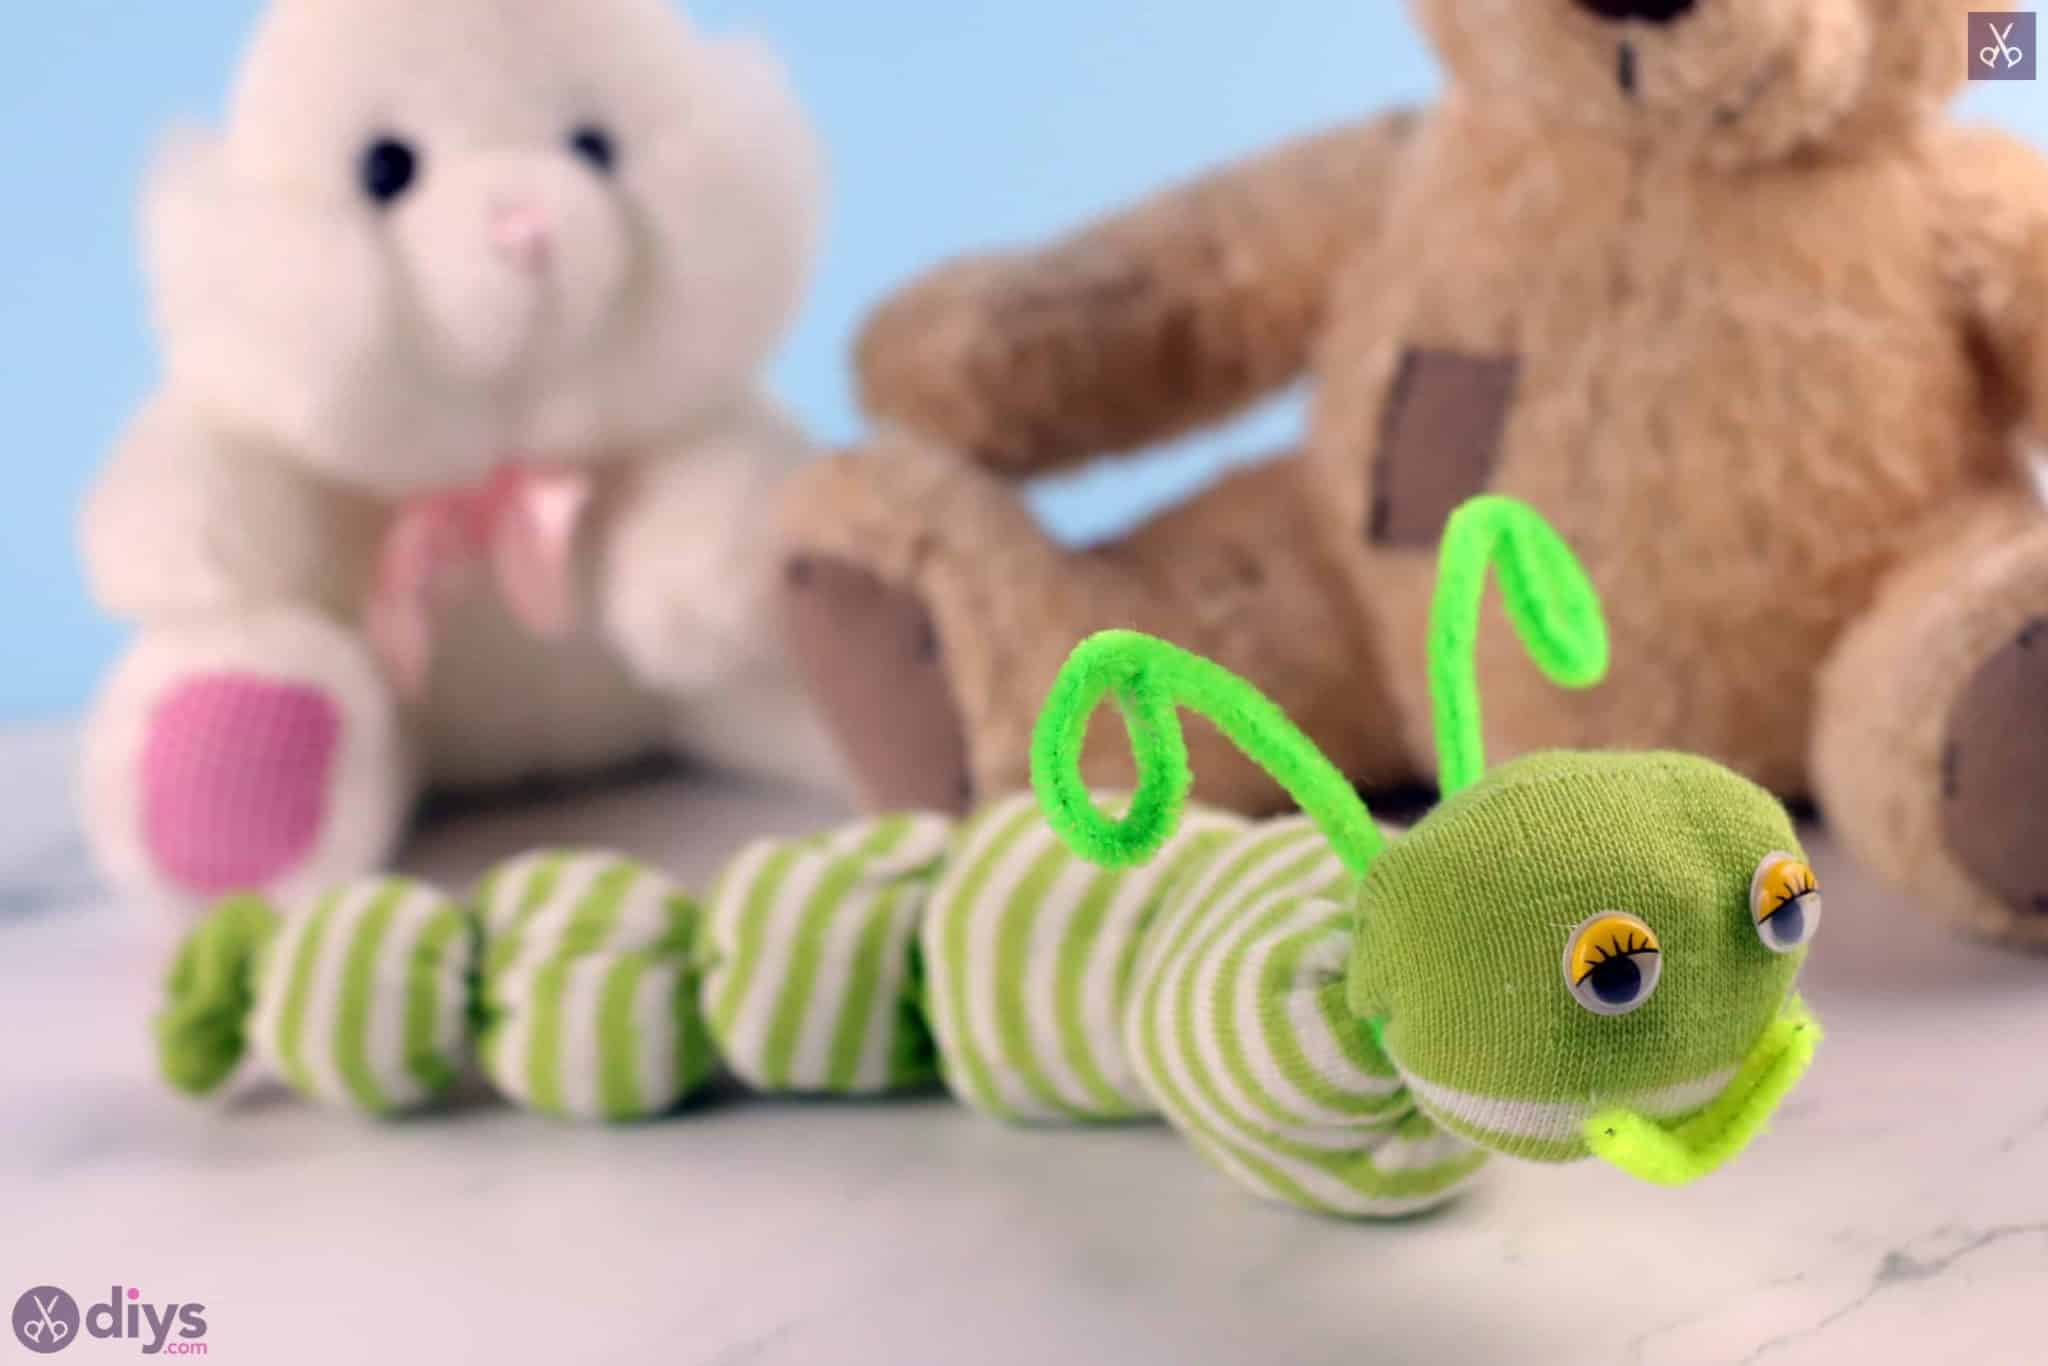
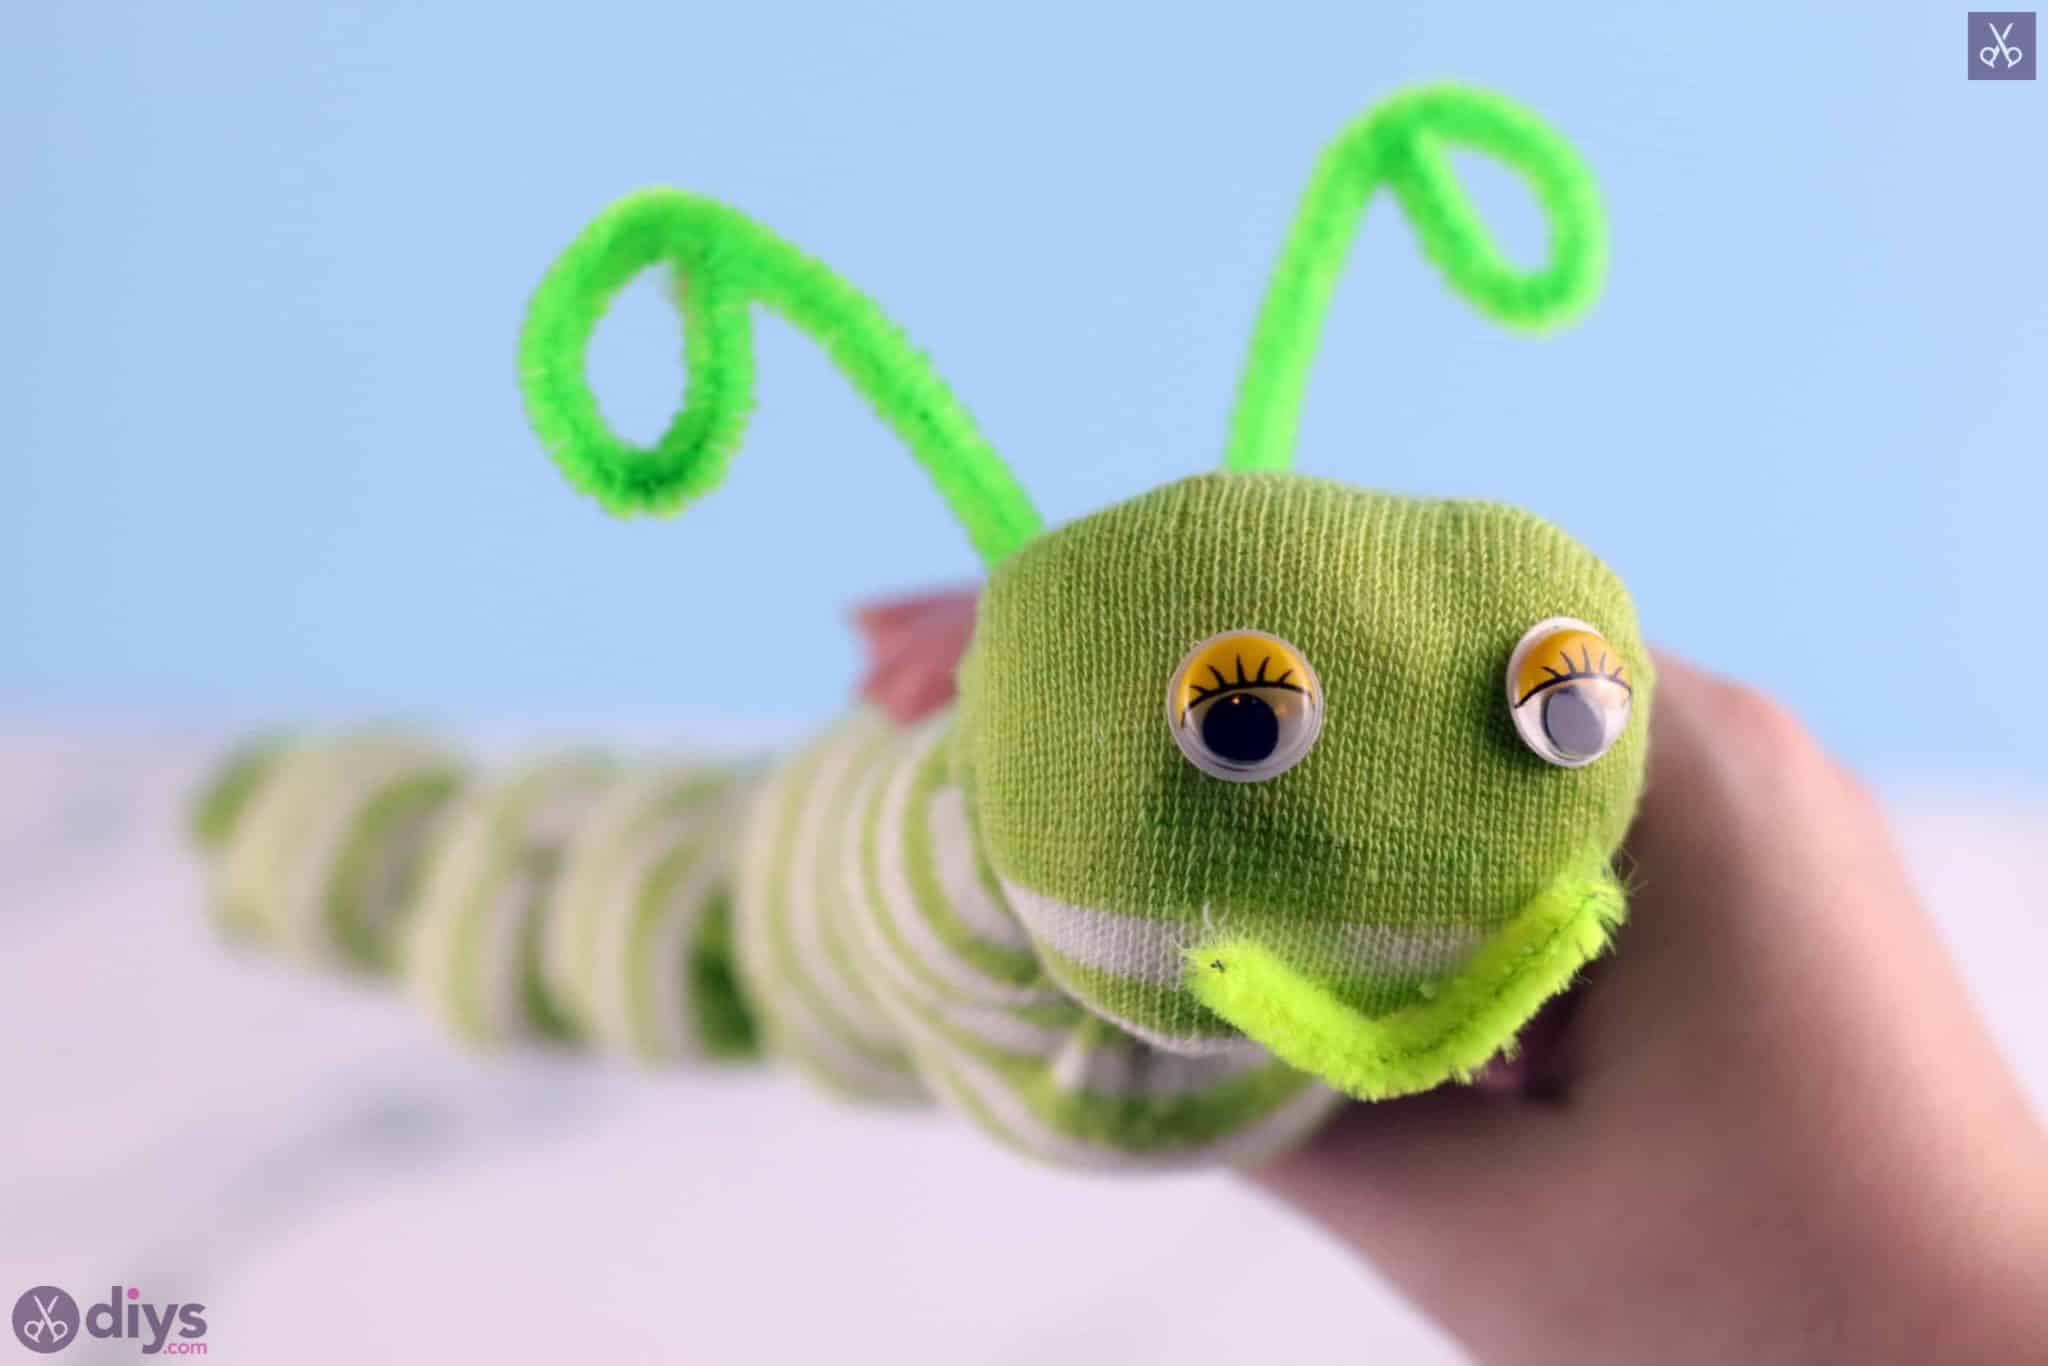
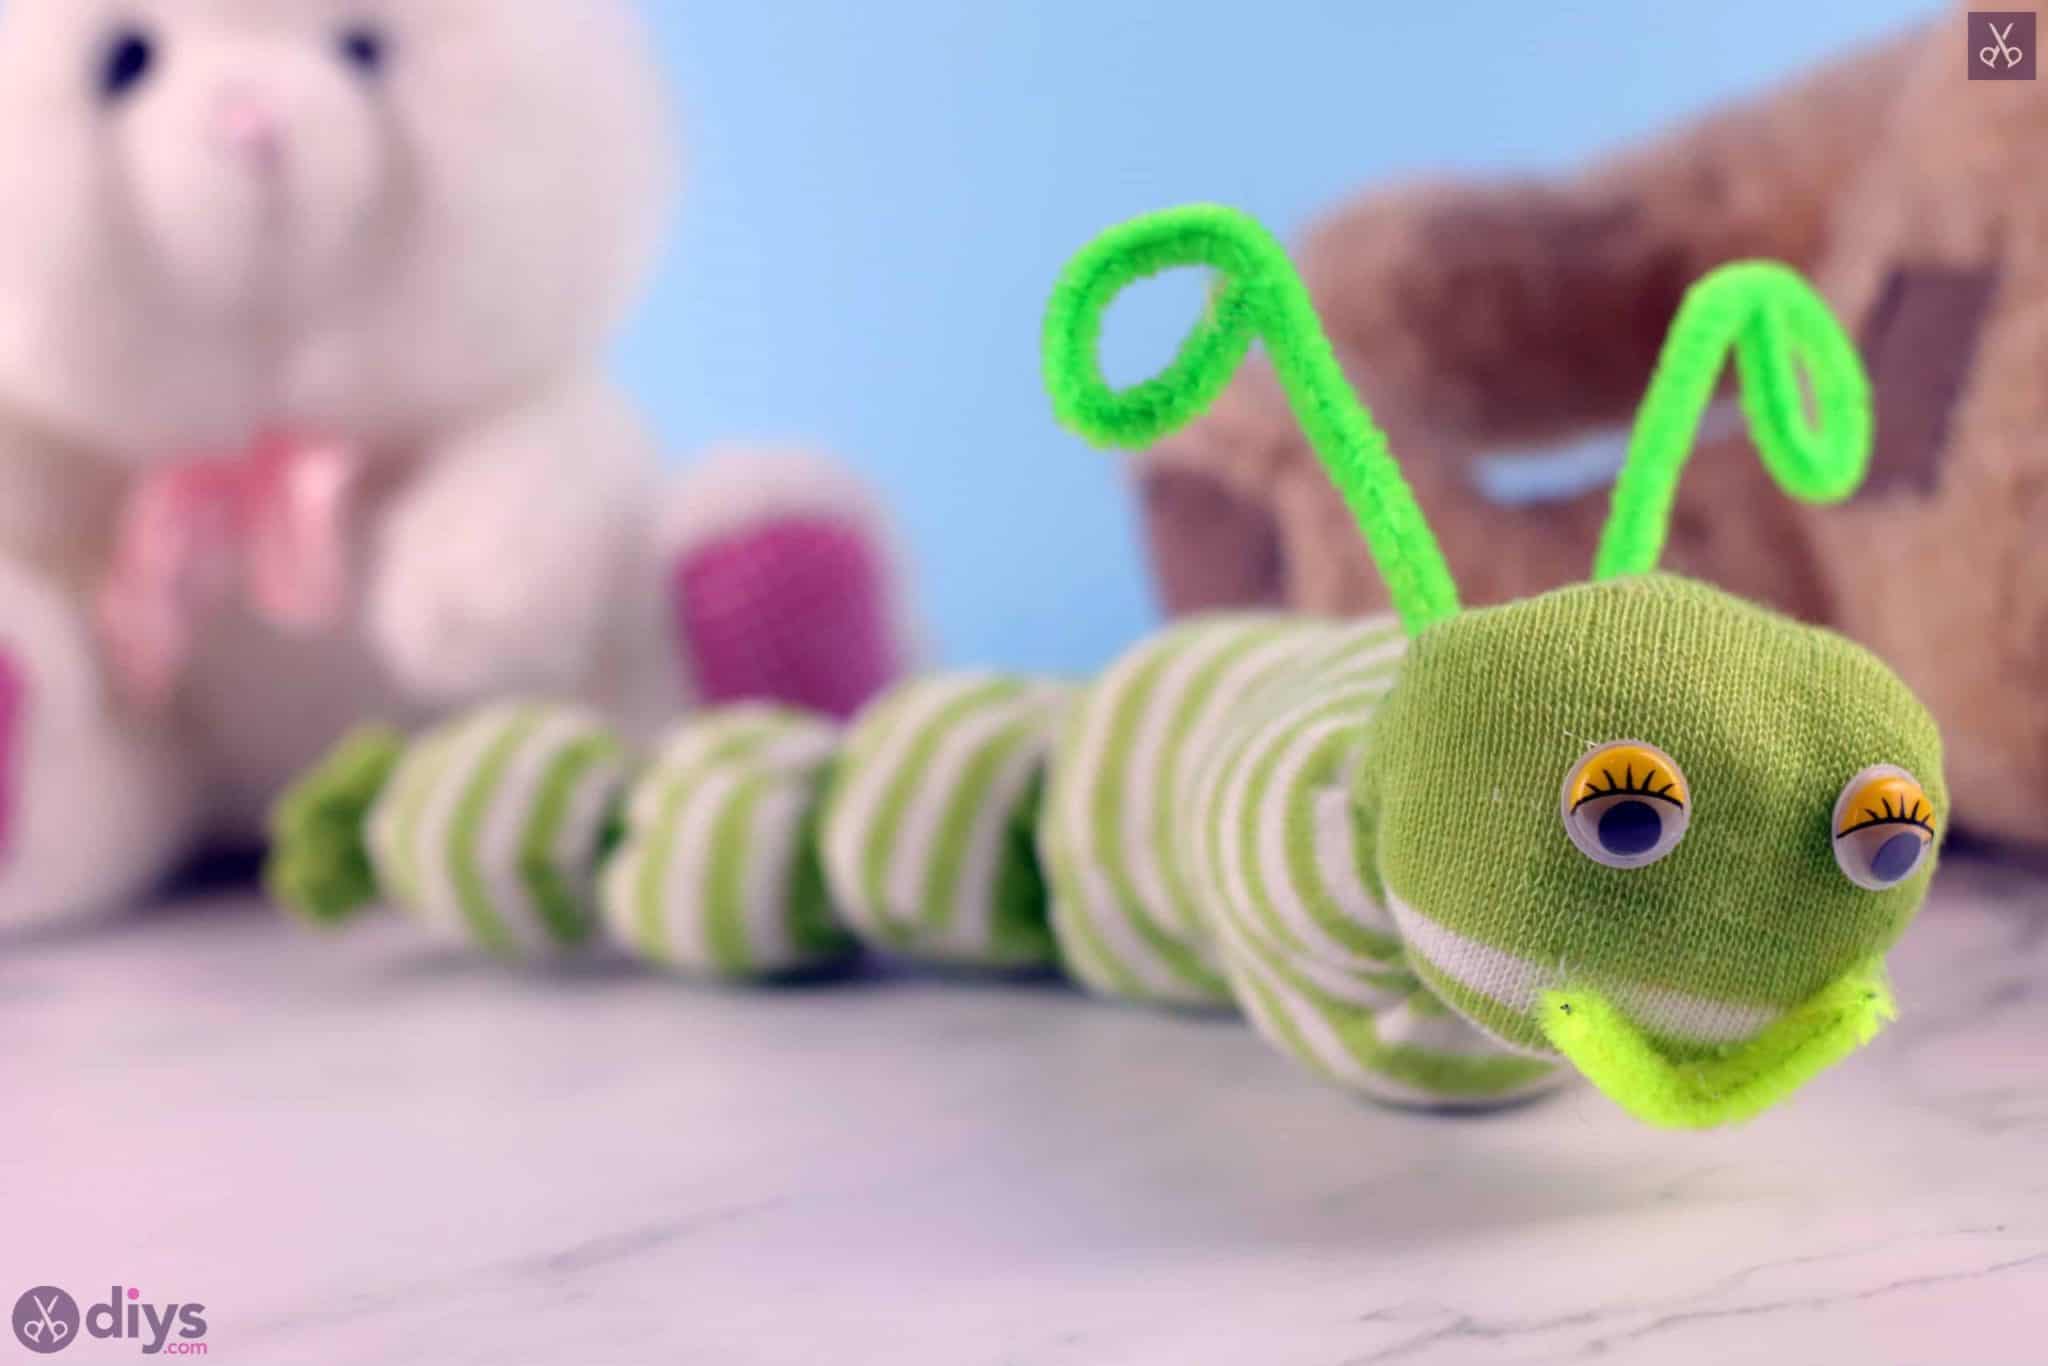
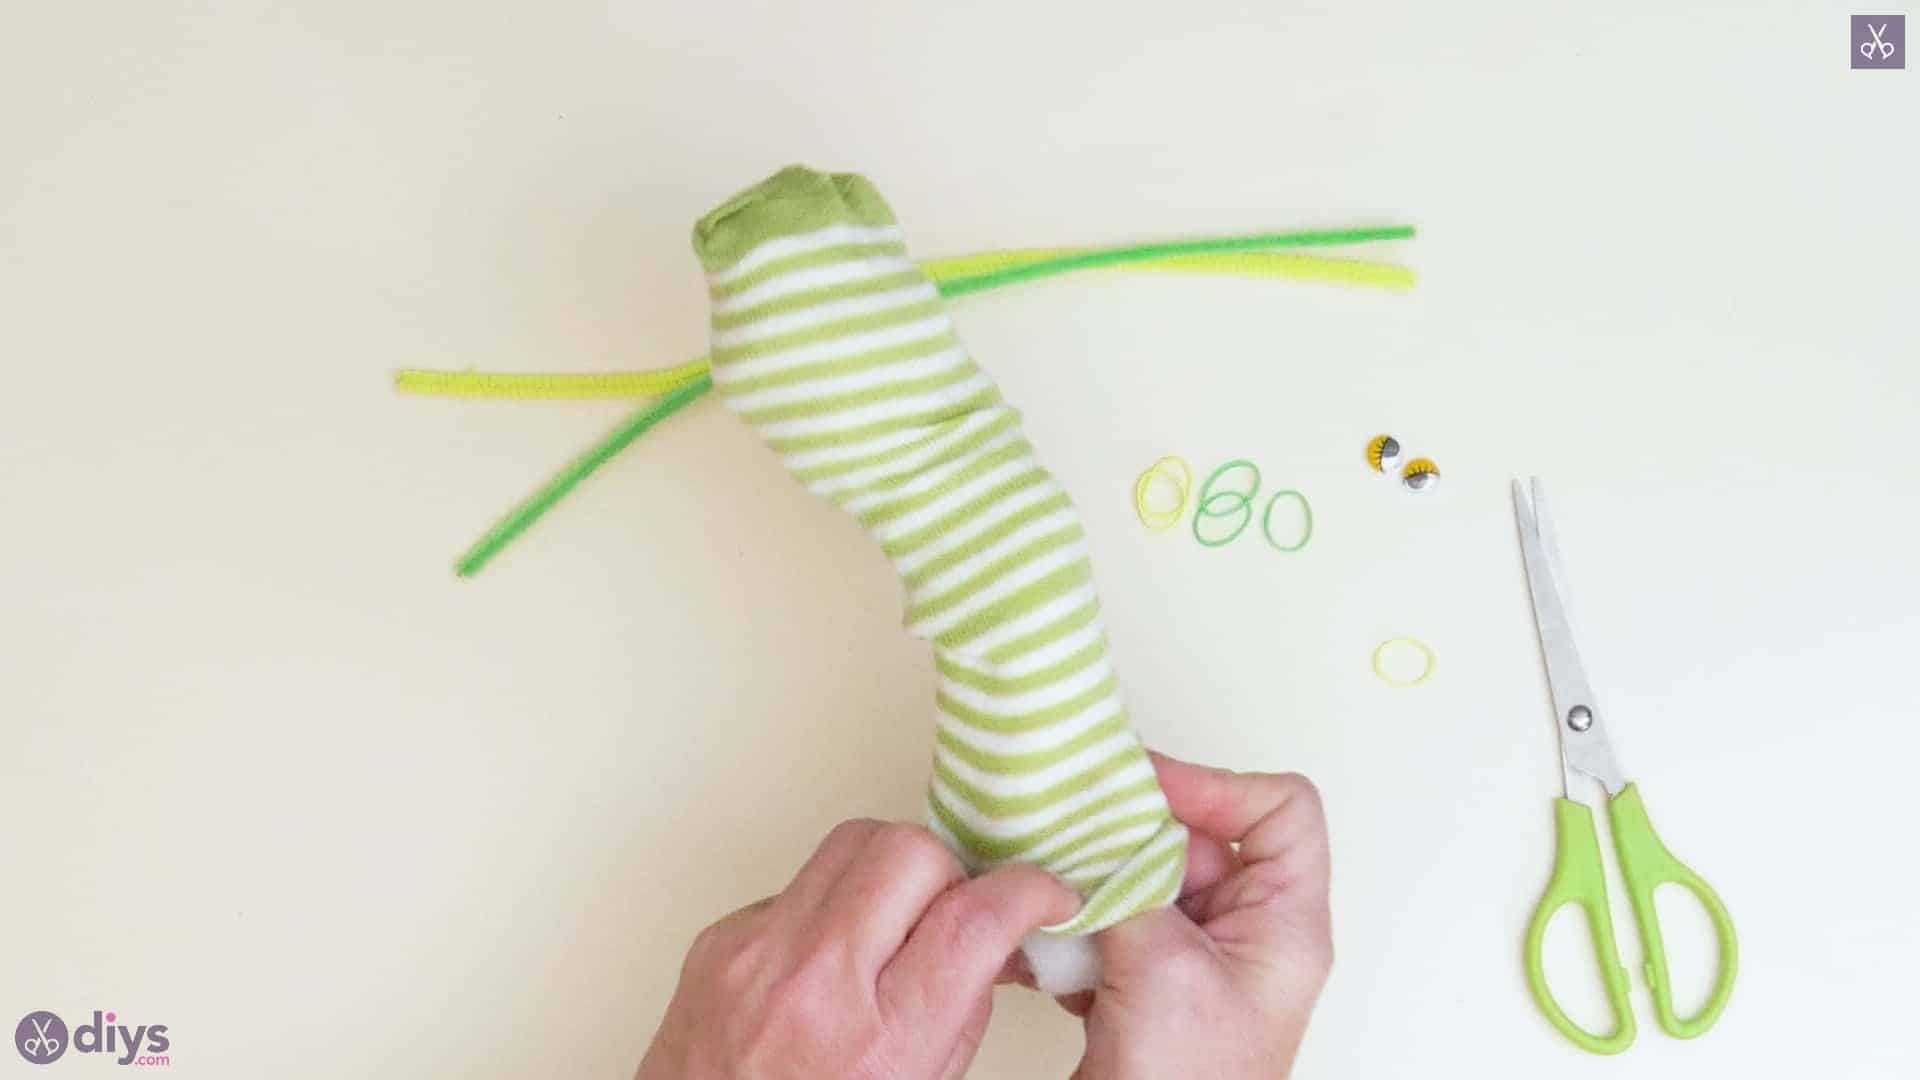
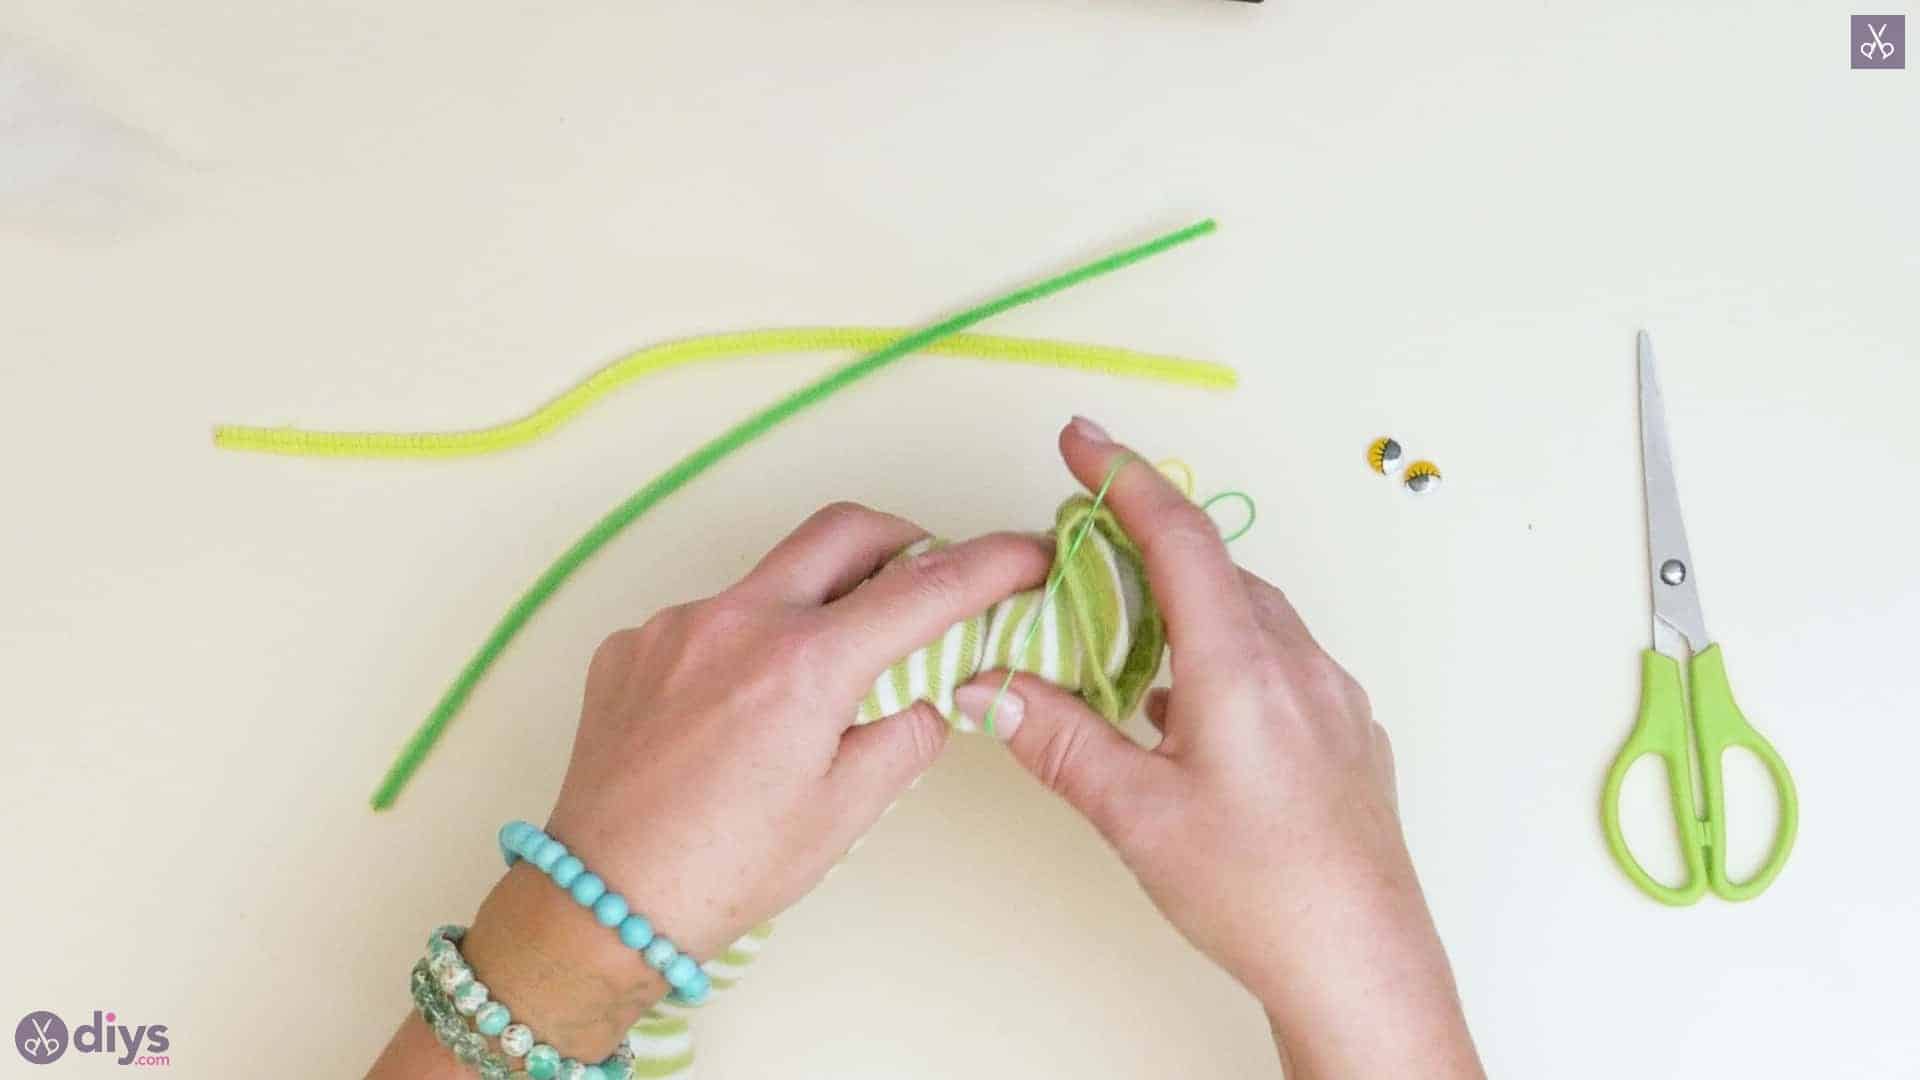
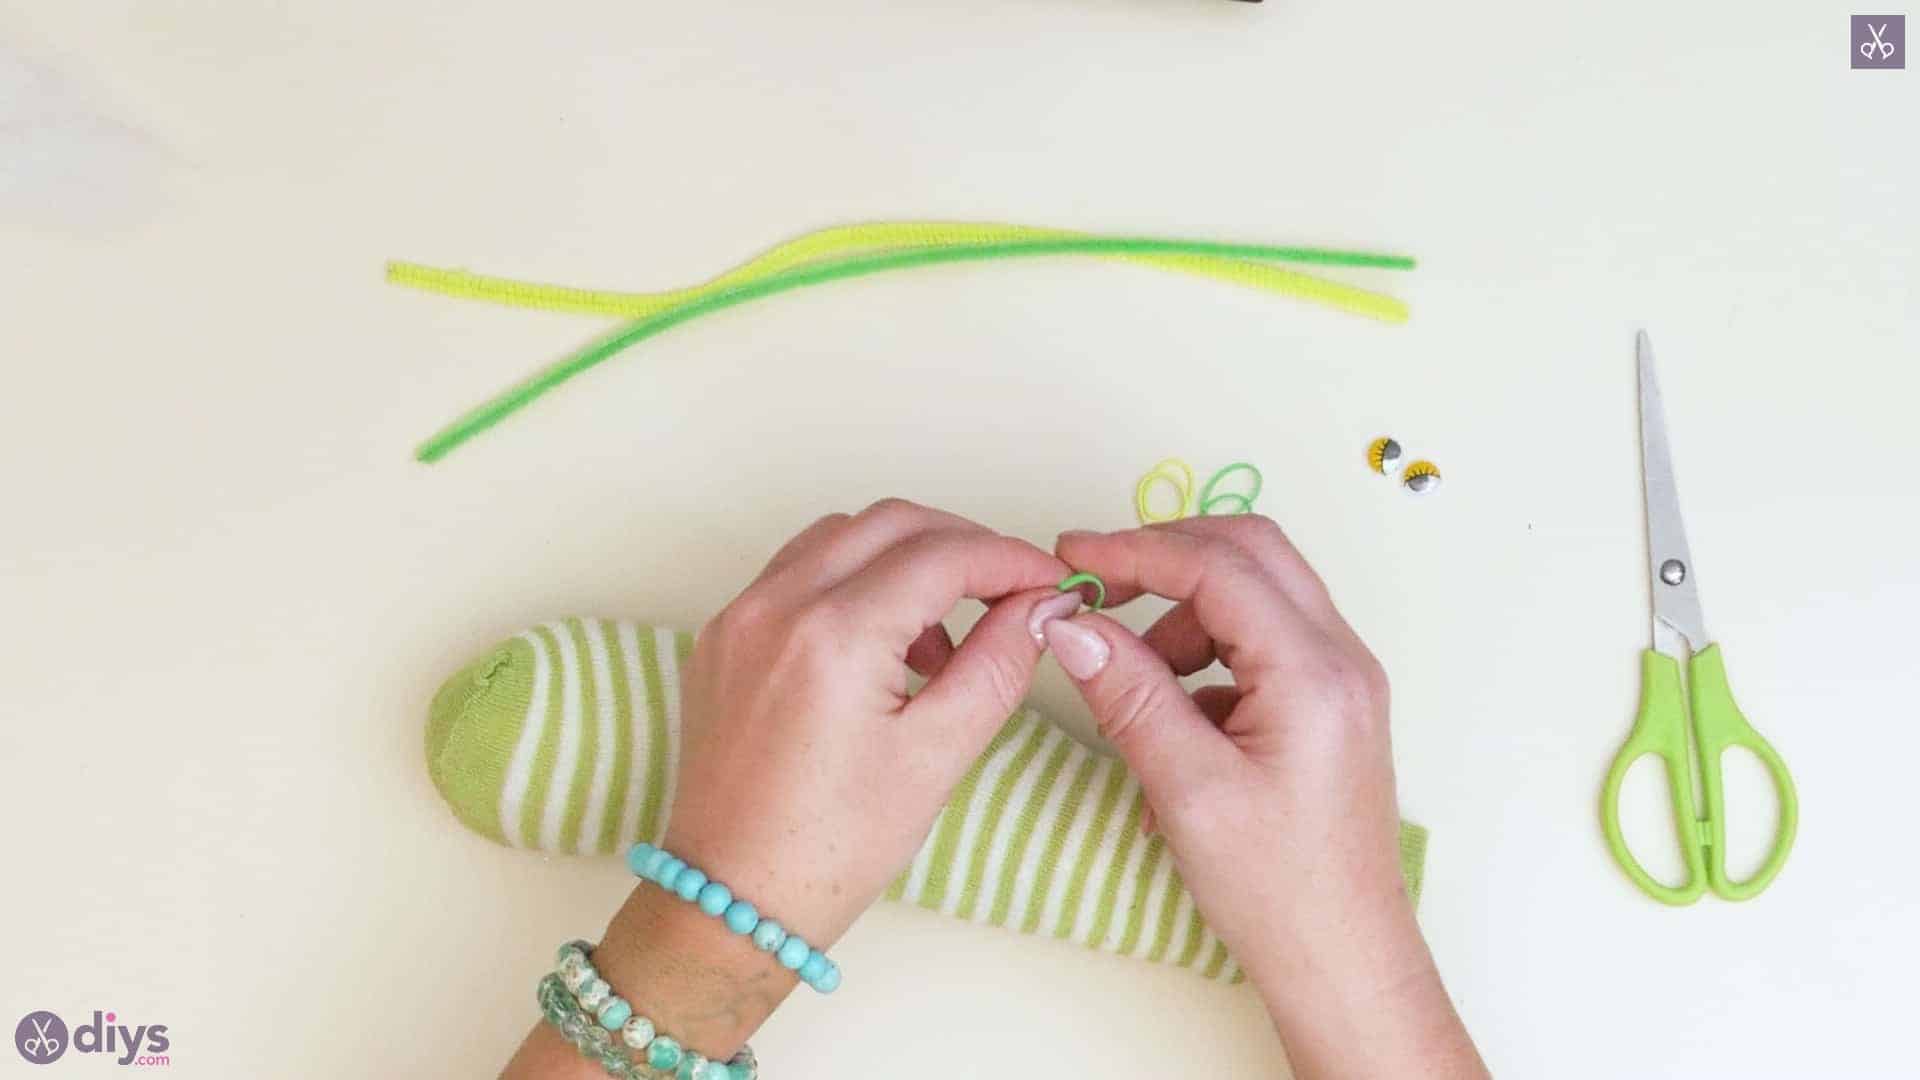
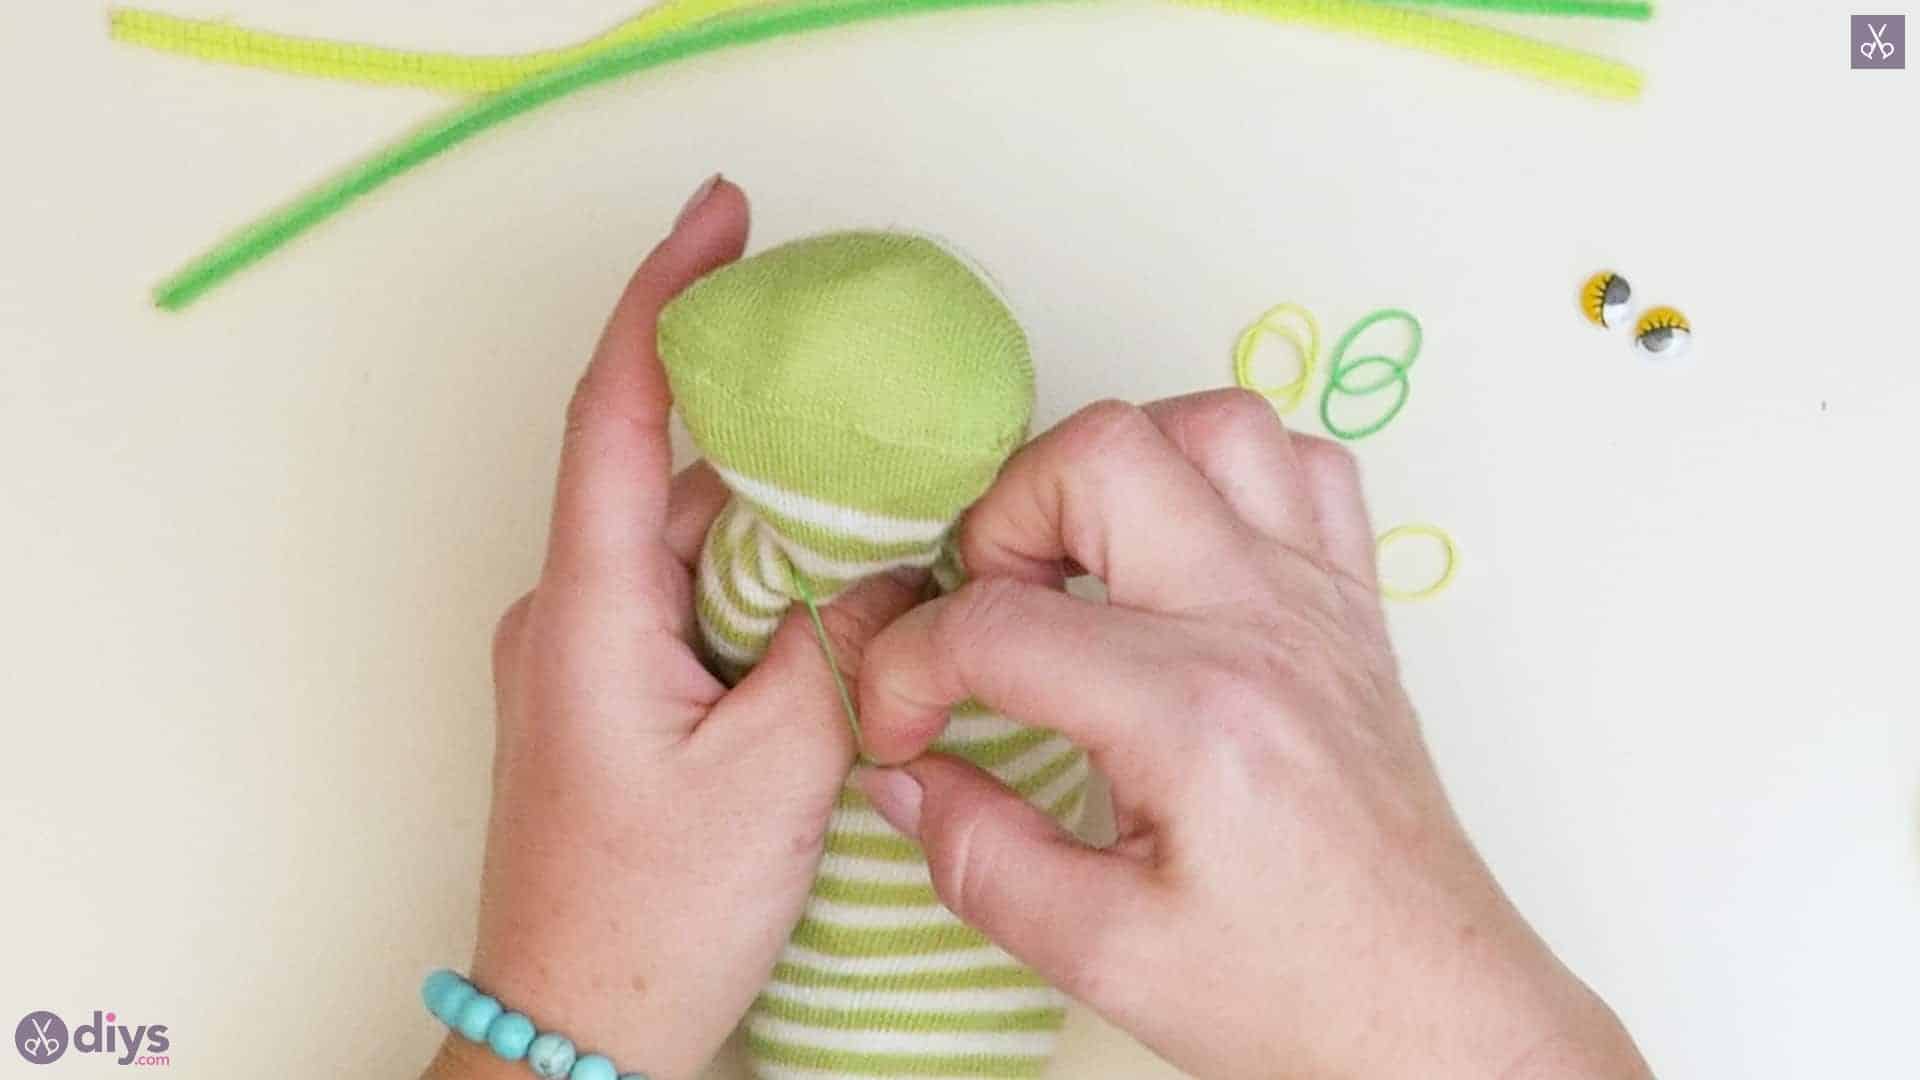
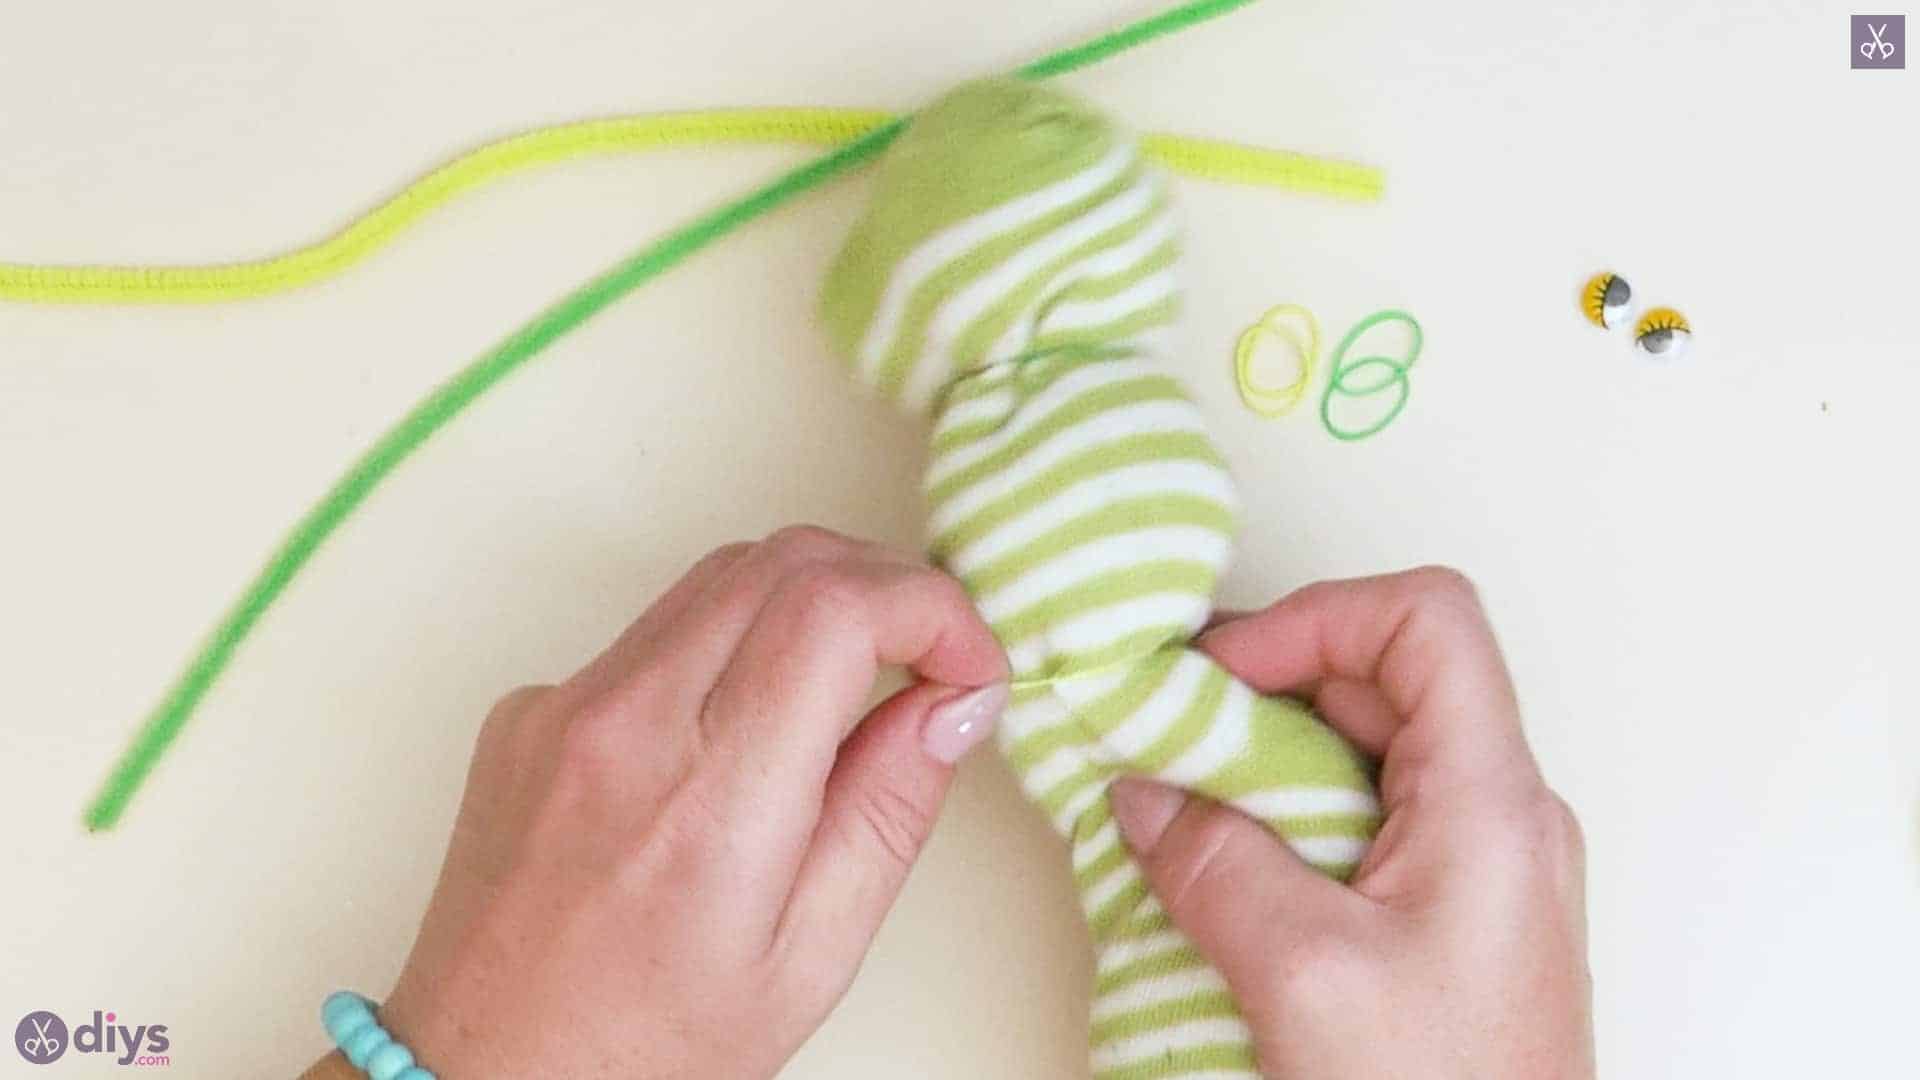
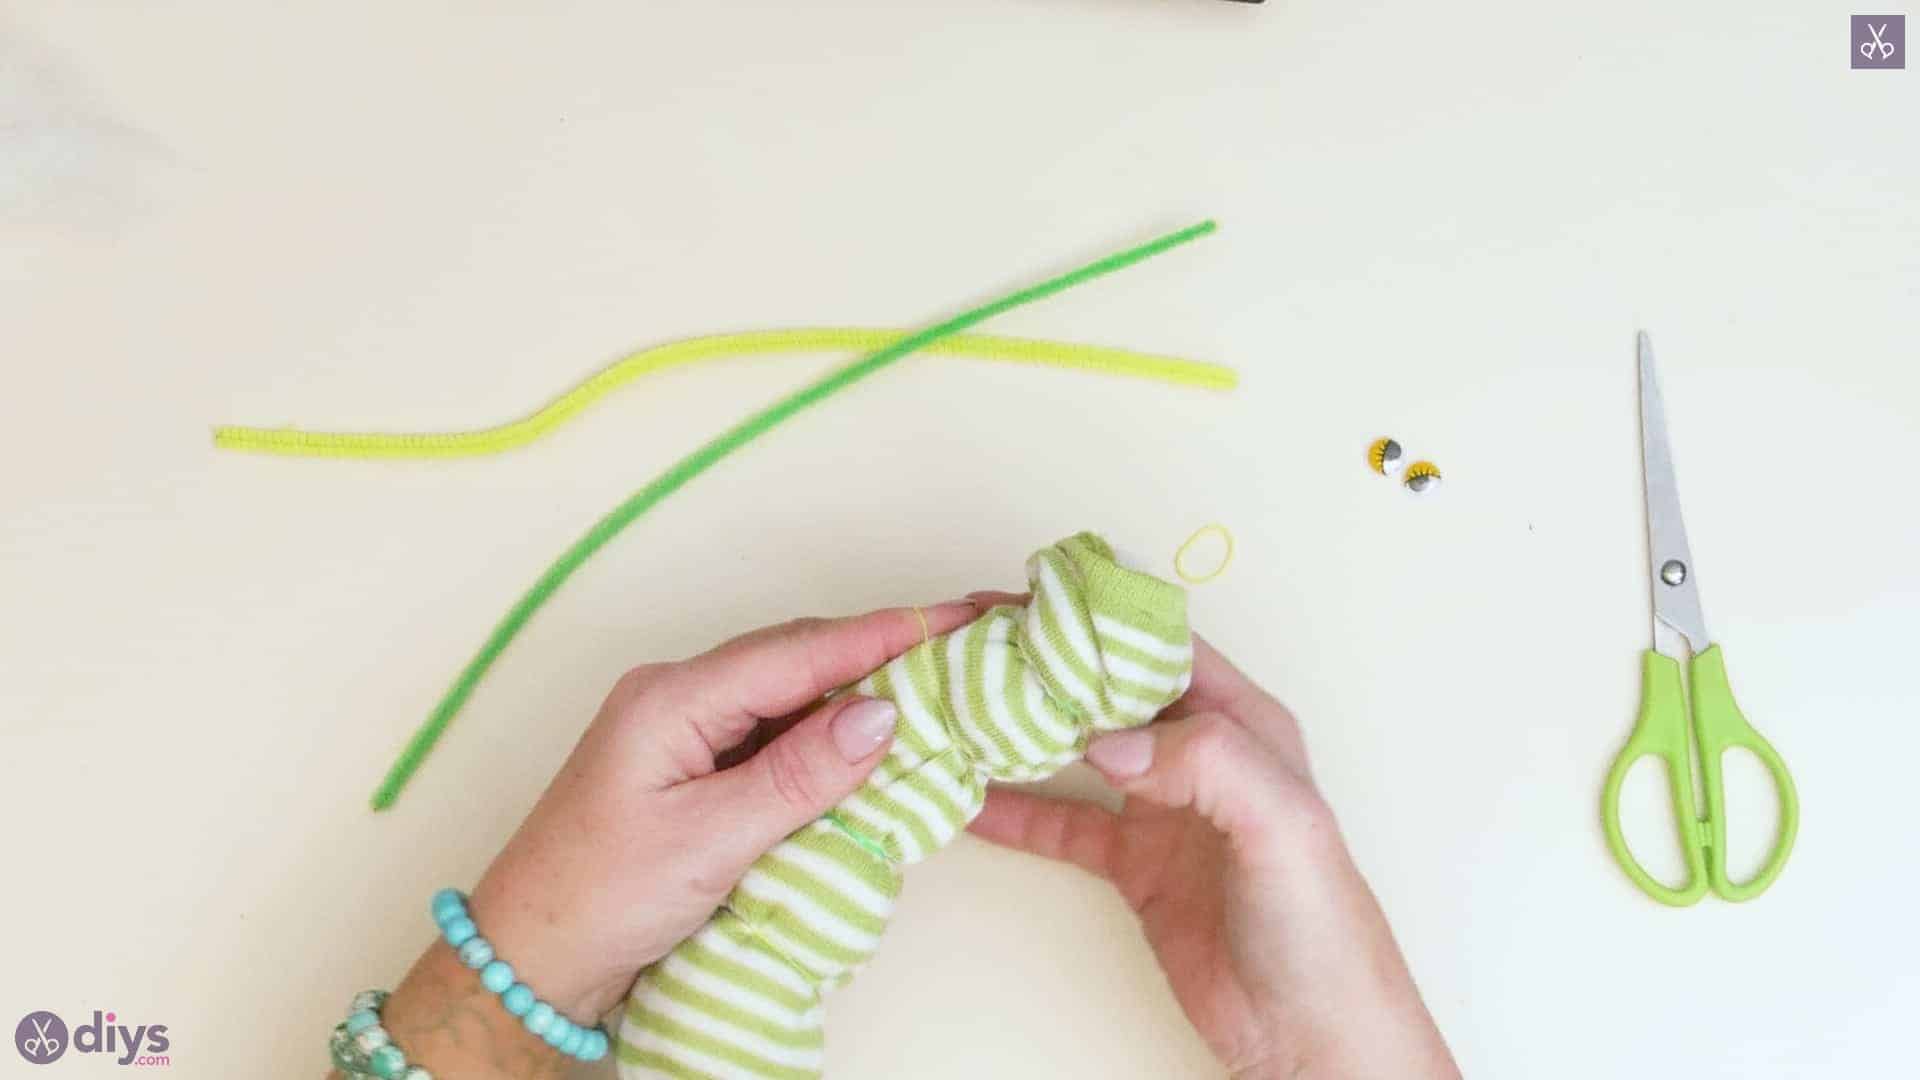
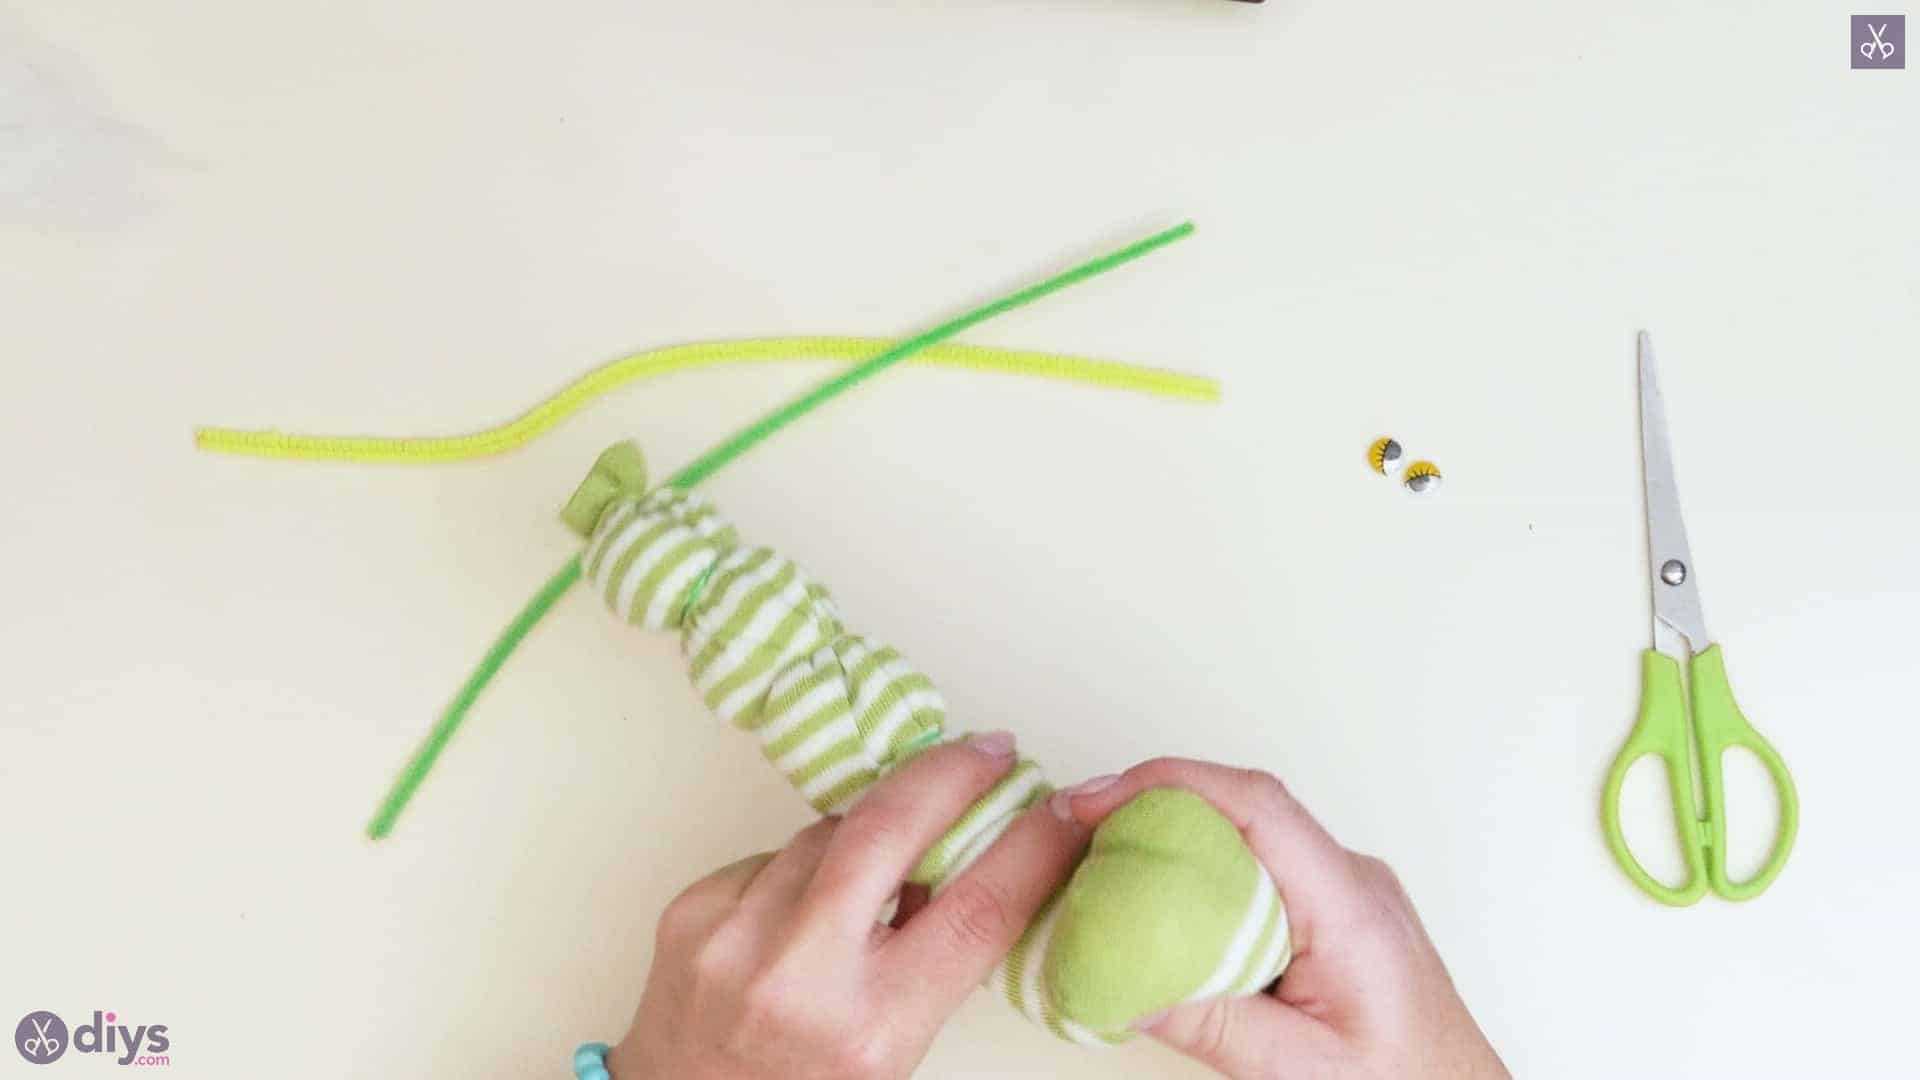
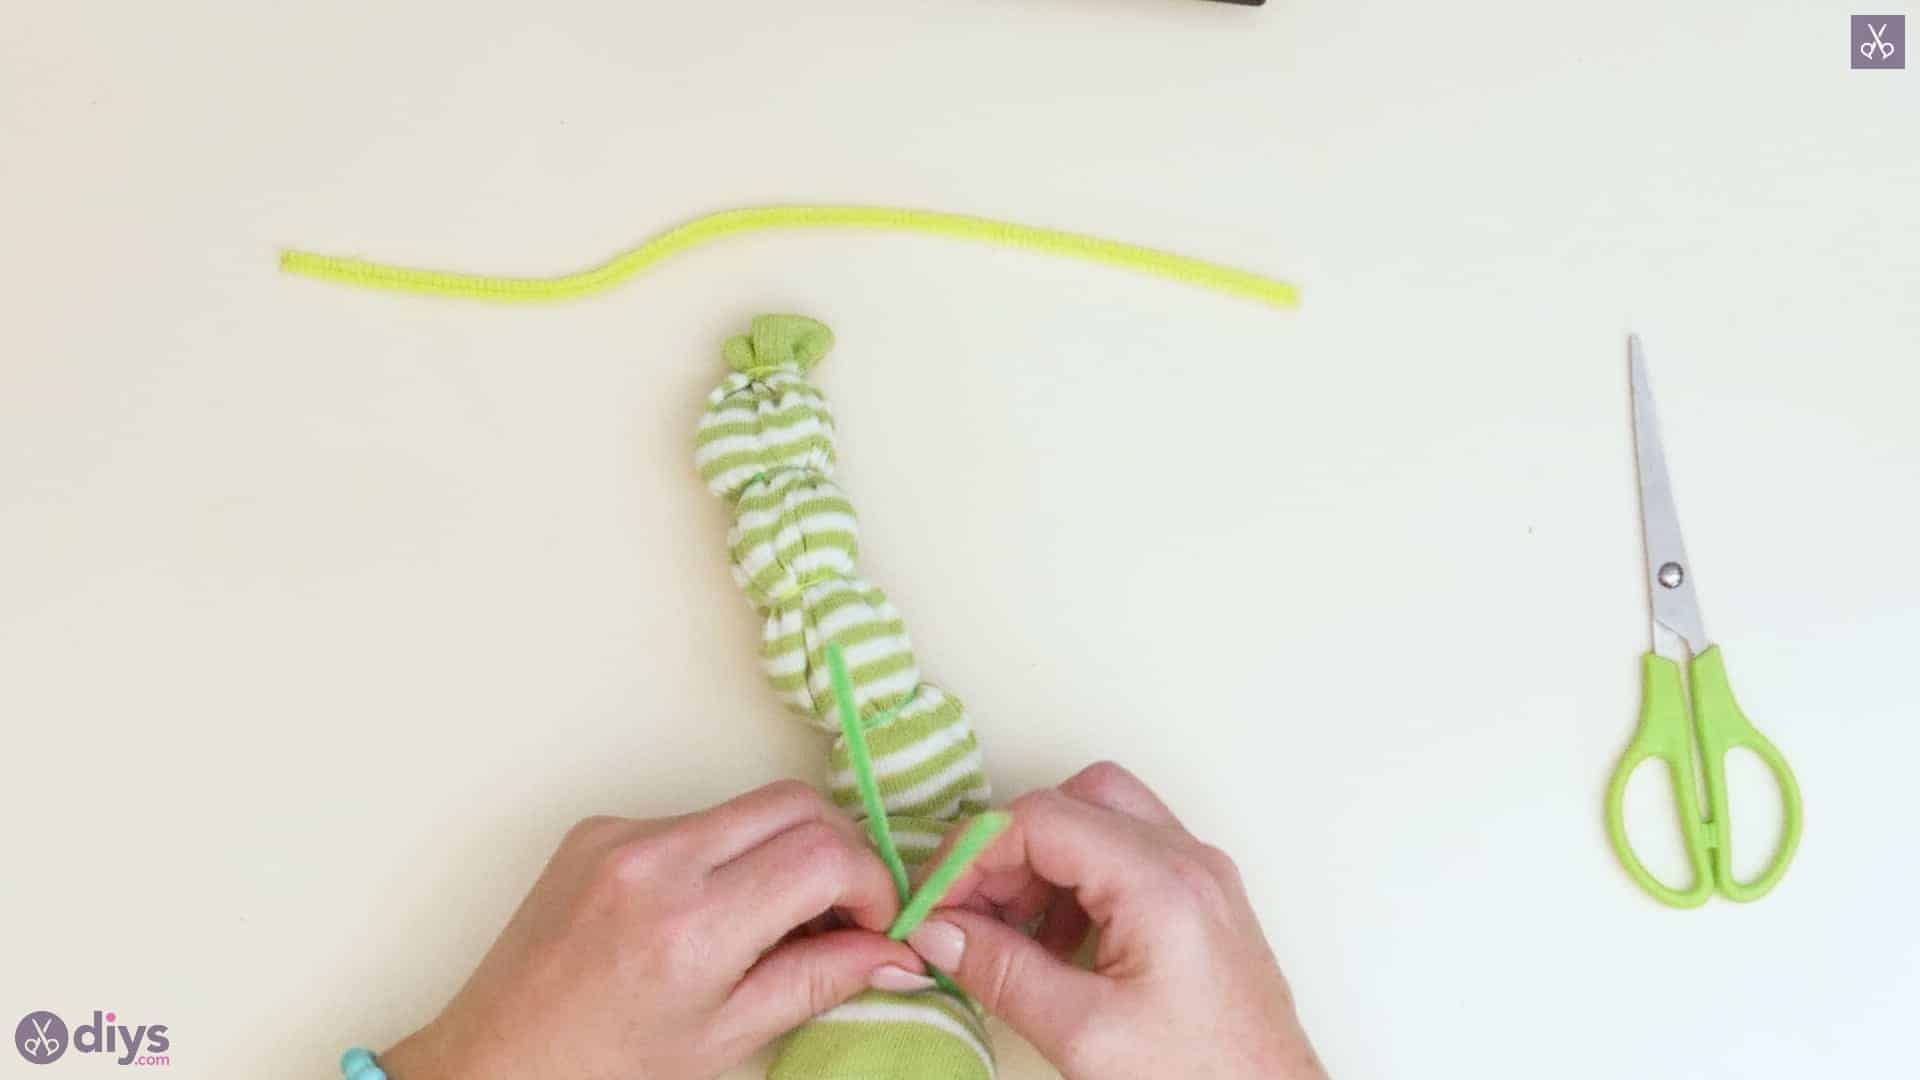
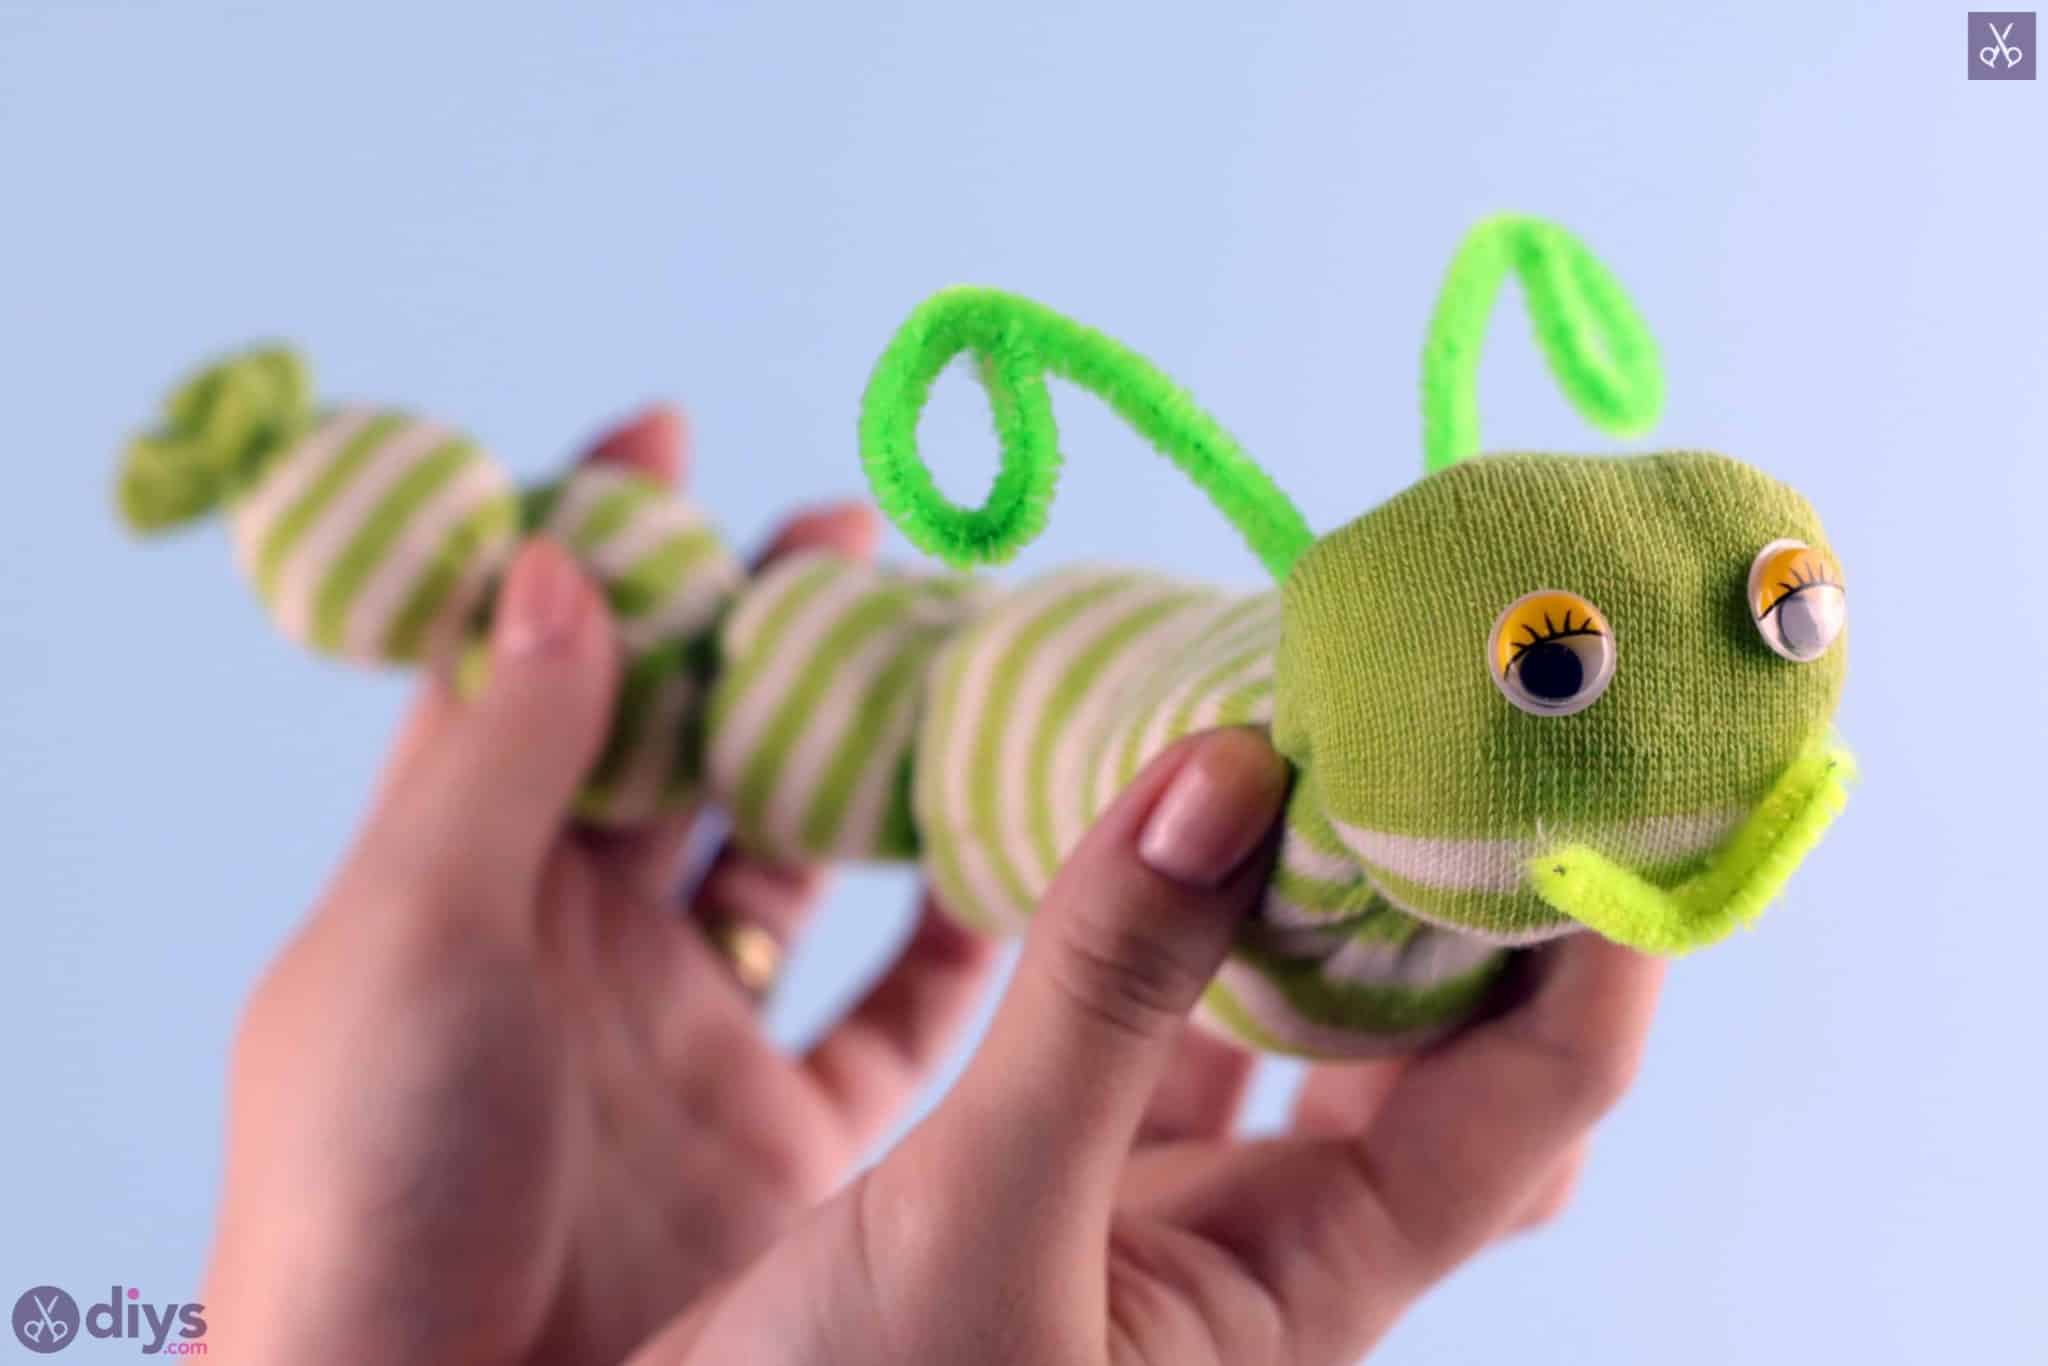
Now you’ll make the pieces of the caterpillar’s body! Do this by wrapping small hair elastics around pieces of the caterpillar’s length at intervals of one inch or so. Start at the toe and make the rounded part with the most stuffing (where you made your fold earlier) the head. Keep wrapping from there until you’re satisfied with how many body sections you have, and their spacing. If you need to, wrap another elastic around the end to keep things even (I added one more past the original one I closed the sock with).
Step 5:
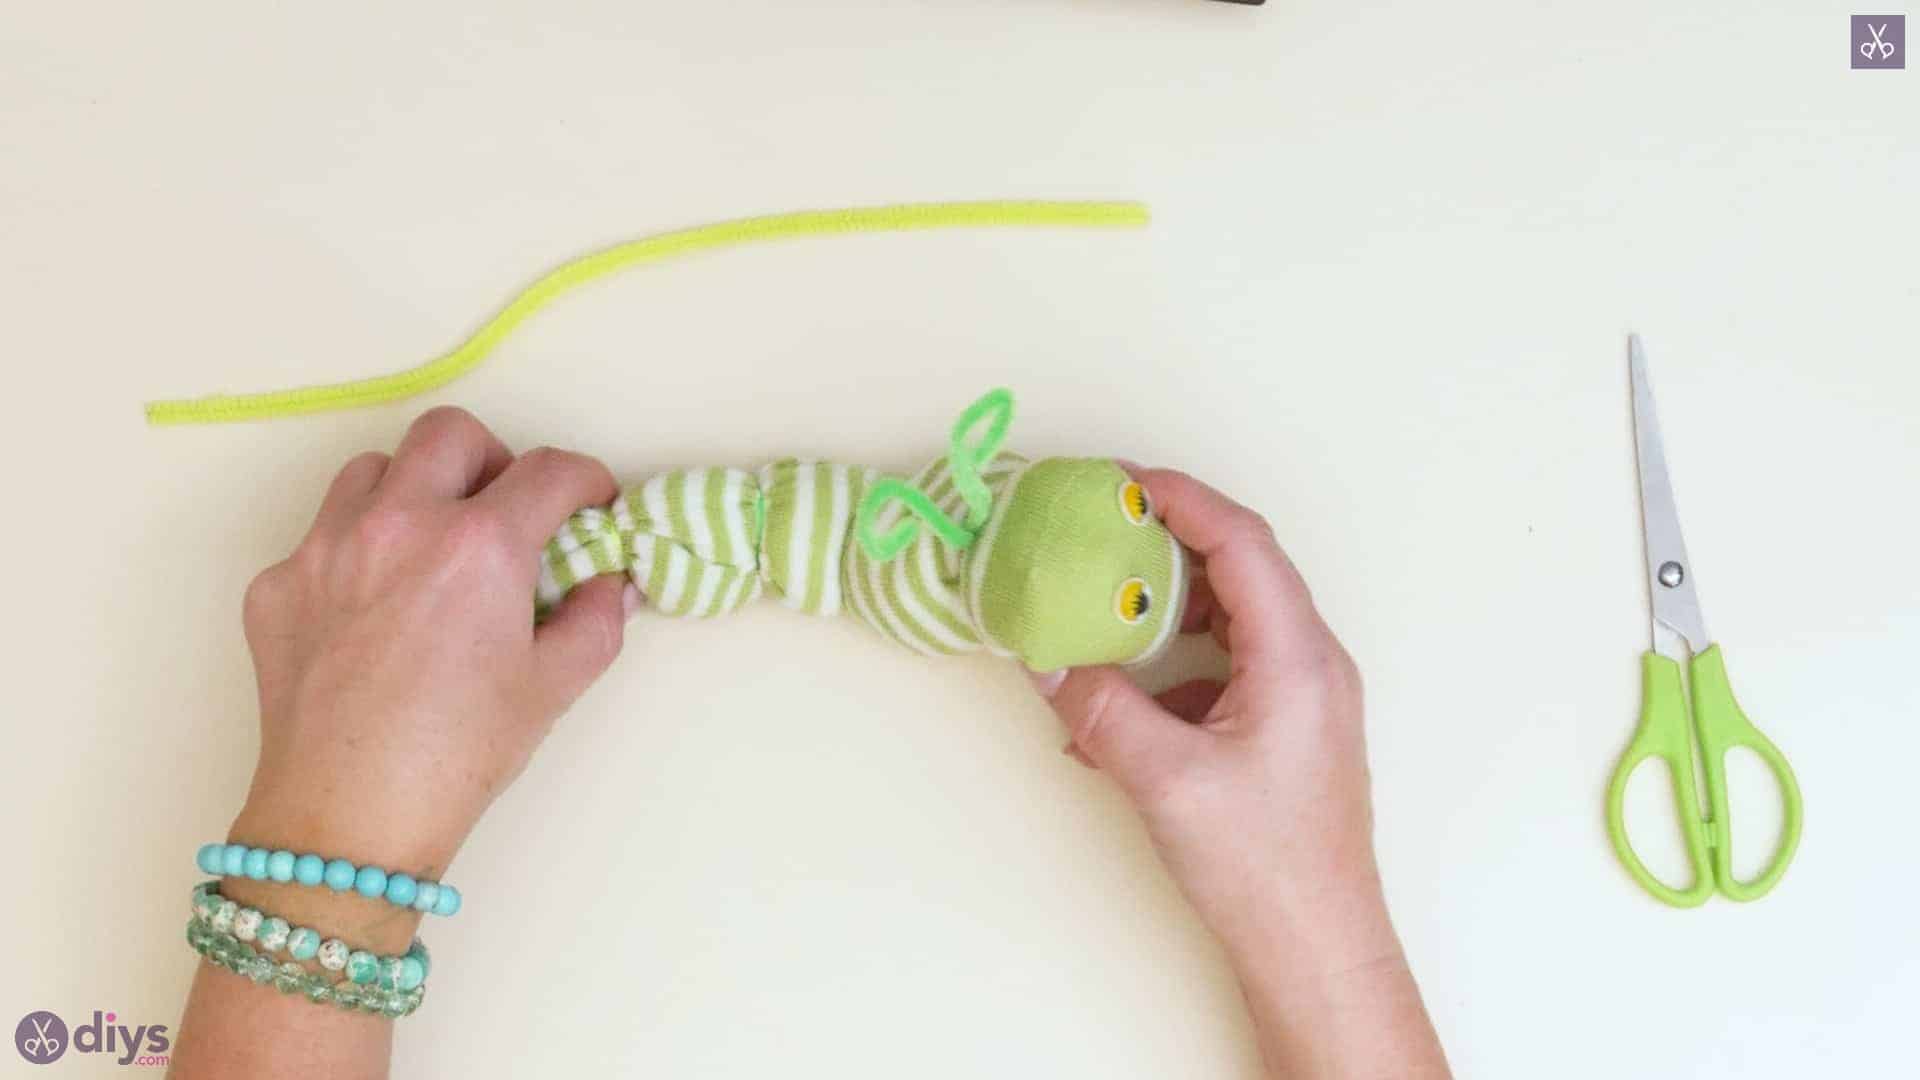
Bend the wire in your caterpillar’s body to give it some wiggle! Choose which parts will sit up and which will sit down; I angled my head up and altered them from there all the way down the caterpillar’s length.
Step 6:
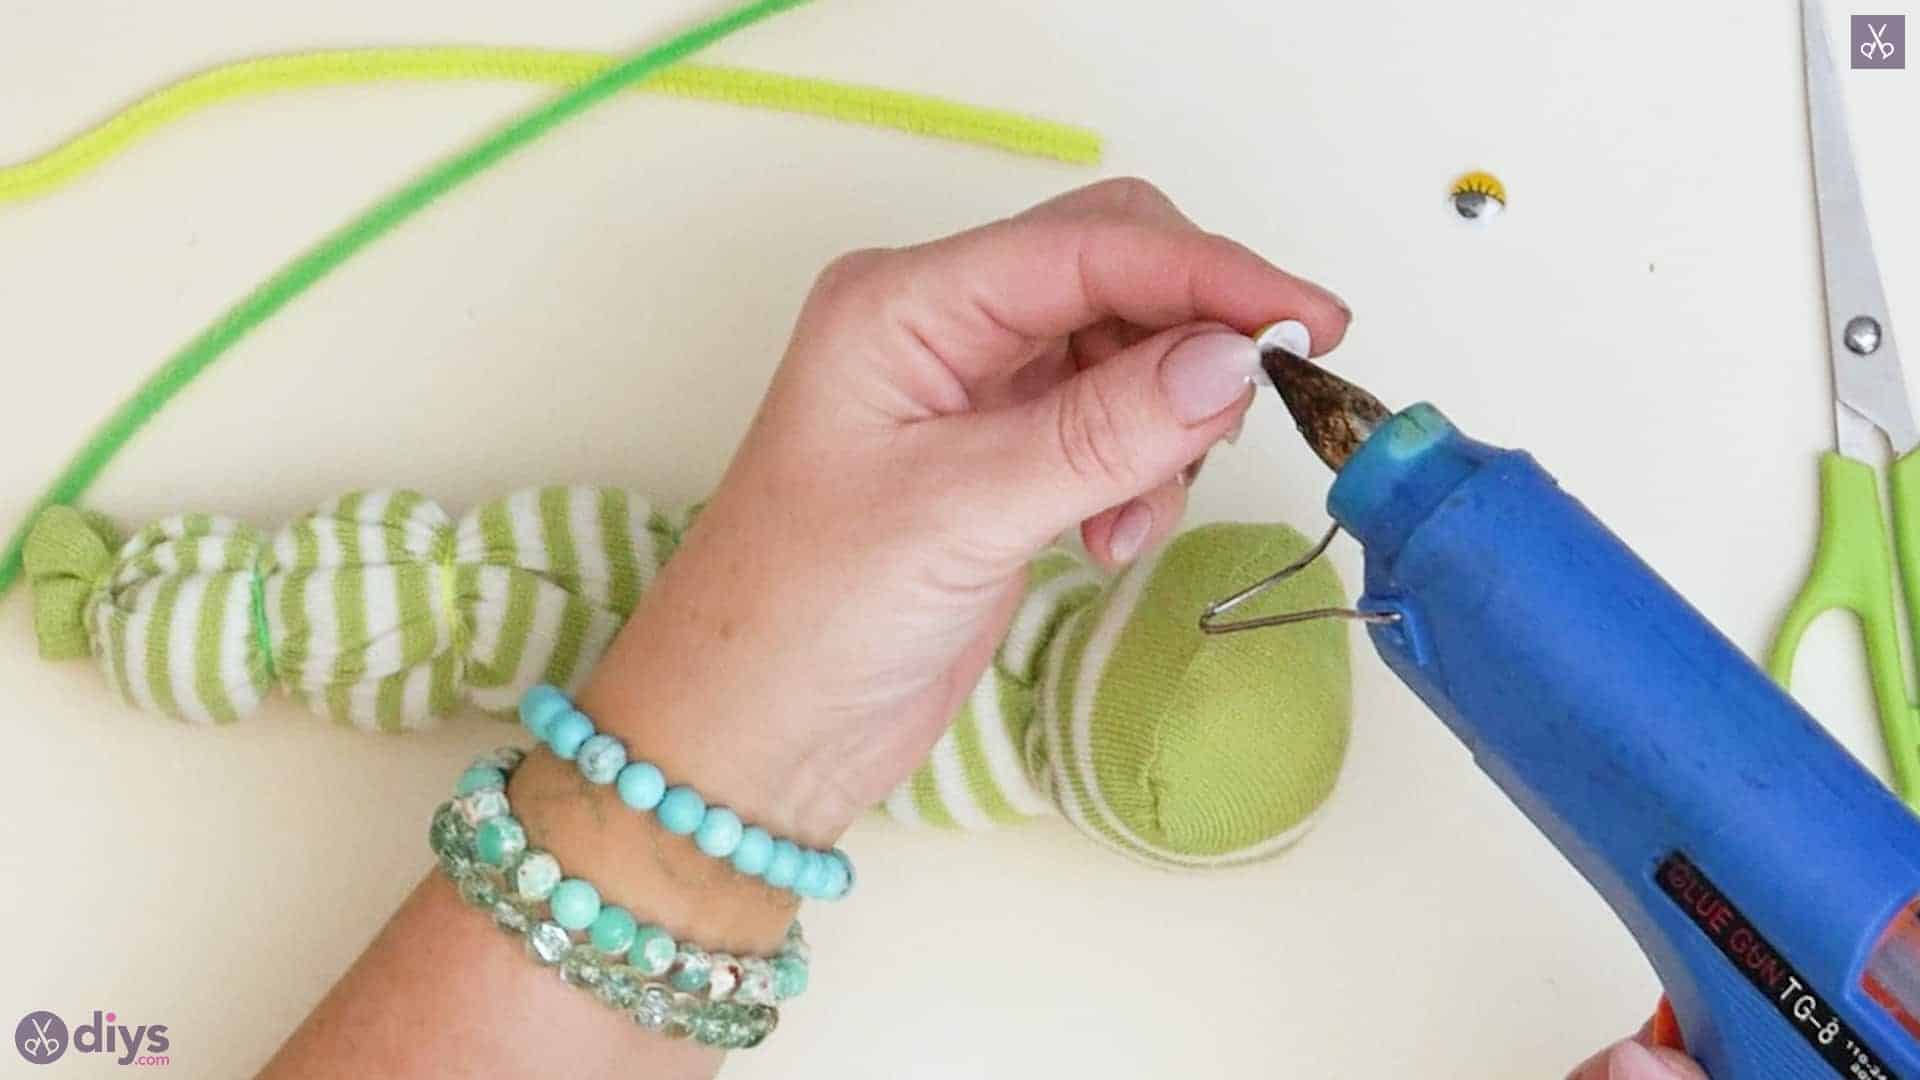
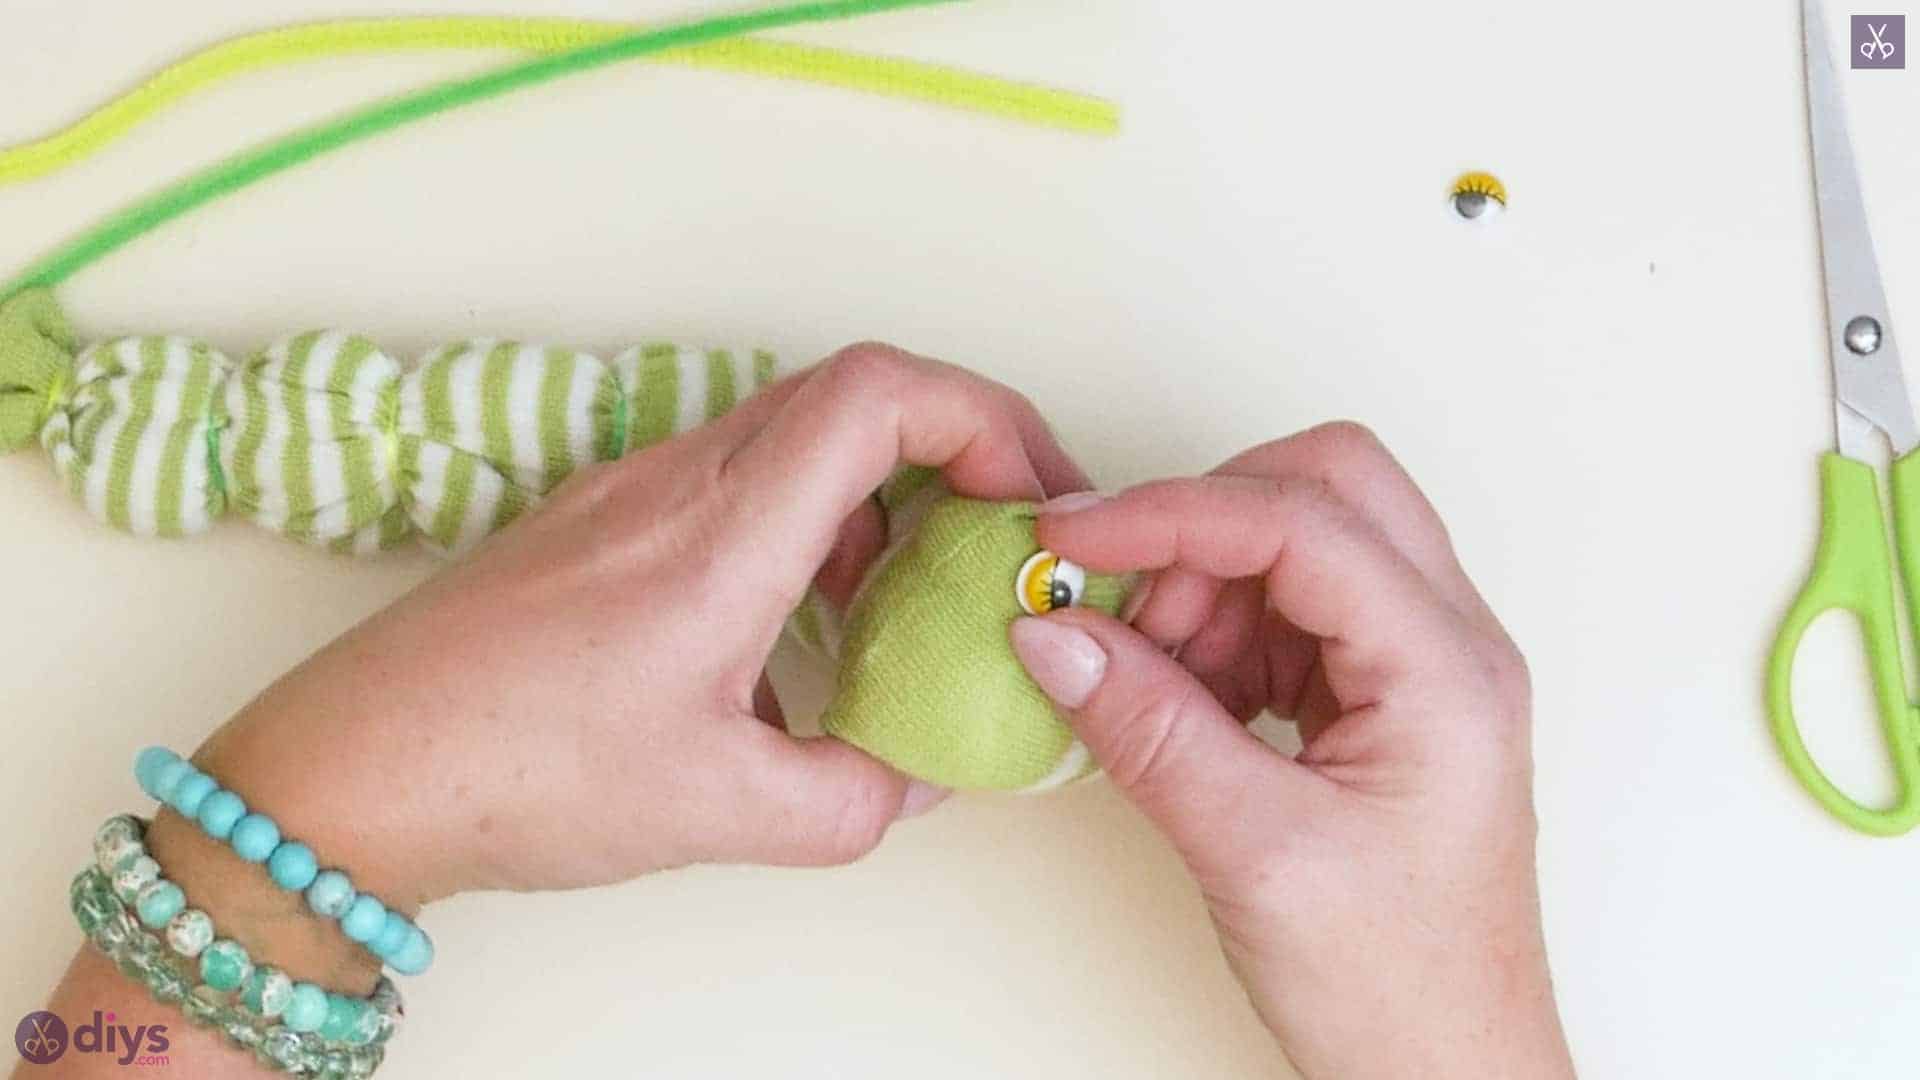
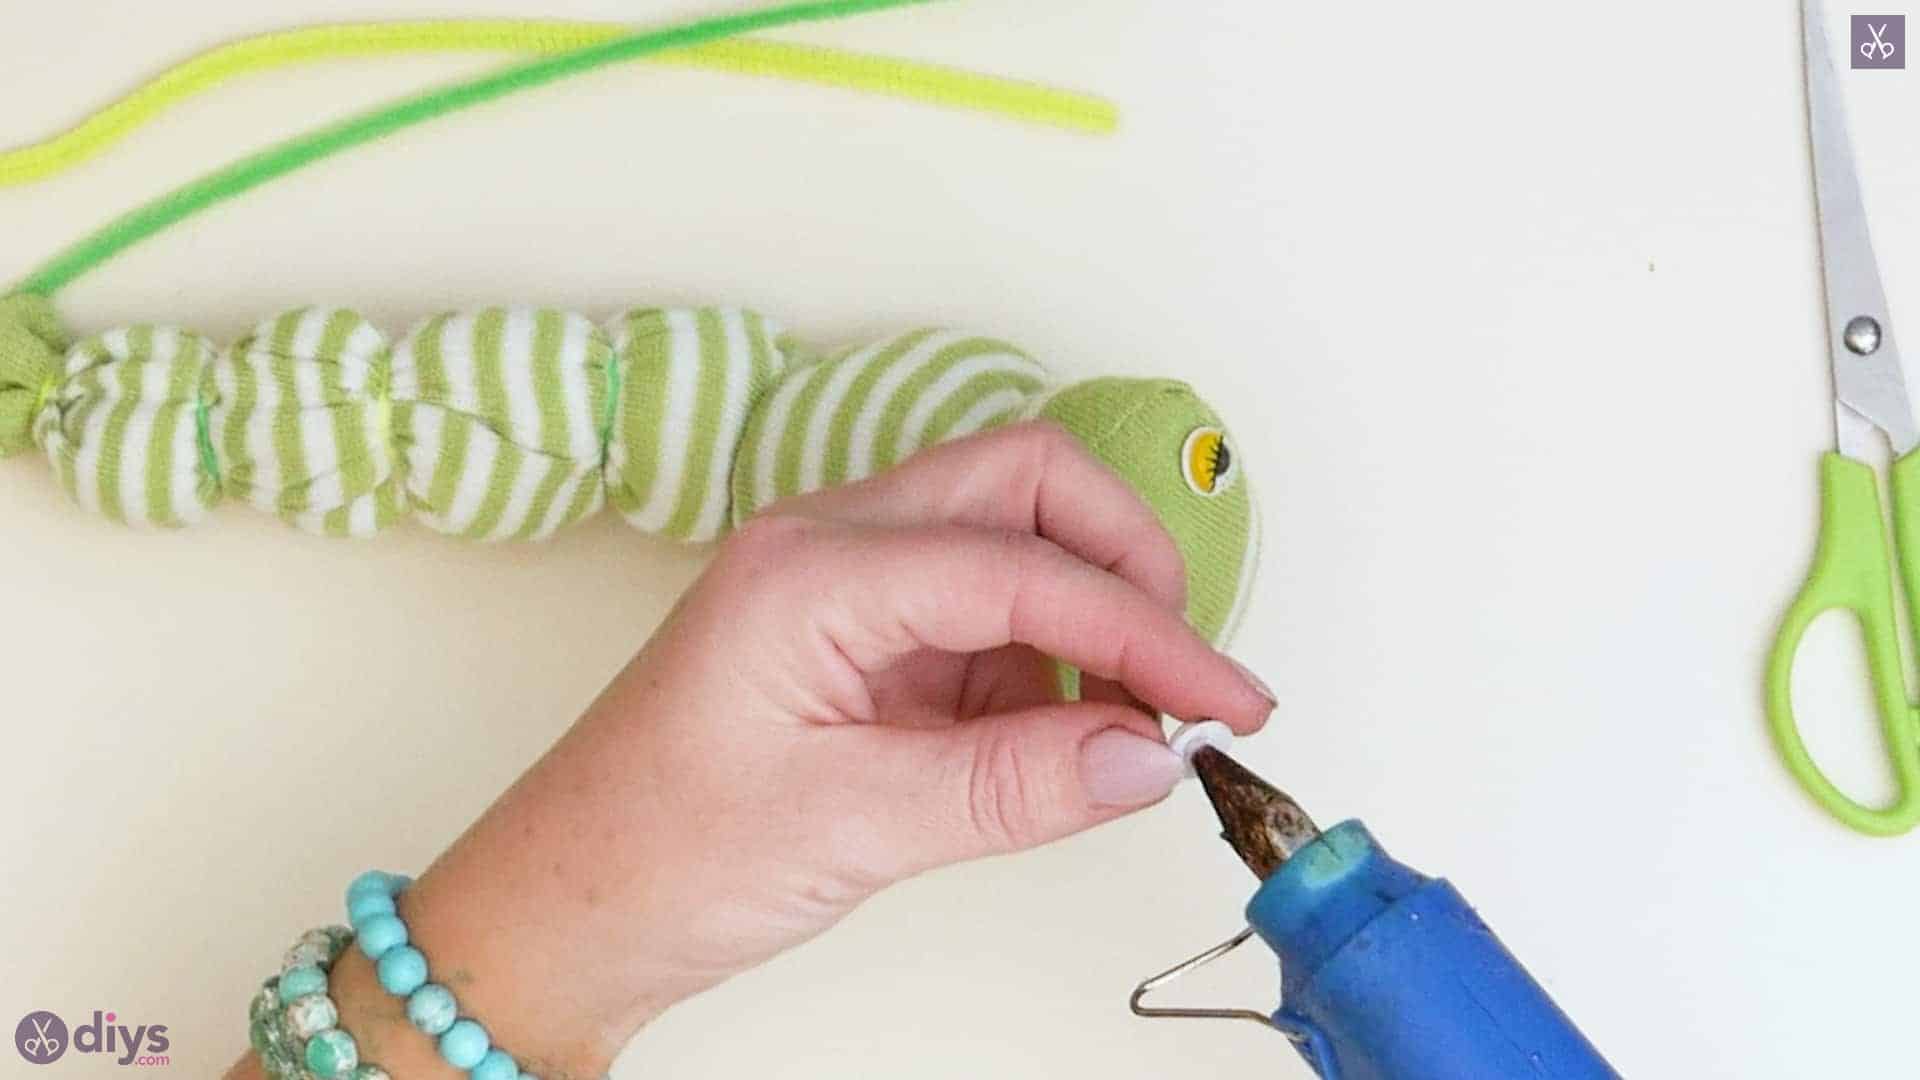
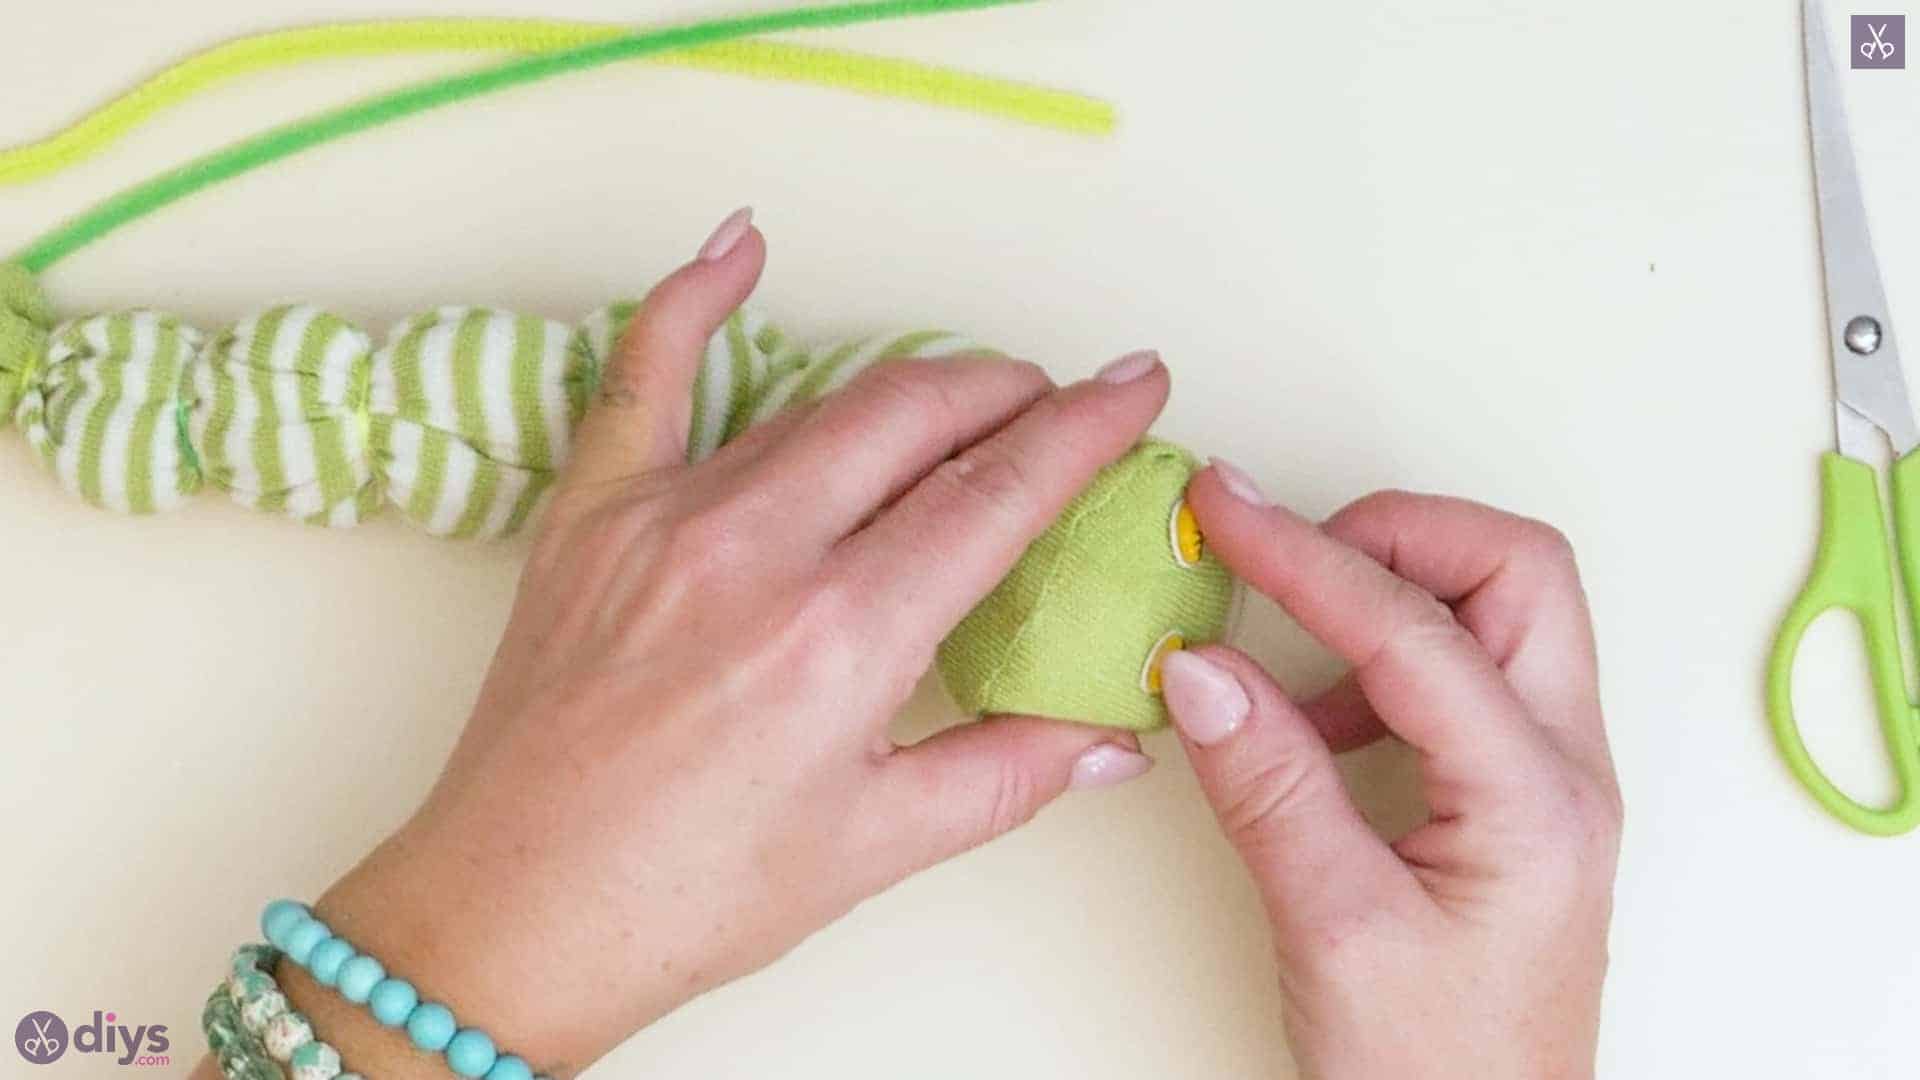
Apply hot glue to the backs of your googly eyes and stick them into place on your caterpillar’s face, near the top of the head on the rounded toe. You can put them, wherever and space them however you think looks right.
Step 7:
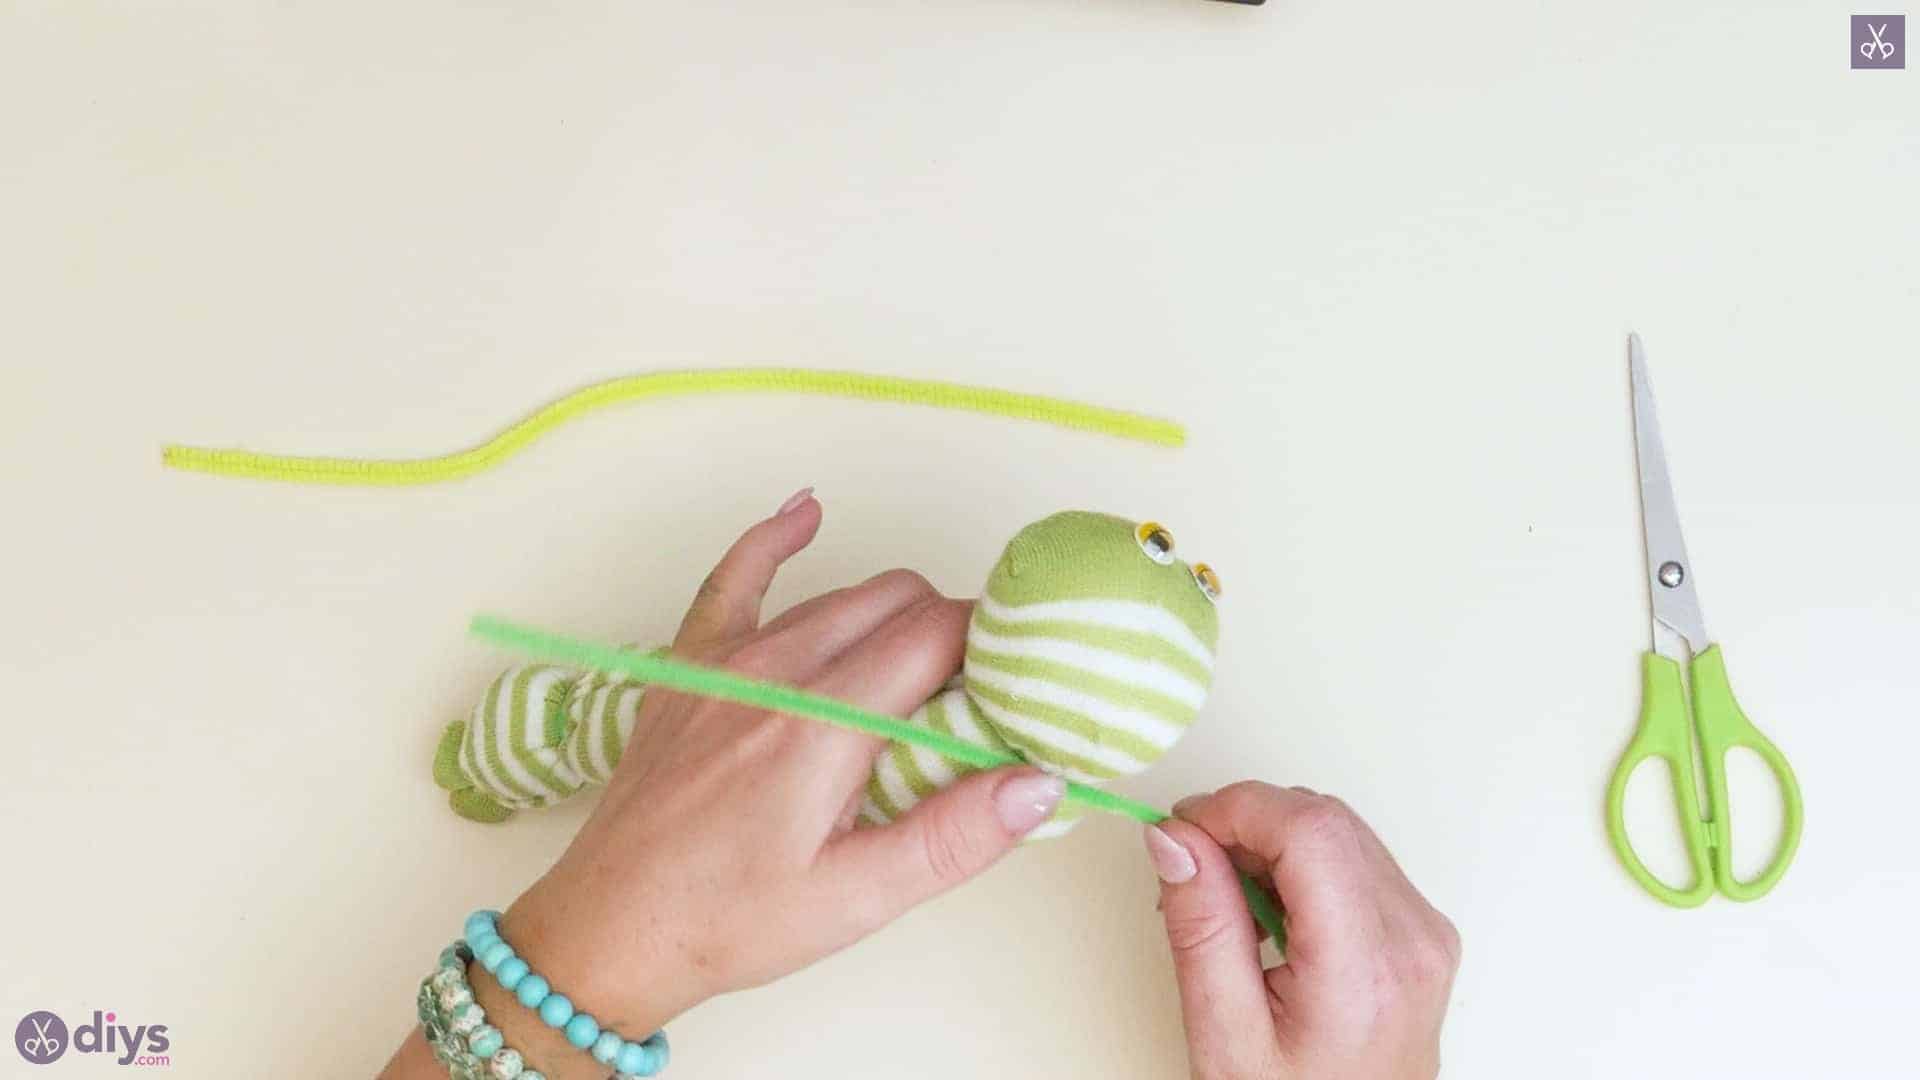
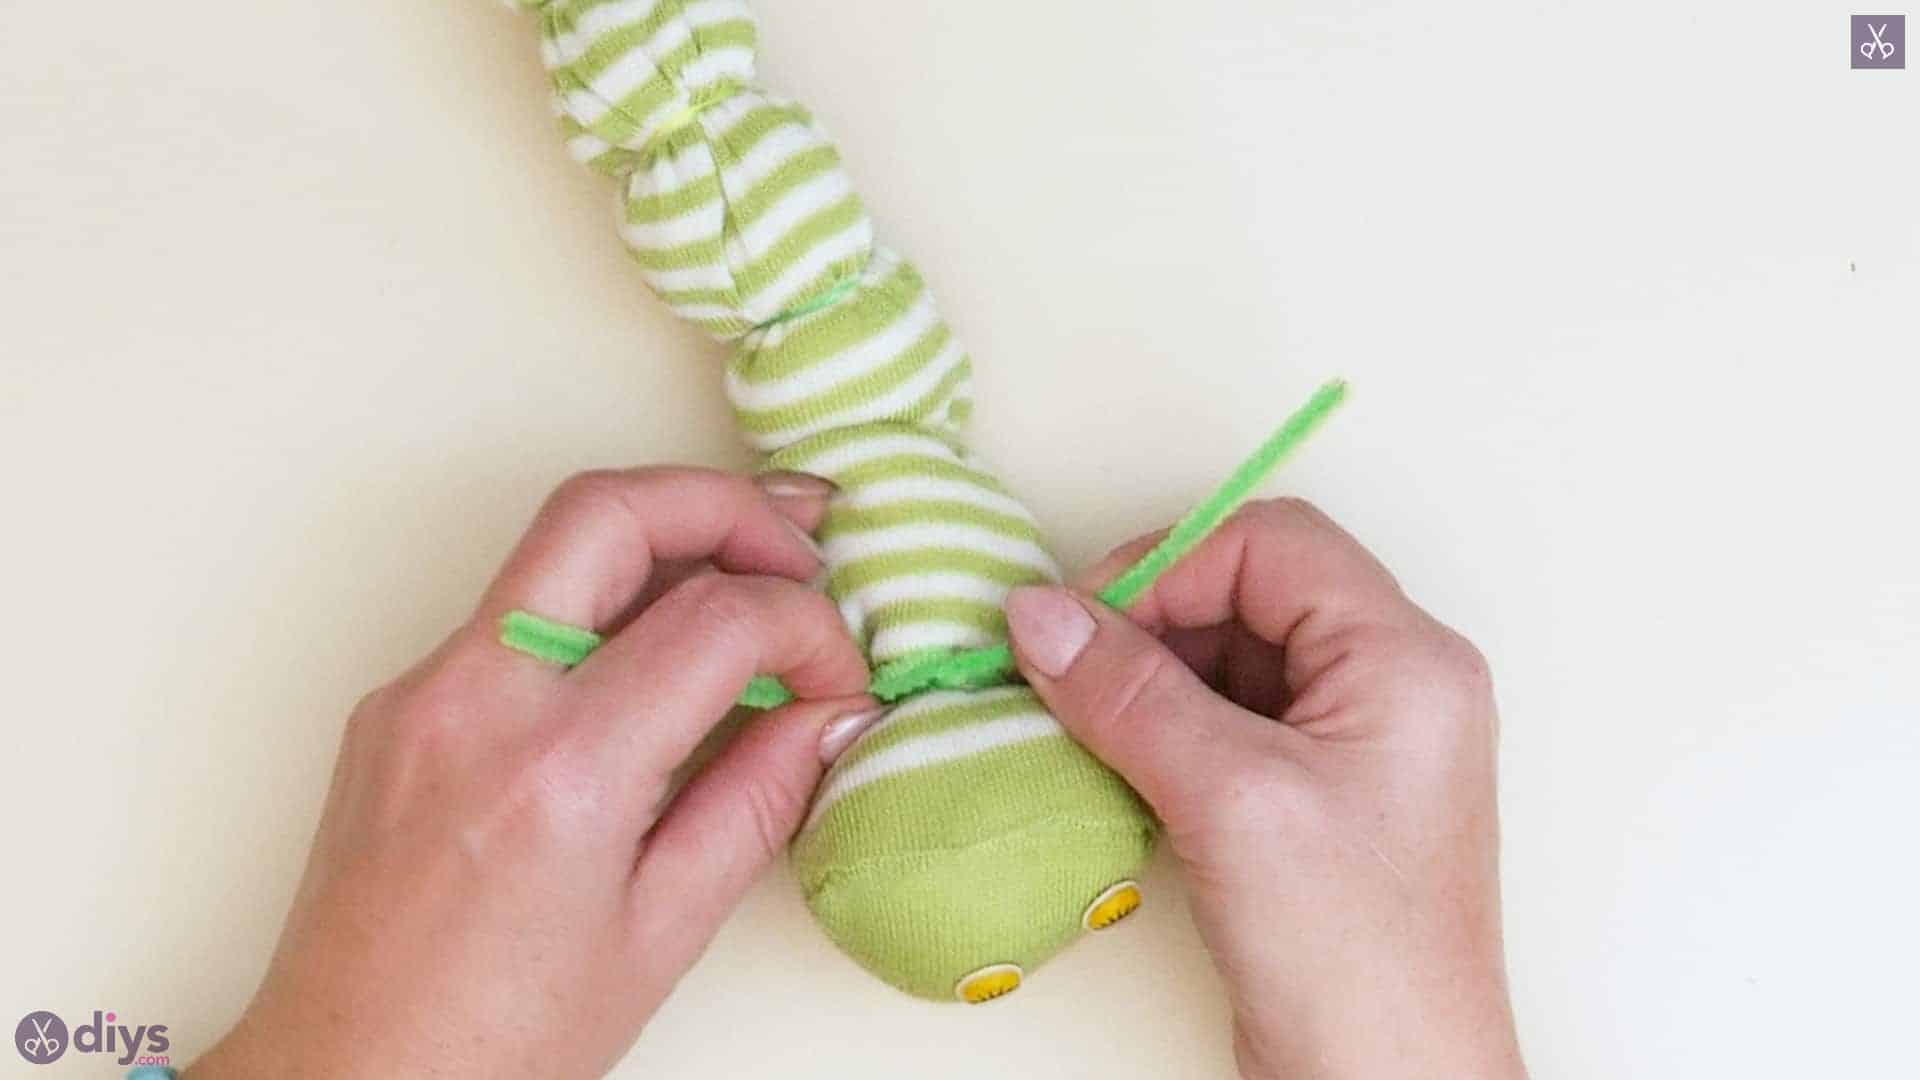
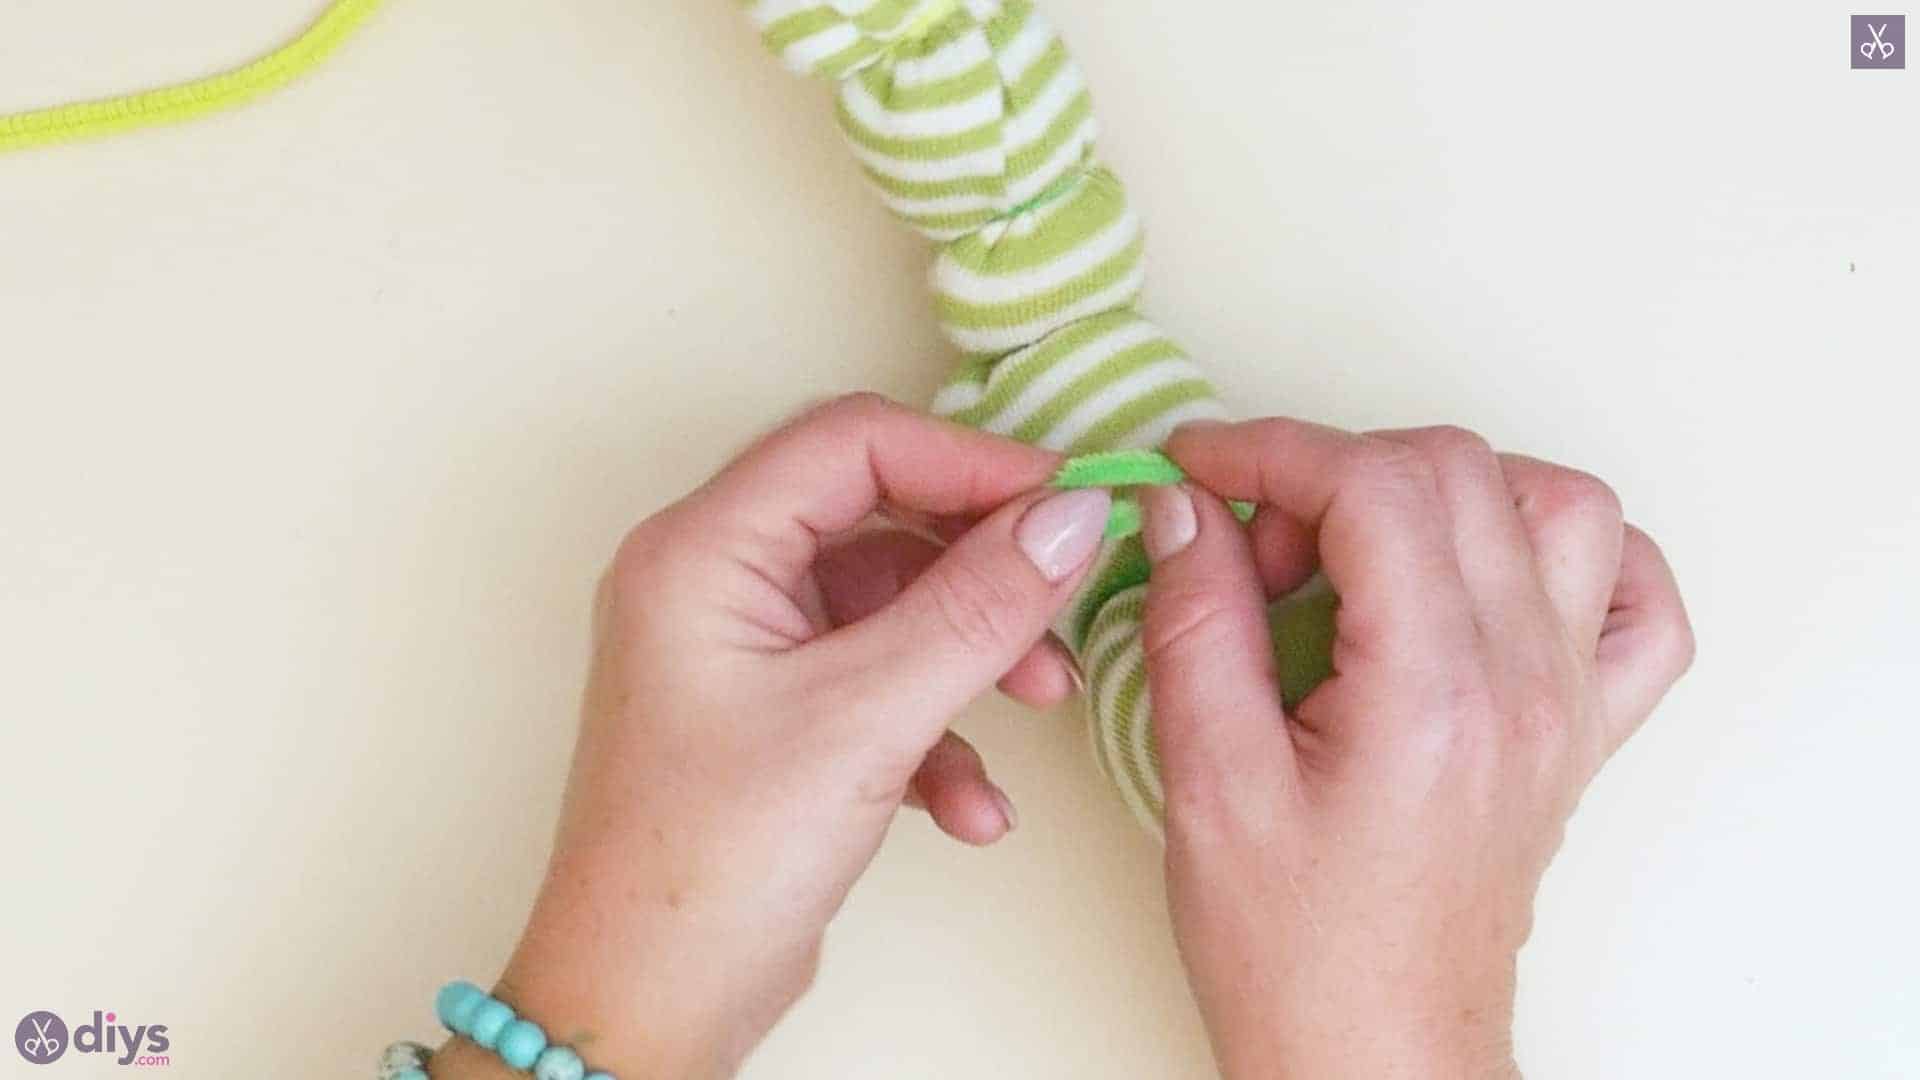
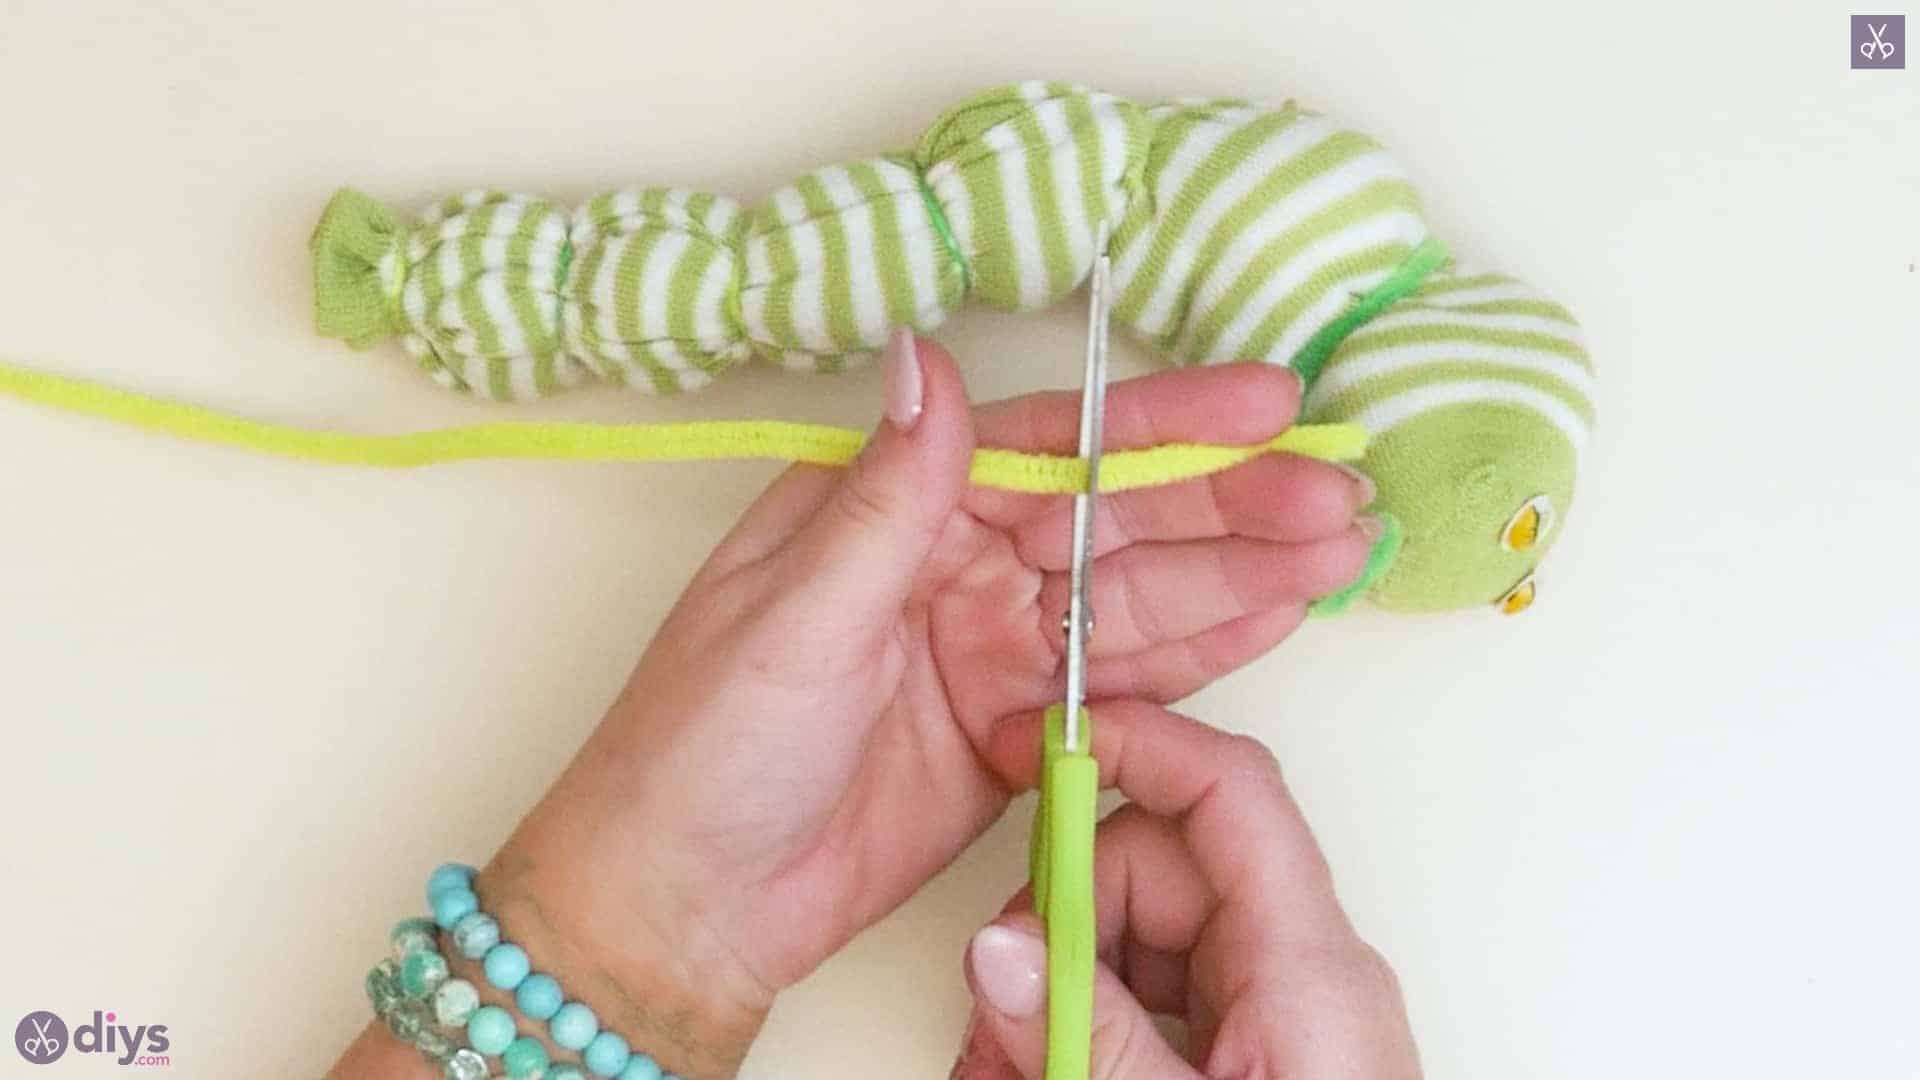
Add your caterpillar’s antennae! Take your green pipe cleaner and place the underside of your caterpillar at the place where the elastic cinches the sock to make its head right in the middle, halfway down the pipe cleaner’s length. Wrap the ends of the pipe cleaner around this spit, bringing them upwards to meet, and then cross them over each other and twist them into place so they stay. Bend each end upward to stick up a little like actual antennae and curl the ends outward (or however you think looks best).
Step 8:
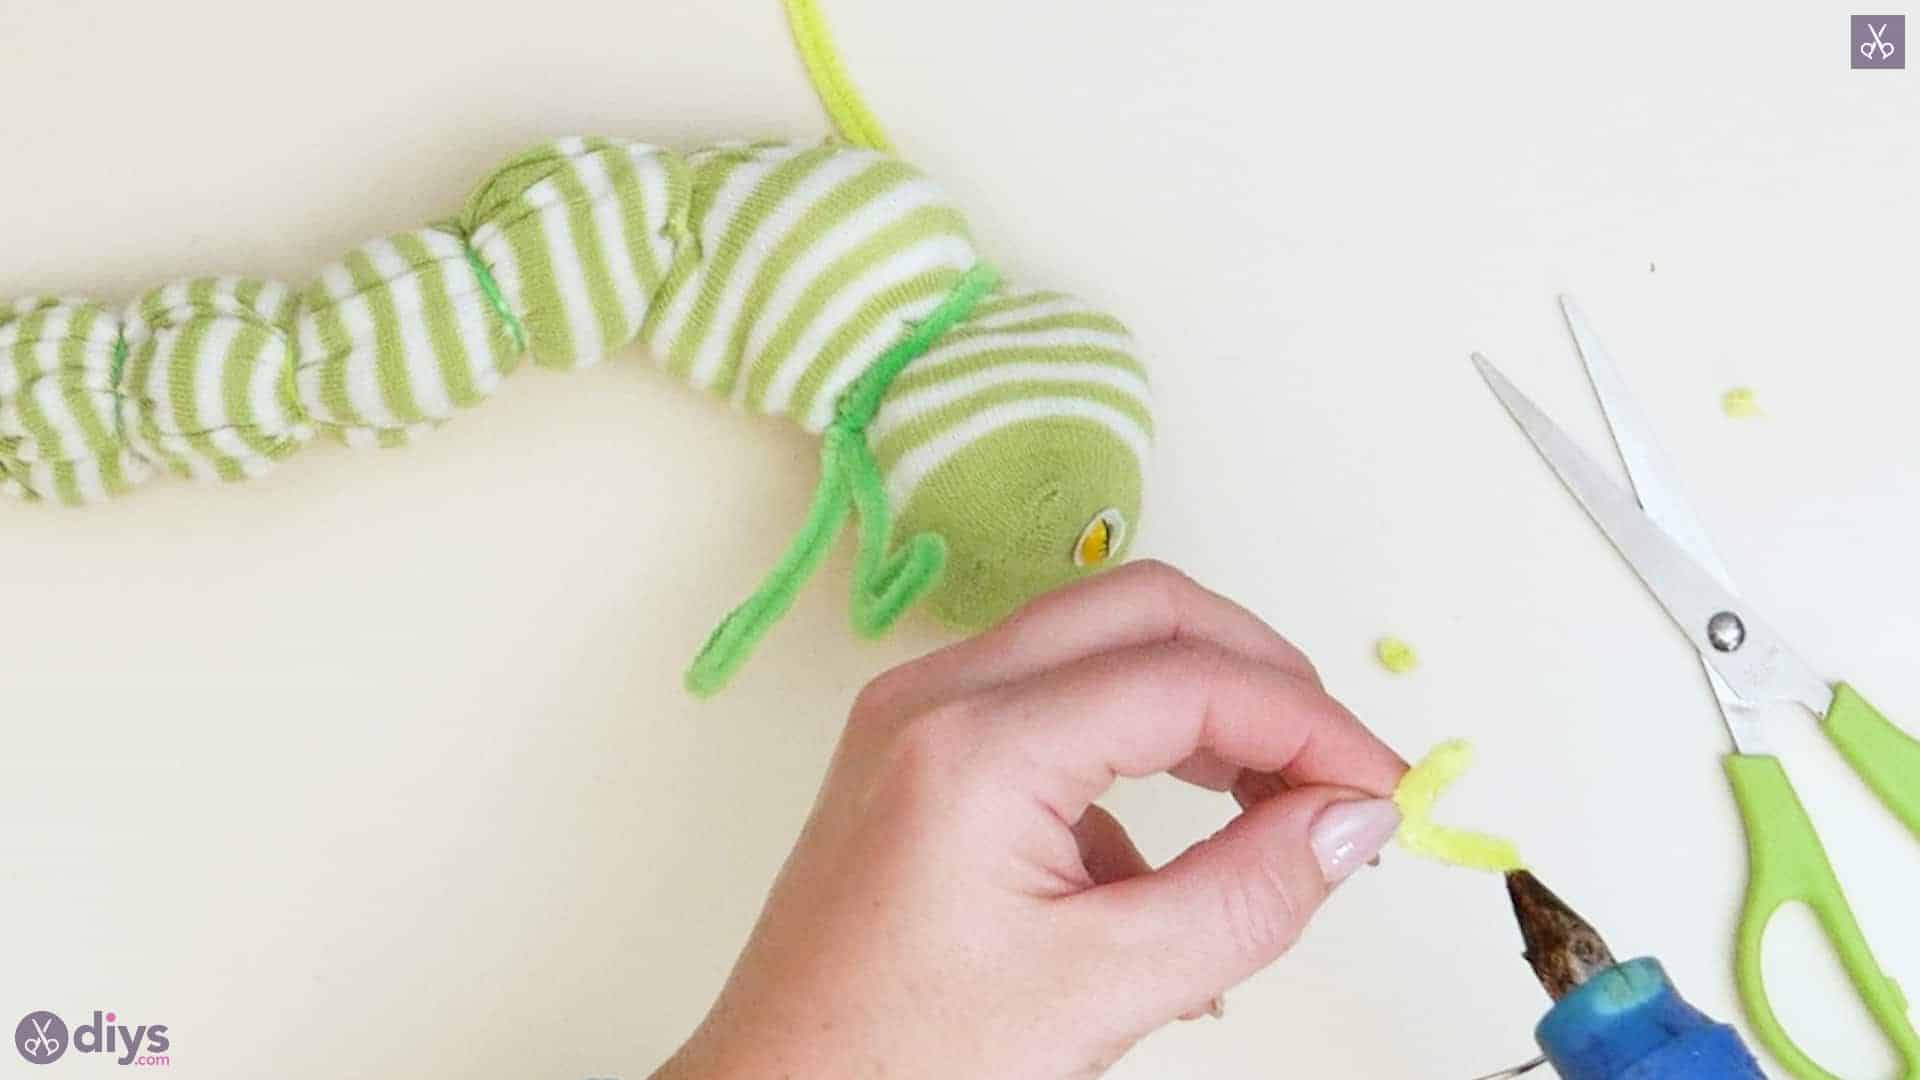
Cut a piece from the end of your yellow pipe cleaner about an inch long. Curve this piece into a little semi-circle so it’s shaped like a smile. Carefully apply hot glue all along its length on one side and stick it down below the googly eyes so your caterpillar has a mouth.

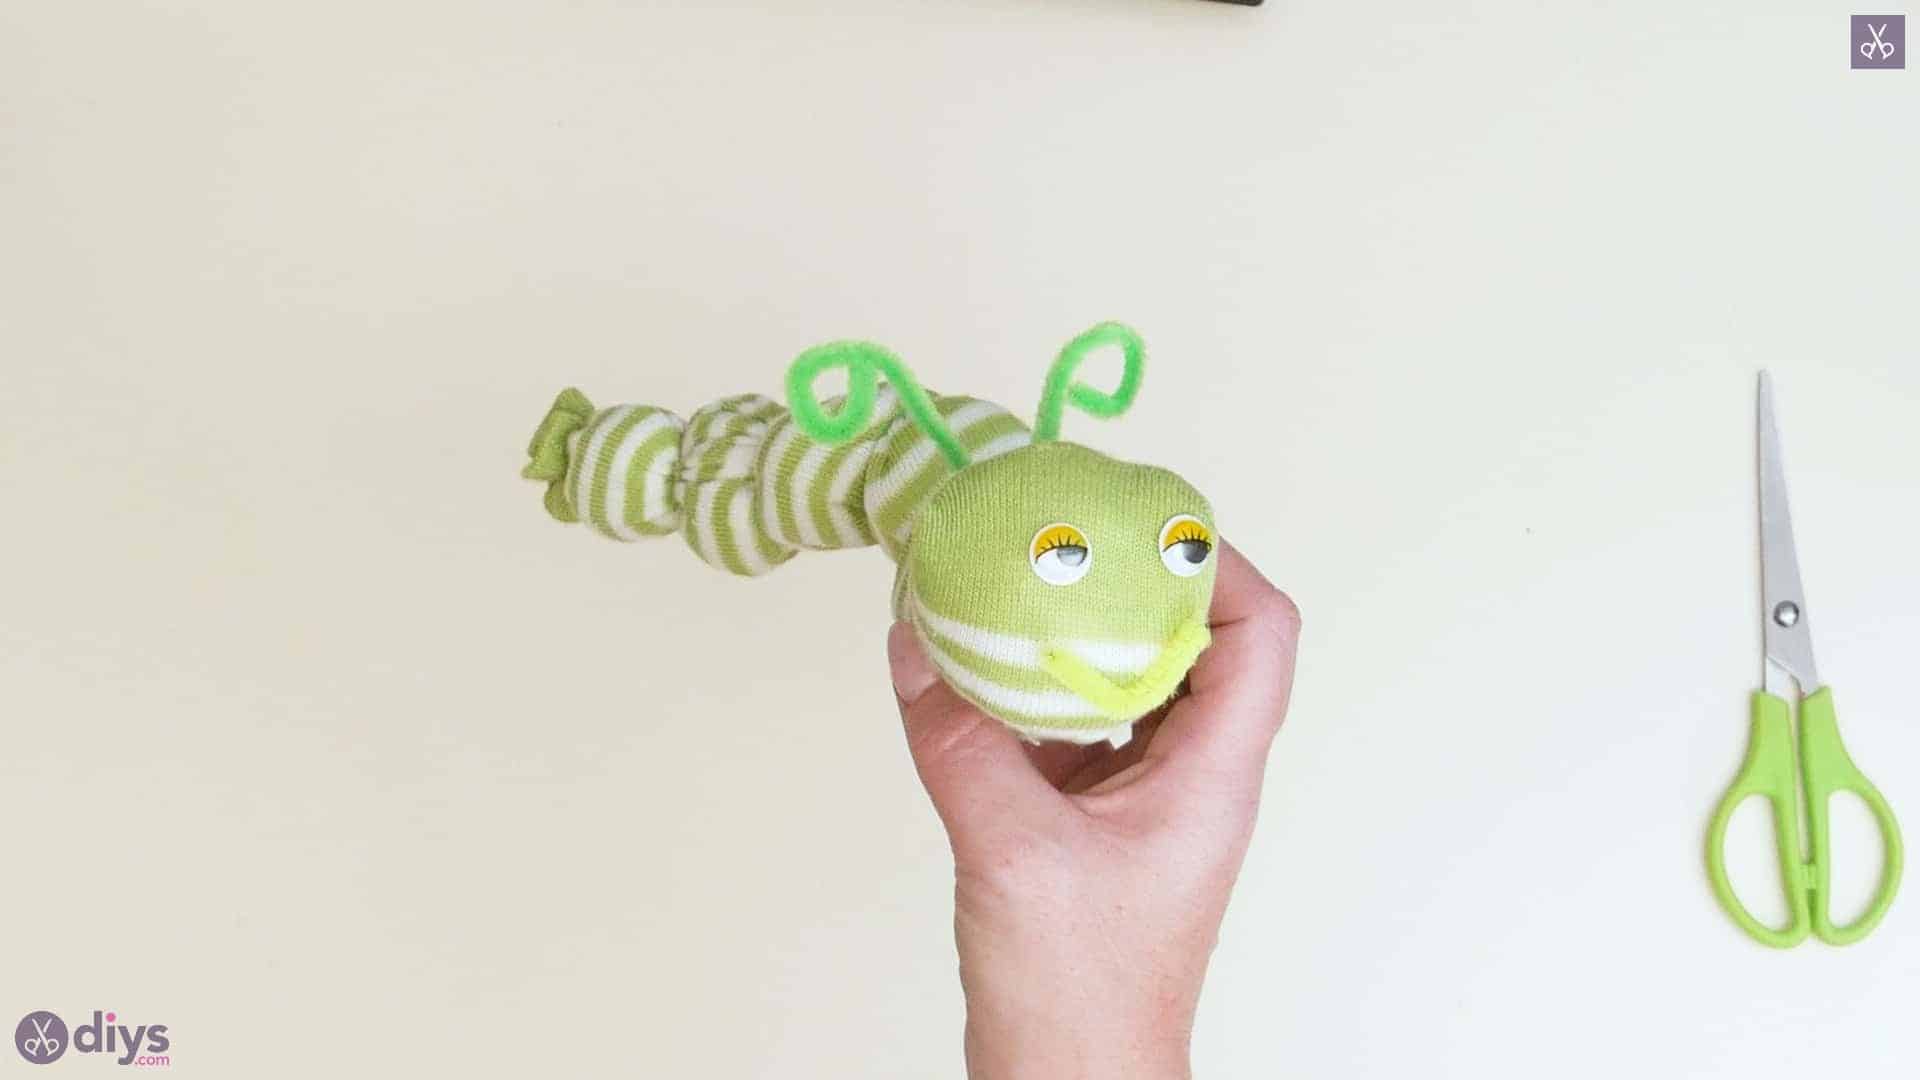
That’s really all there is to it! Feel free to get creative with the colours and details using this basic concept as a guide. Just in case you’d like to try this project out for yourself, here’s a fantastic tutorial video to help you!
The post How to Make No-Sew Sock Worms – Video Tutorial appeared first on DIYs.com.